Table of Contents
The page is for model NEJE 3 (170x170mm) installation manual.
What NEJE 3 has improved:
- You can safely and stably upgrade to the latest GRBL firmware through NEJE software, When using the device for the first time, please open the NEJE software to update to the latest firmware.
- NEJE optimizes the low-light experience in GRBL mode for diode lasers, and the low-light settings can be adjusted through the laserGRBL software.
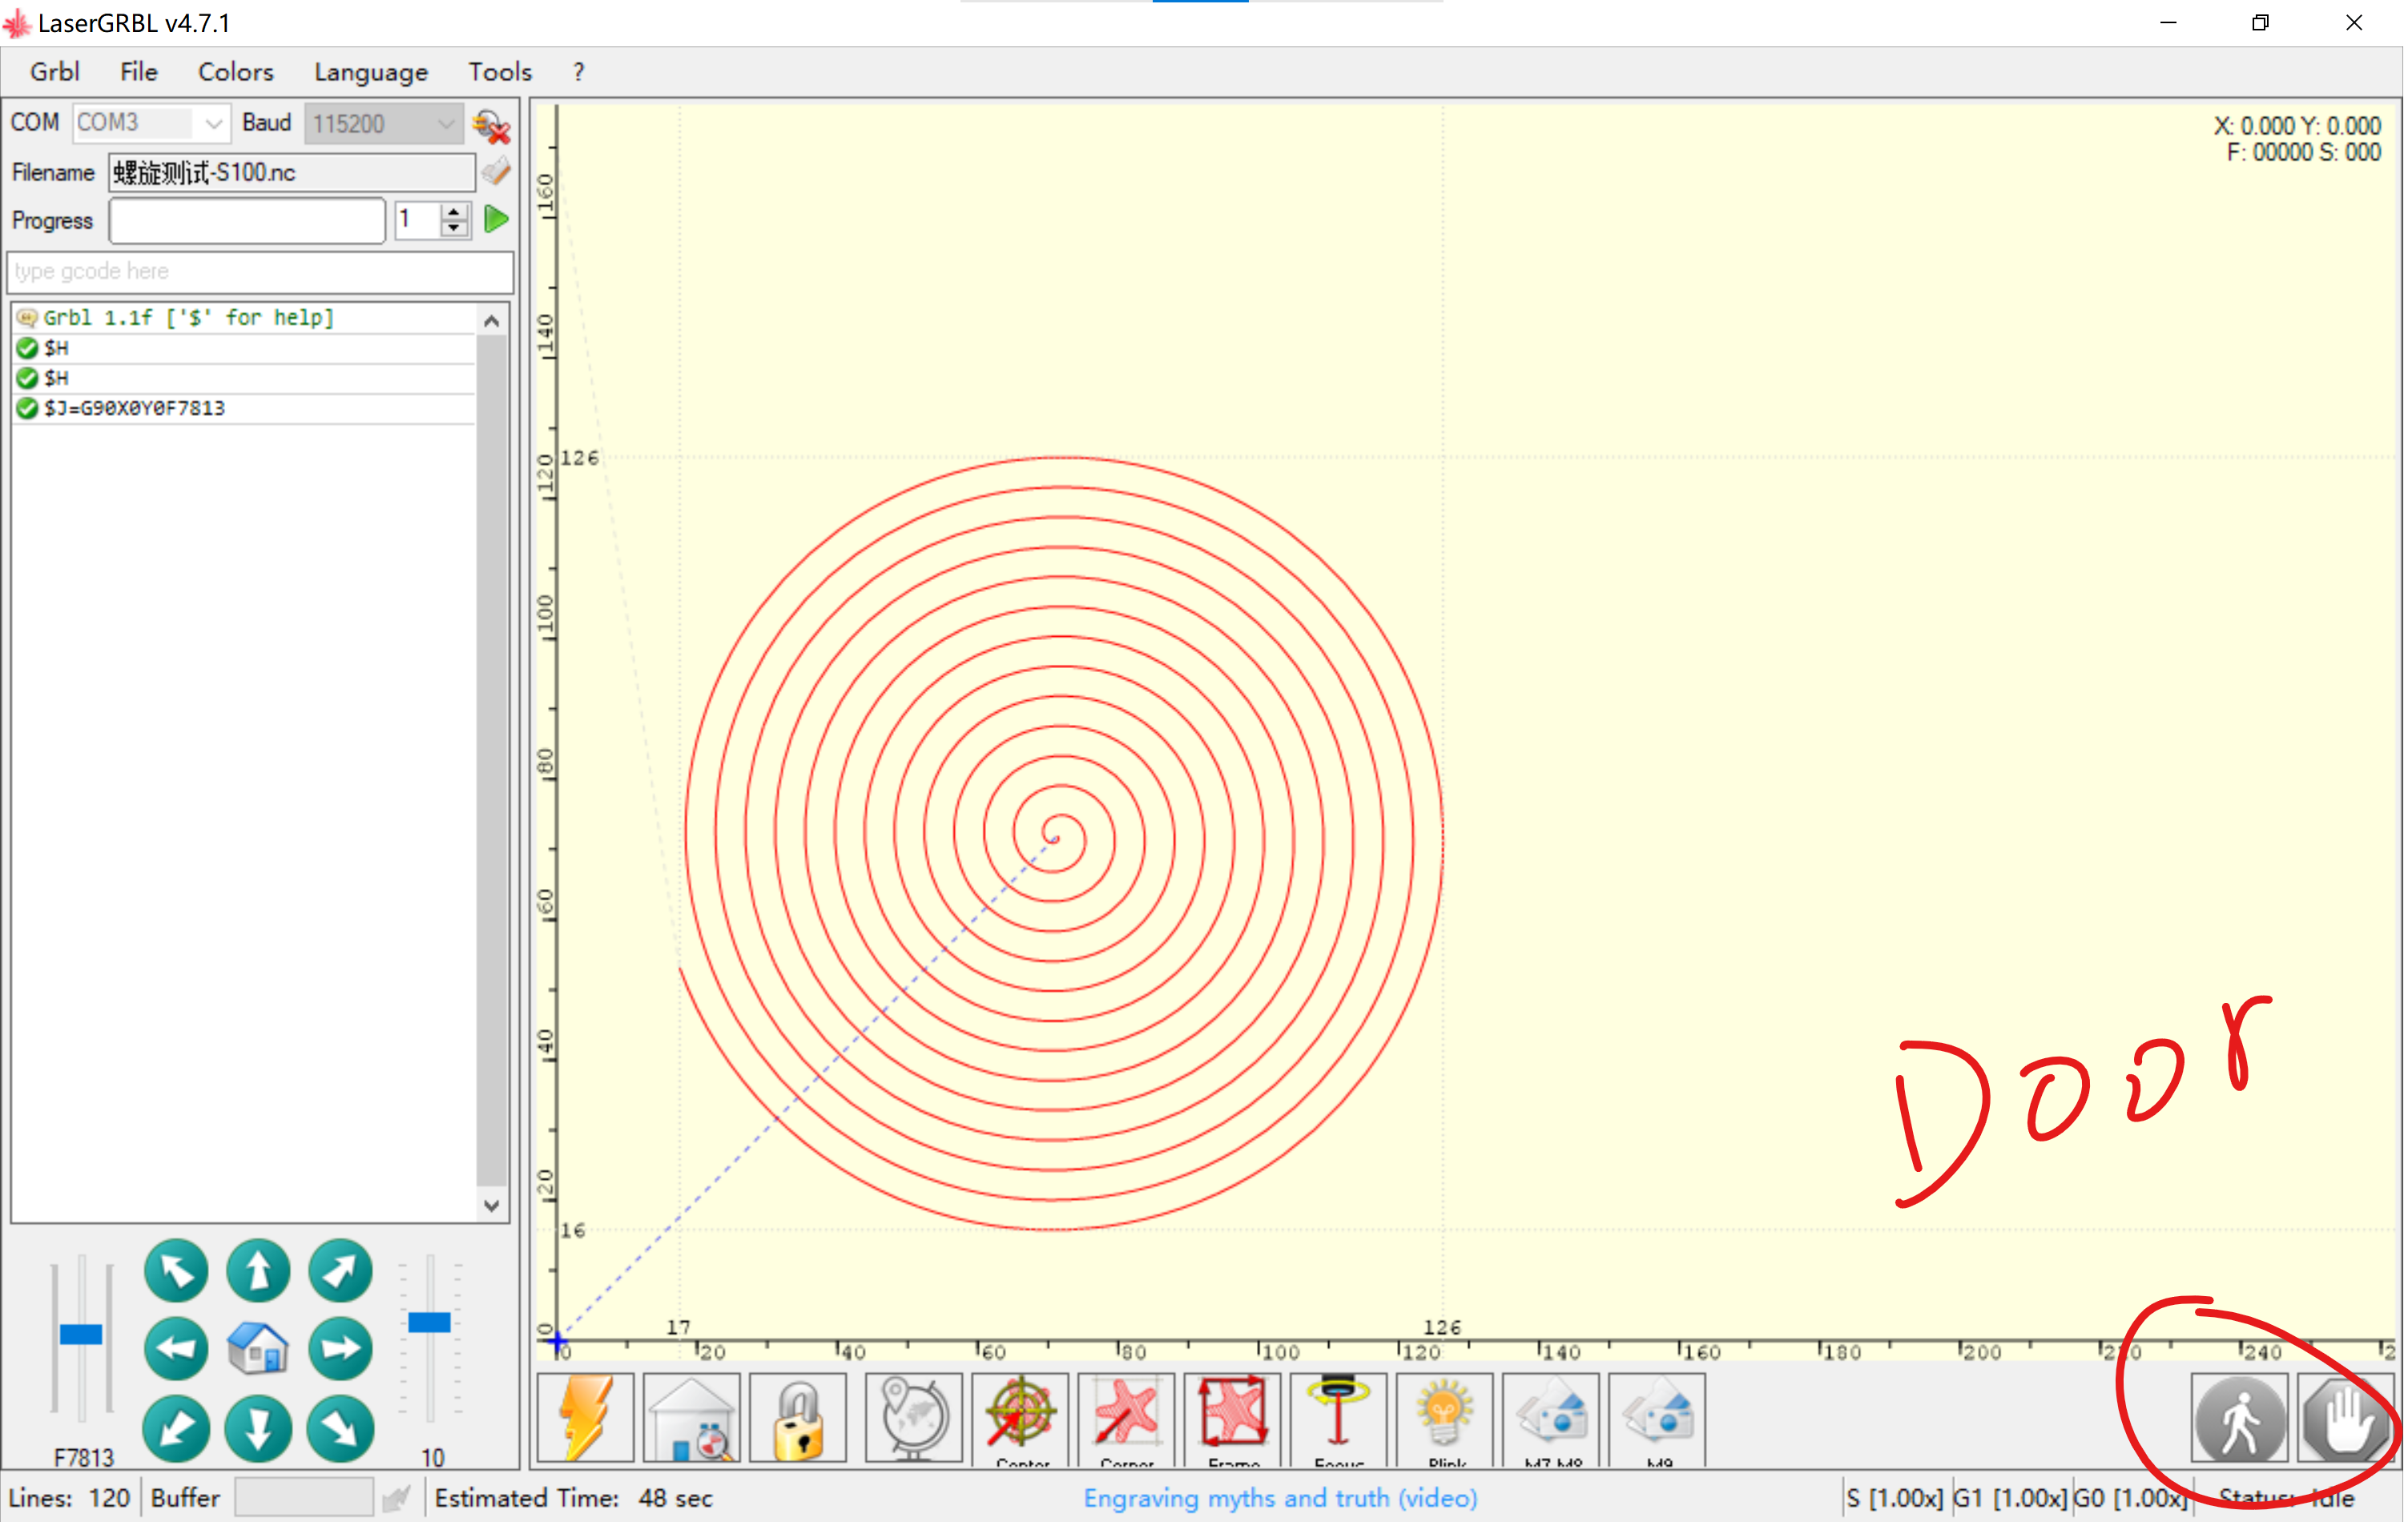
- NEJE is compatible with M8, M7, Door functions, and automatically adapts to lightburn, laserGRBL and NEJE software for better automation of processes.
- The motor is automatically locked when power is turned on, and secondary processing can be performed when repeating the engraving work, so that the position information will not be lost.
- NEJE win software adds area customization settings, NEJE provides the function of expanding the orbits, both the Y-axis area can be freely expanded, and the laser module also automatically engraves silently.
- NEJE 3 comes standard with a high-pressure air assist kit.
- NEJE 3 support M8 air valve kit for controlling air assist, M7 relay switch kit for controlling smoke exhaust system, and Door switch for emergency stop. These 3 automatic control components are not included in the product list, you need to buy them in the NEJE authorized store according to your own needs.
- NEJE has greatly enhanced the anti-static and surge design under the new control system. NEJE has passed the very severe test in the experiment, which has greatly improved the reliability of the NEJE control system. The new system does not require additional grounding to protect equipment.
Step 1: Structural Install
Tutorial Video for NEJE 3 Installation (video)
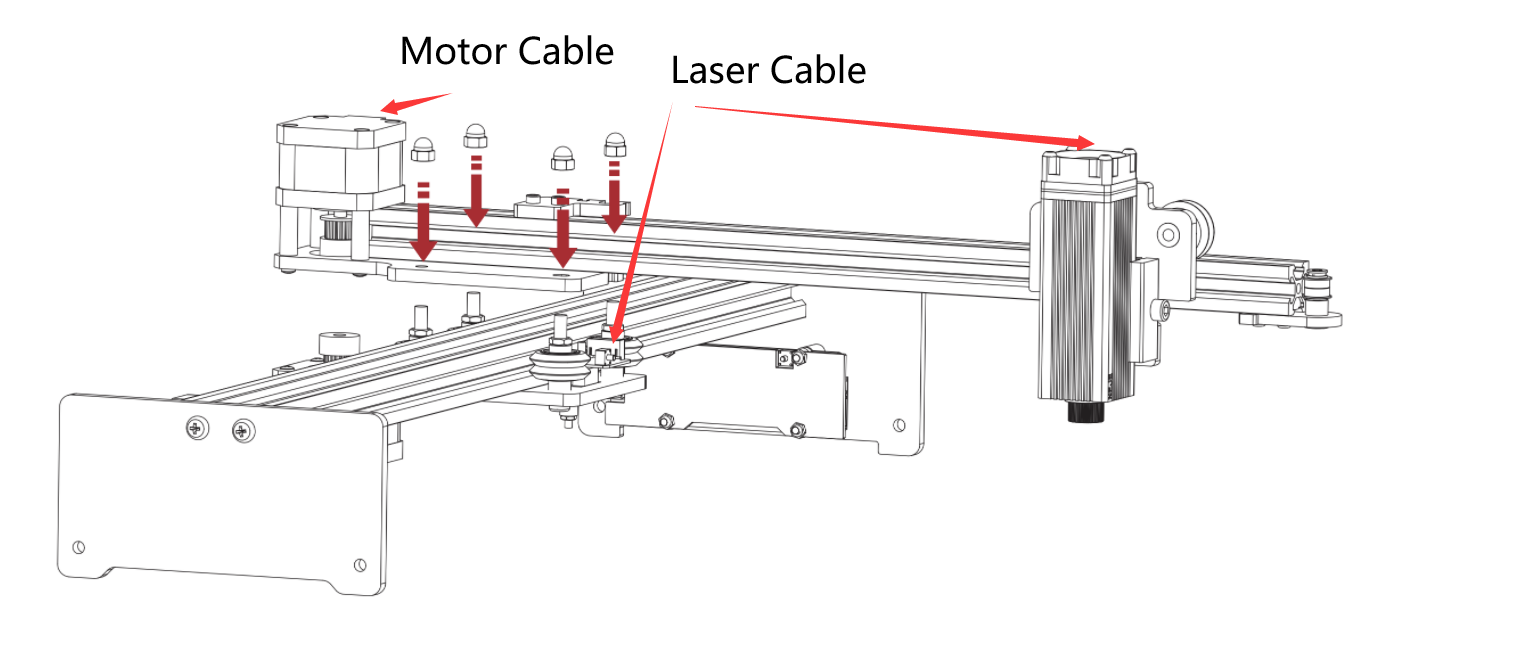
Install 4 screws, connect the motor wire and the laser wire.
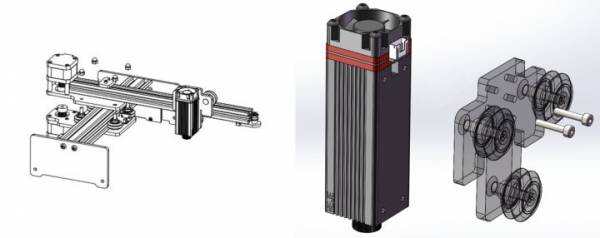
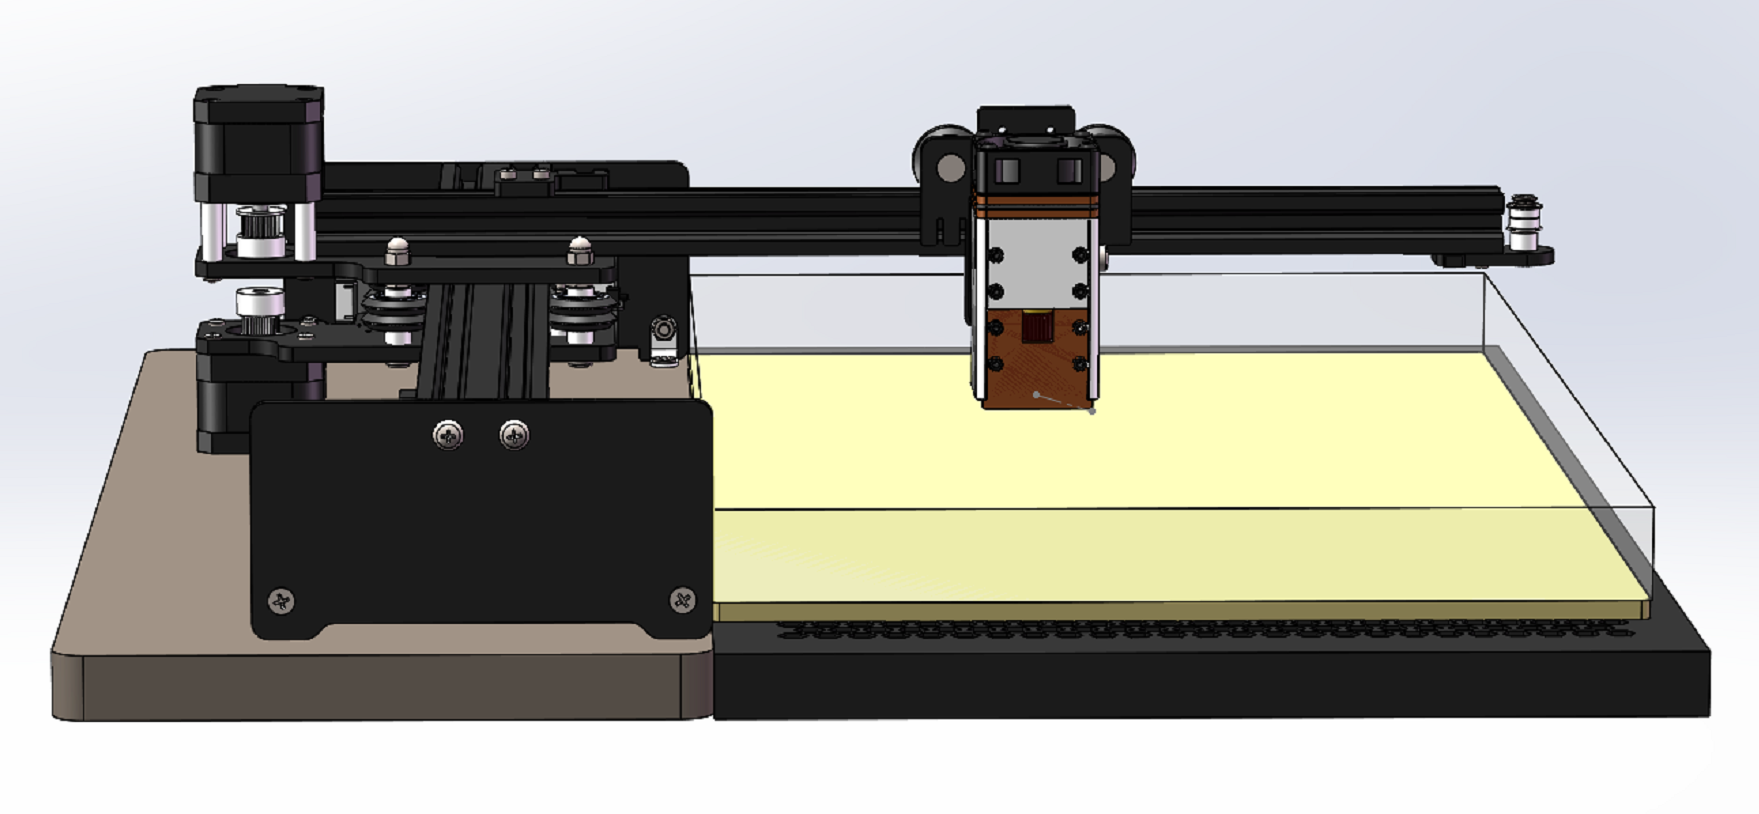
Install laser module: NEJE 3 has 2 kinds of module installation interfaces, the marked model is a notch that can slide up and down, and the other is an adjuster with a clamp; the standard design reduces the weight and improves the extreme performance during scanning. The models with clamps are mainly In order to be compatible with higher power modules (it should be noted that when combining higher power modules, it is recommended to upgrade the power supply to 12V5A, which can easily provide power for extended accessories).
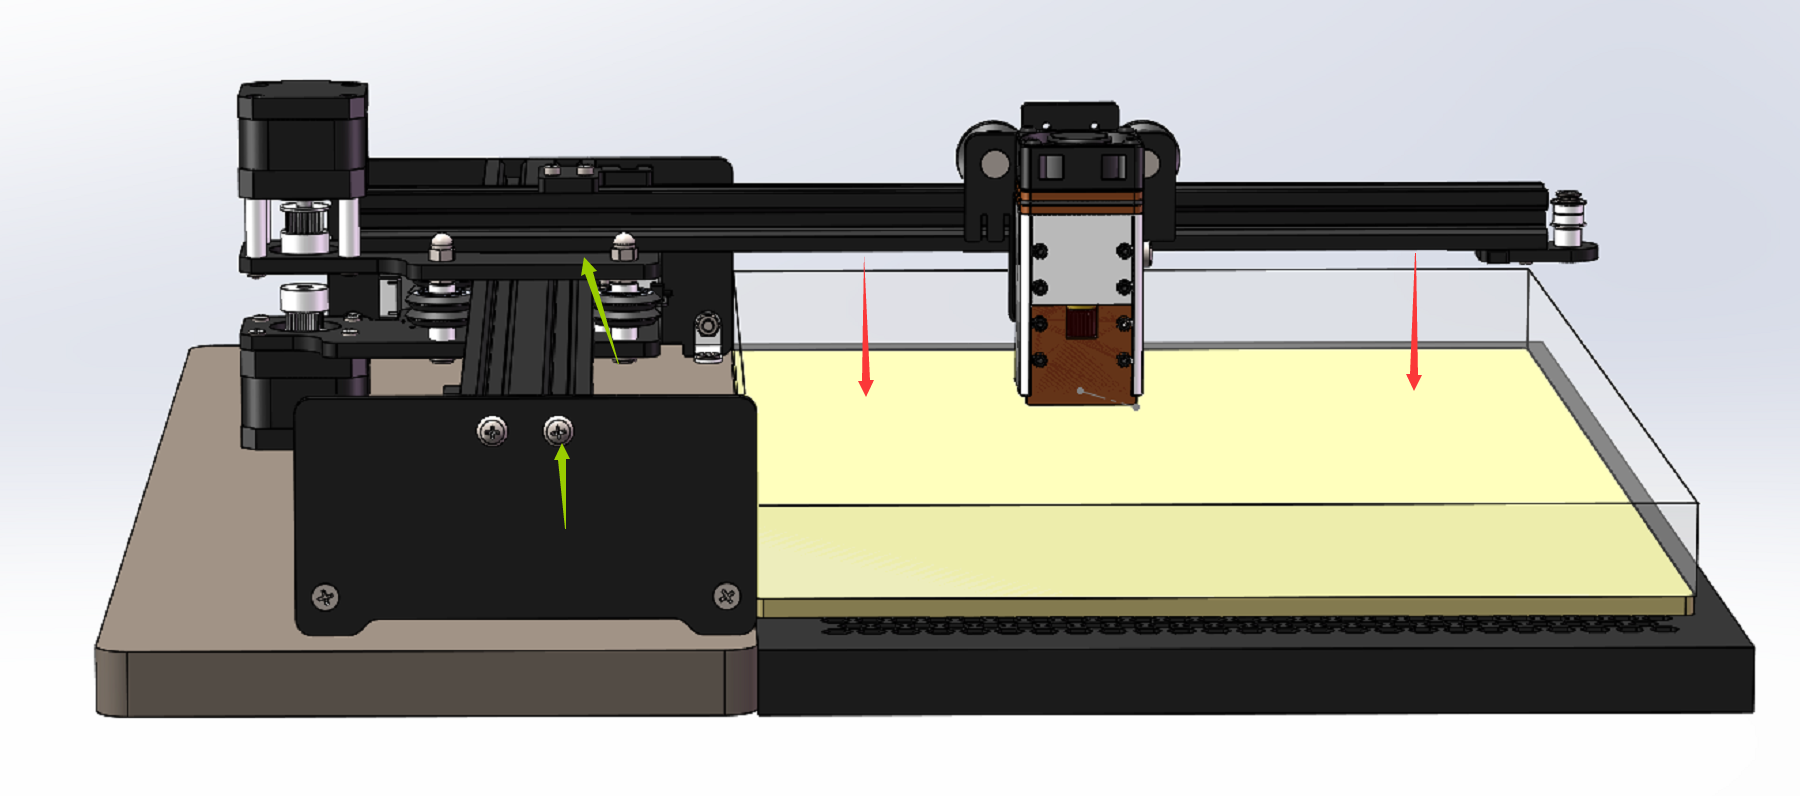
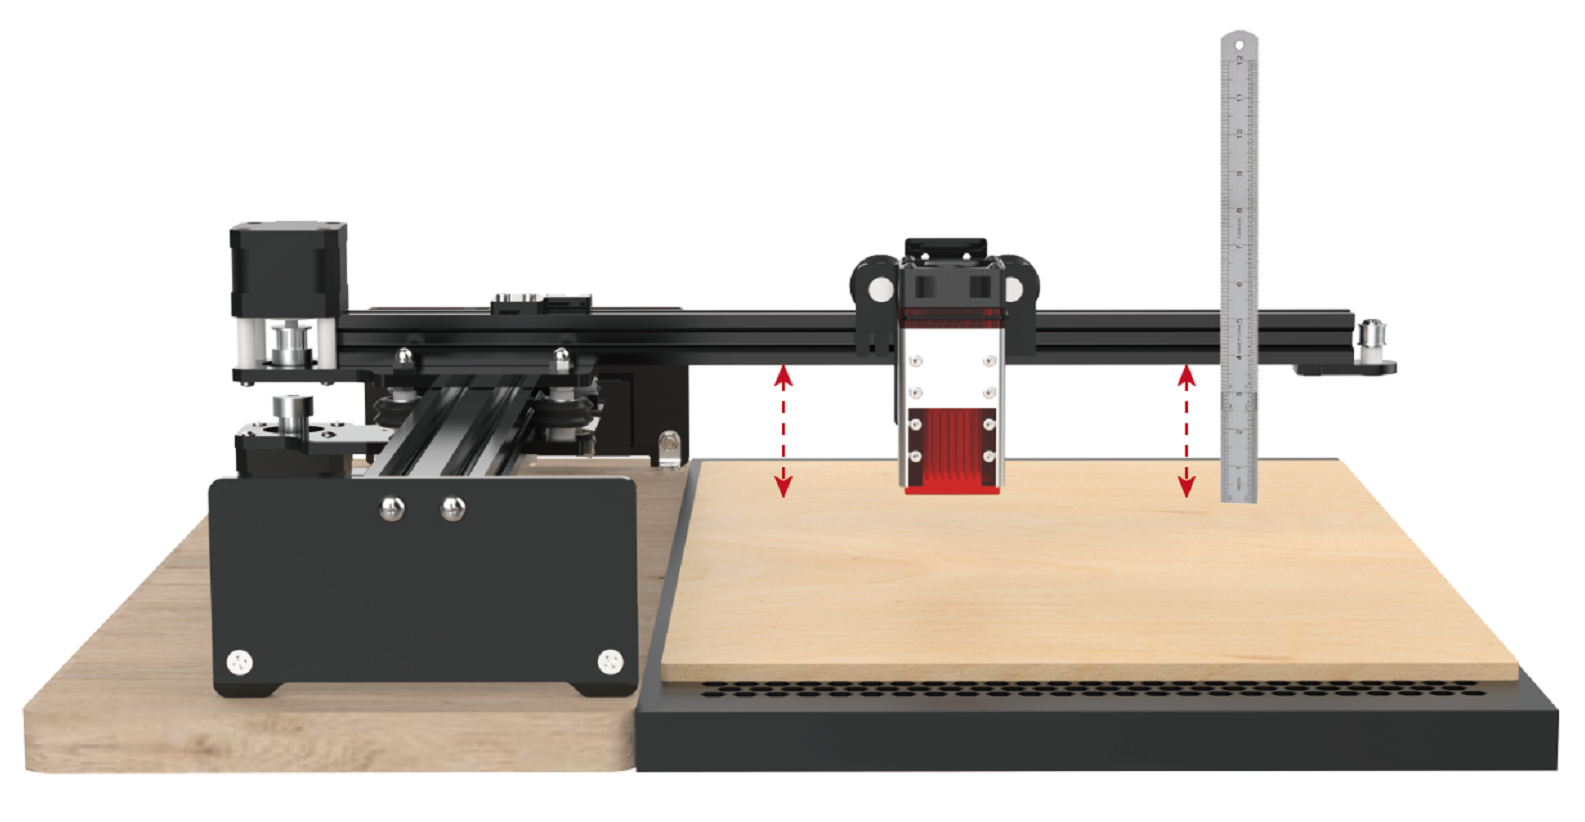
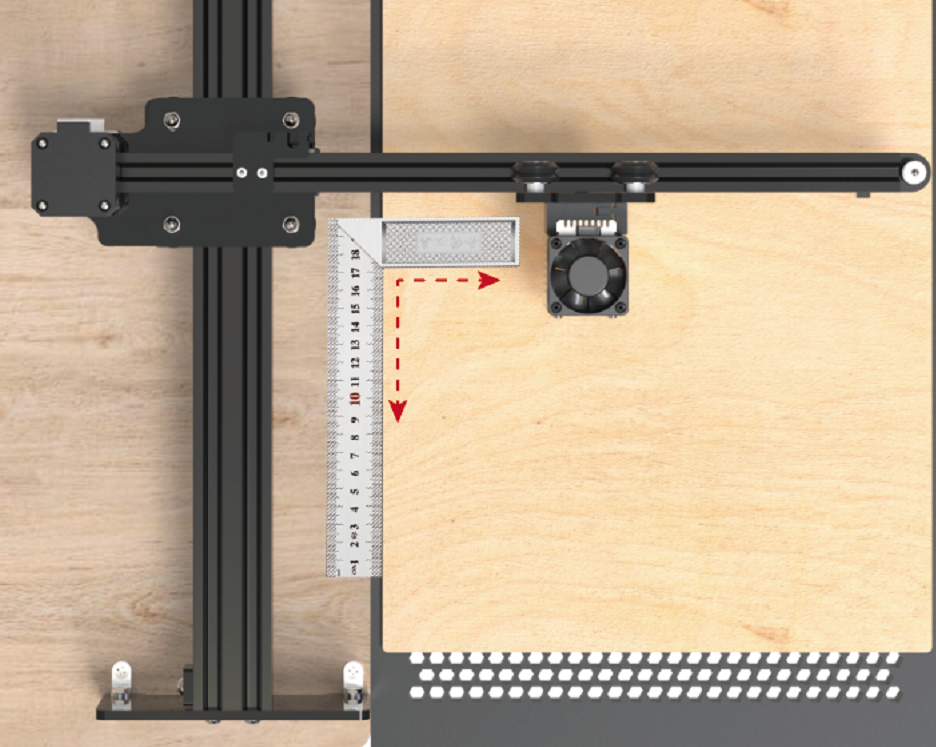
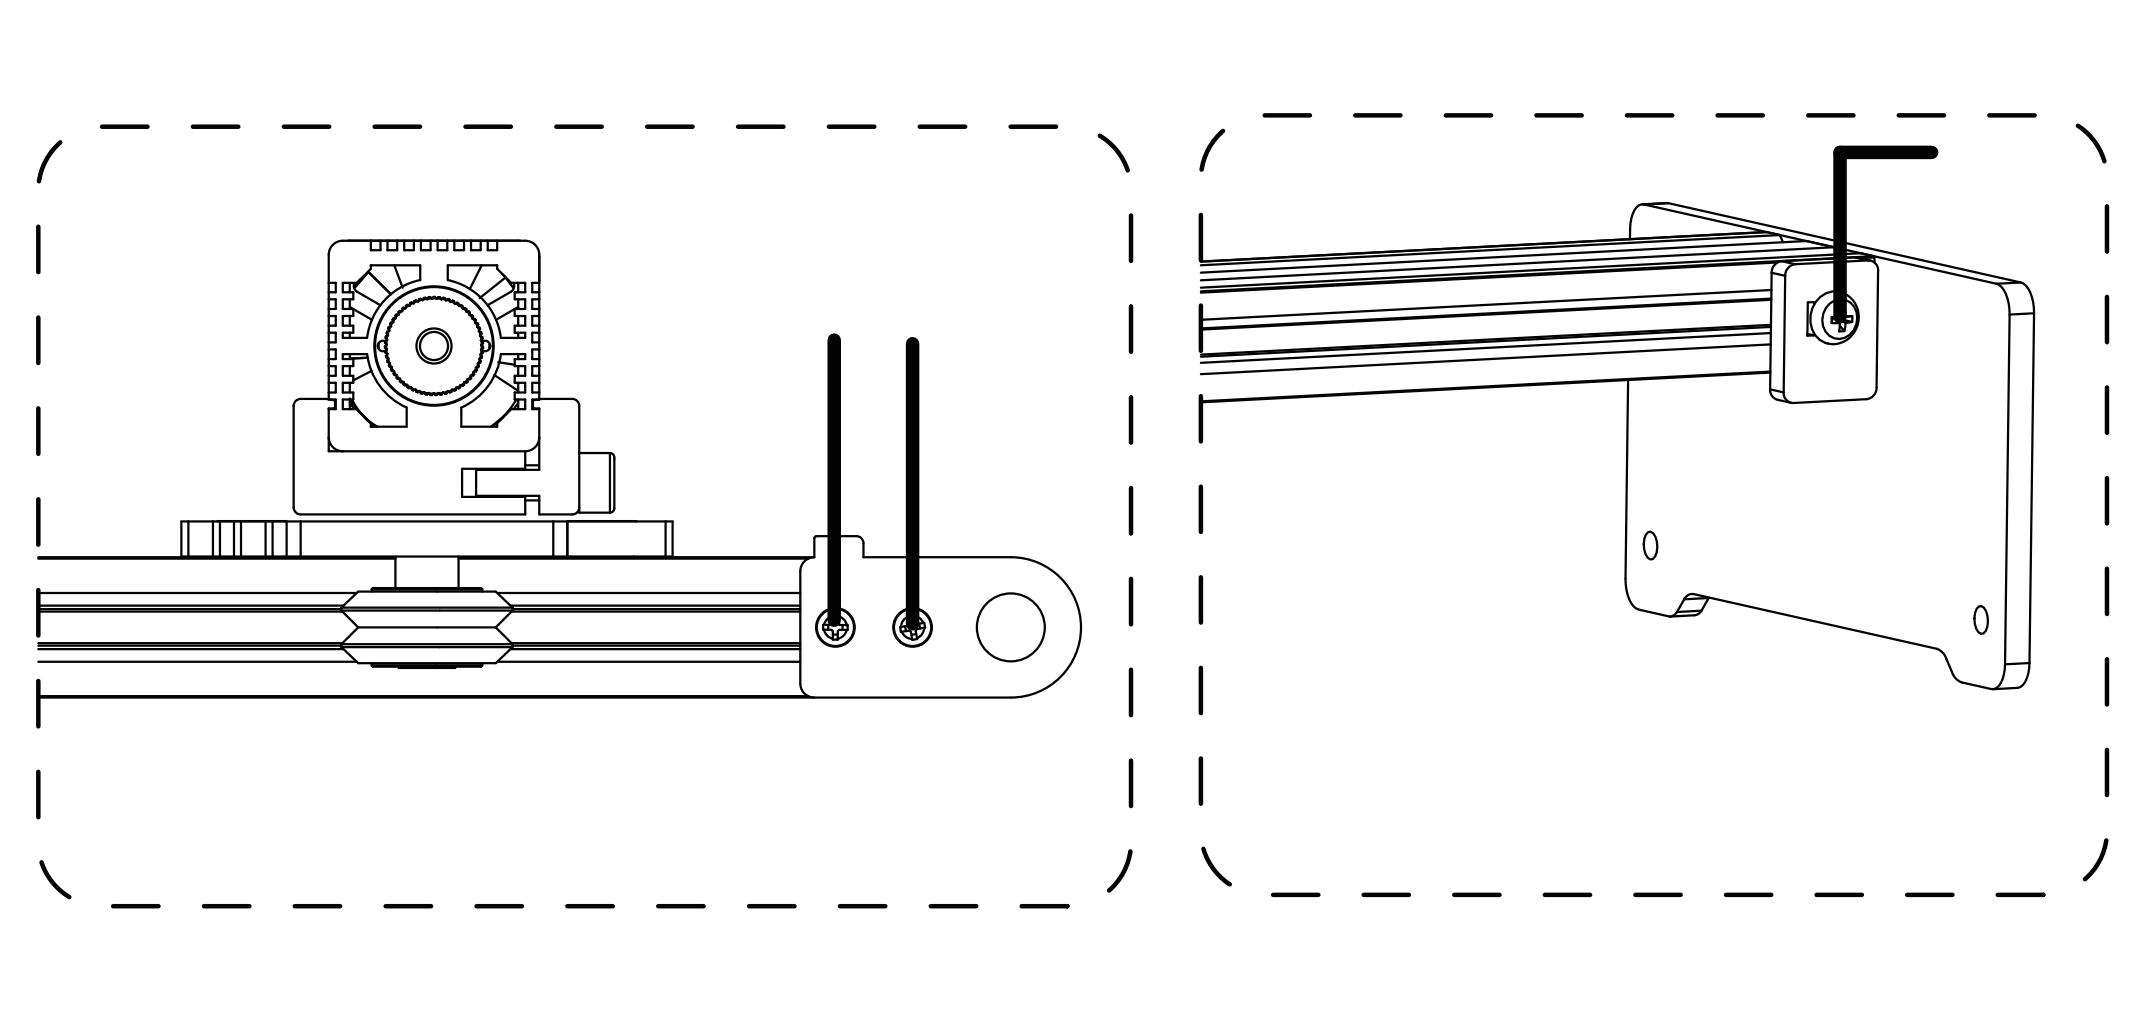
Leveling: After installing and placing it on the desktop, use a ruler to check the distance from the left and right ends of the X-axis to the desktop, and check the perpendicularity of the X-axis and the Y-axis; if there is any error, you can adjust it by adjusting the screws indicated by the green arrows. A vertical reference hole is made above, you can calibrate it according to the hole position.
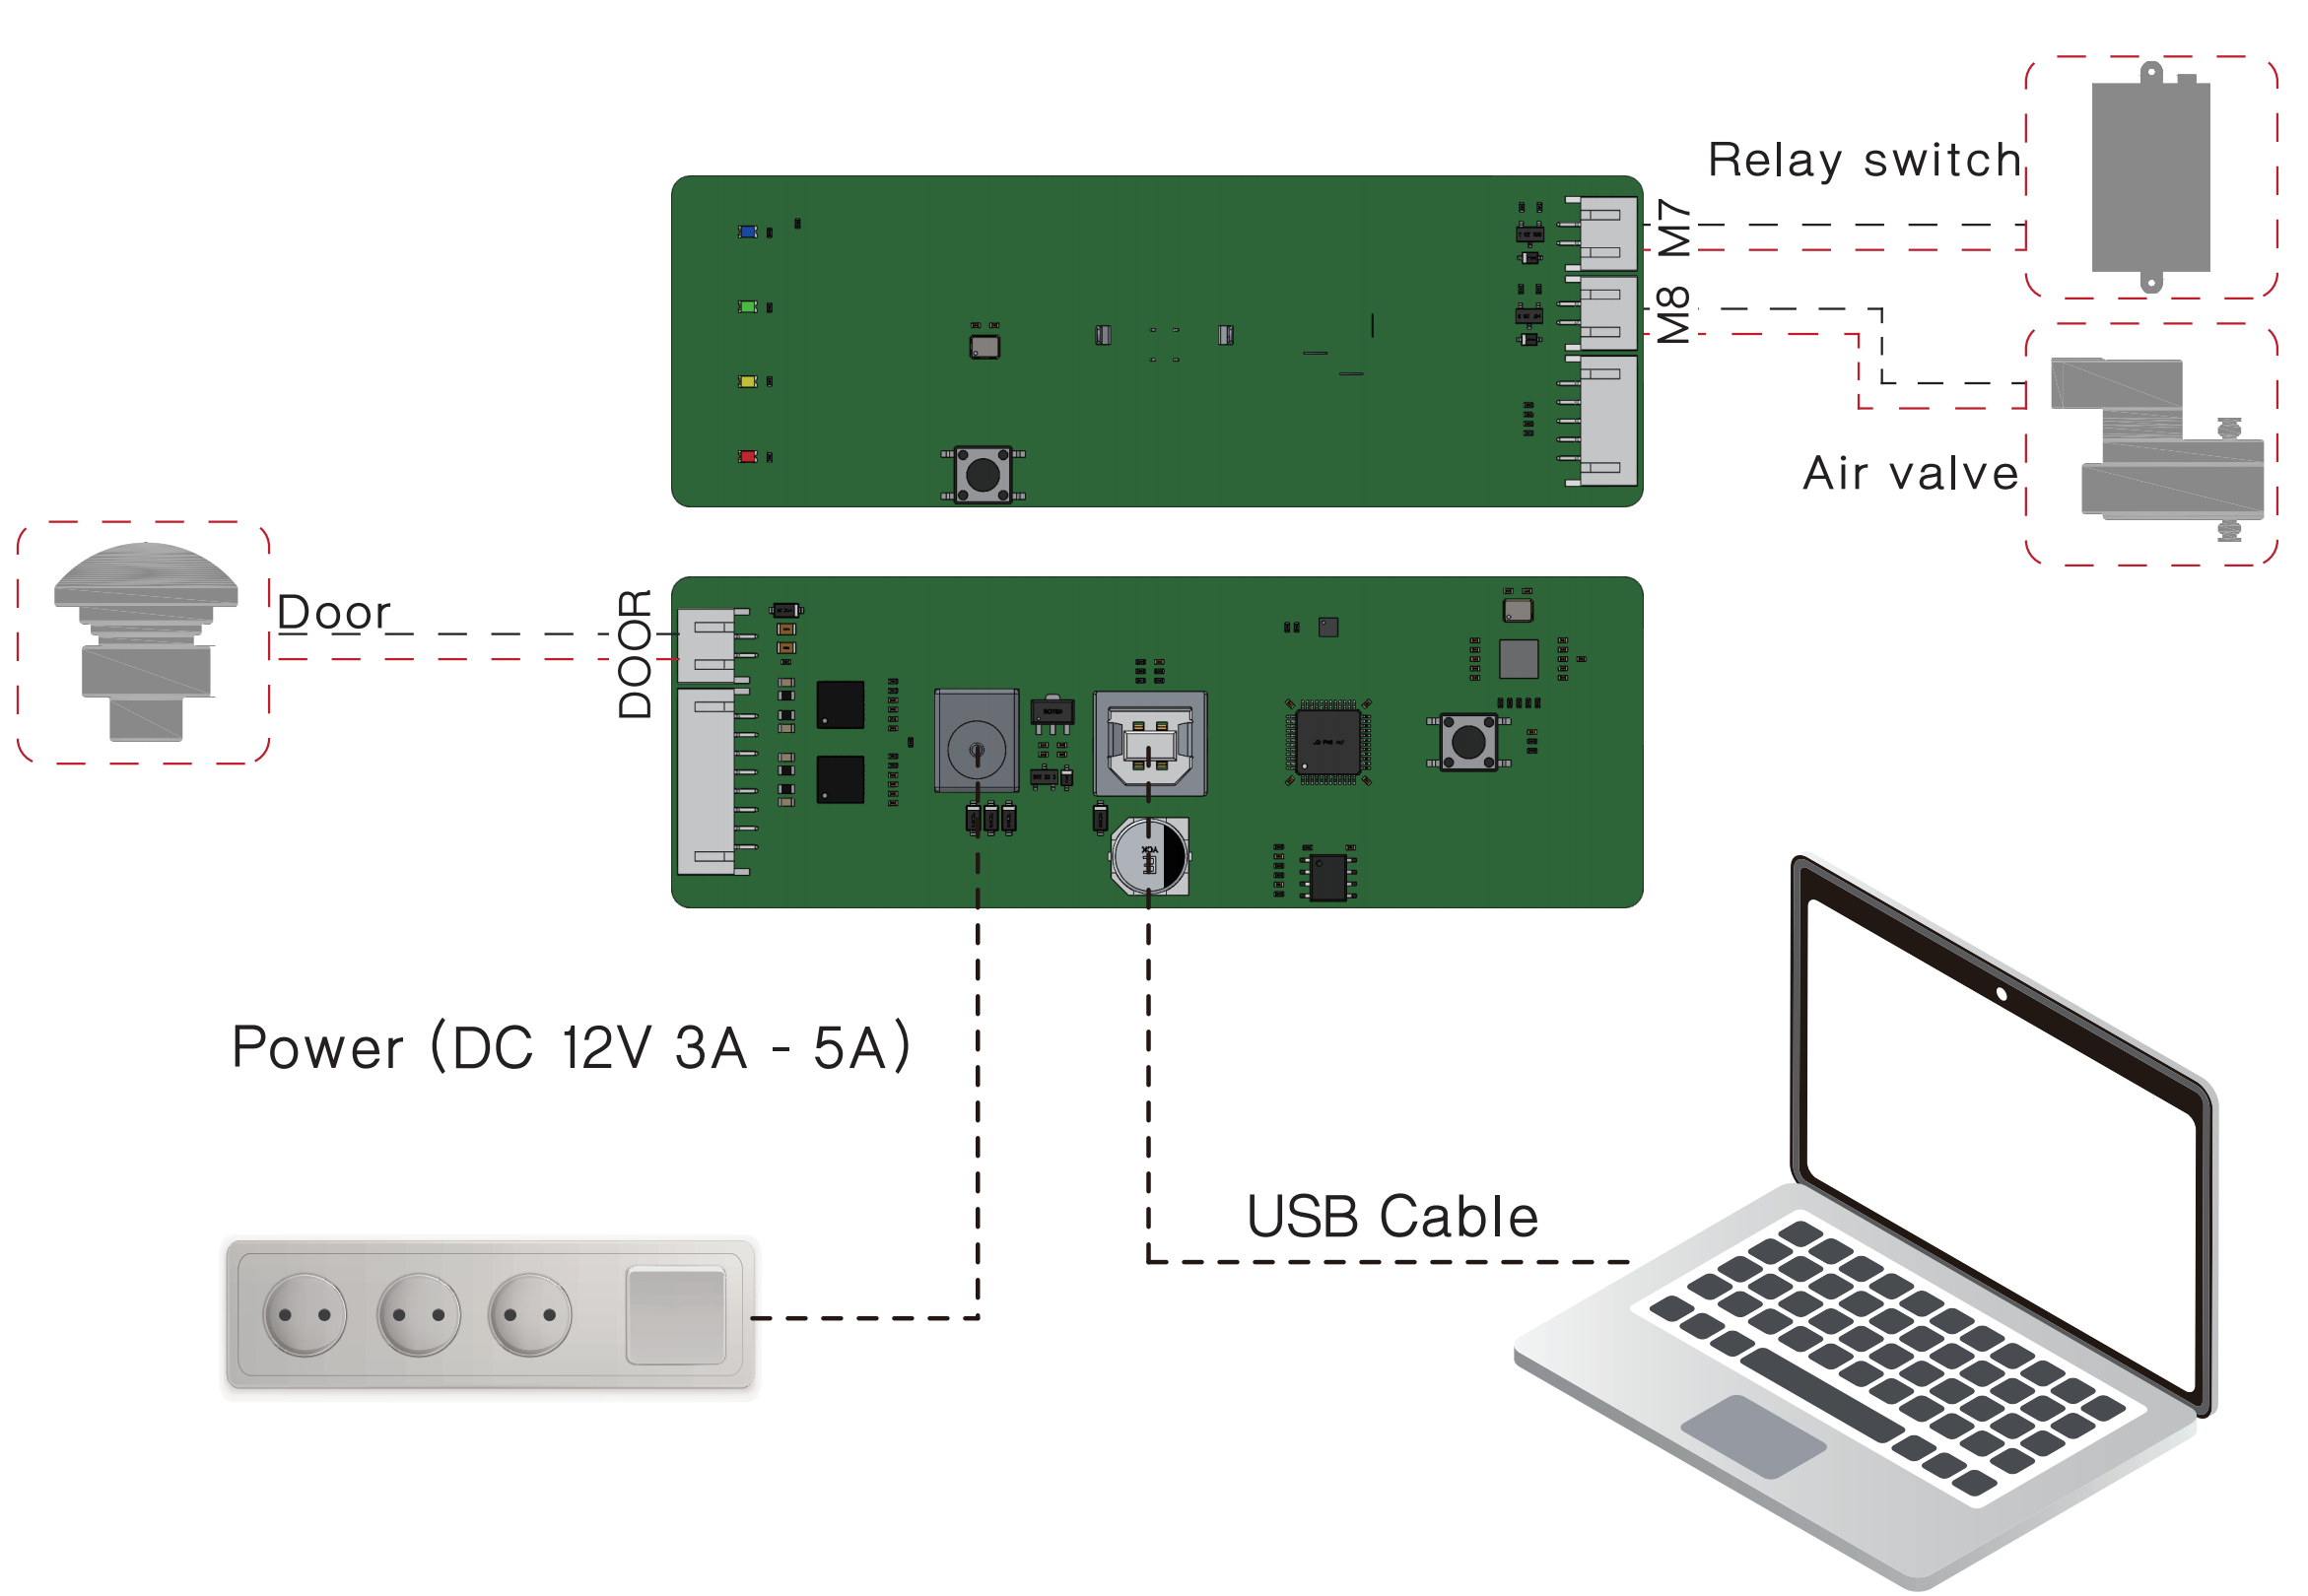
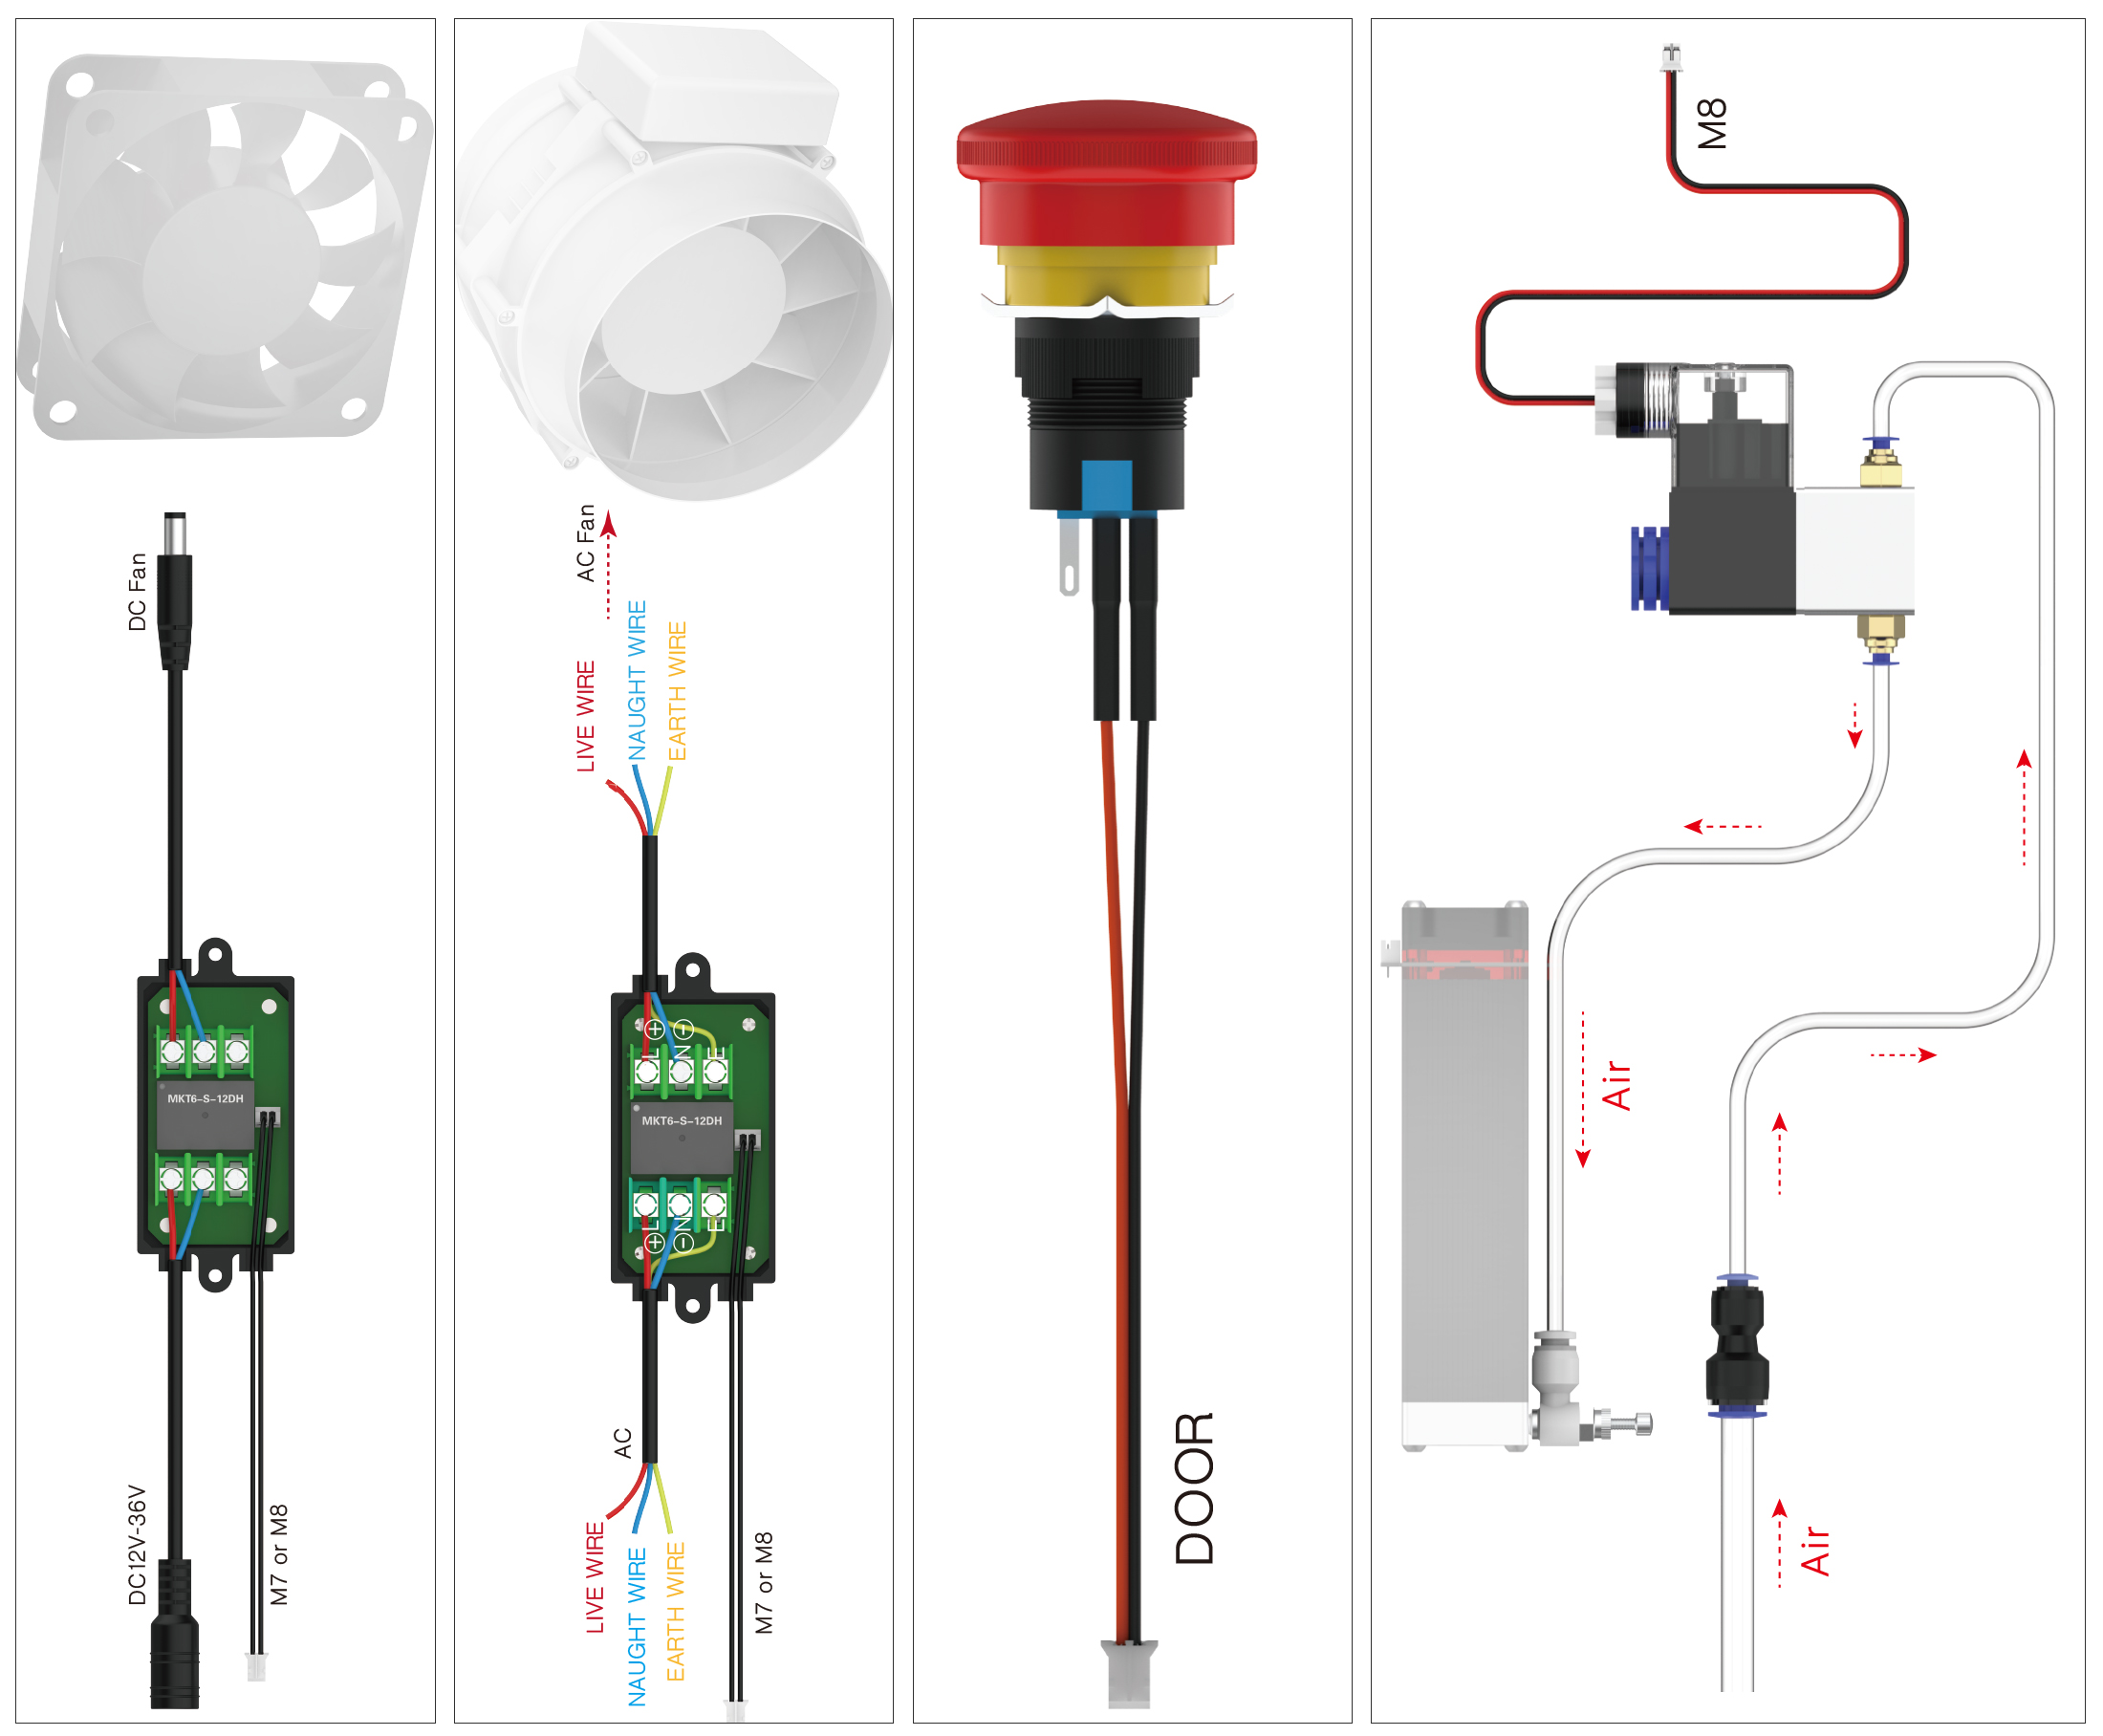
Connect a 12V4A power supply, if you have purchased additional accessories such as M8, M7, Door, etc., please refer to the picture below for connection.
M7 relay expansion accessories, can be used to control AC or DC power supply smoke exhaust system, can also be used to control other circuits, used as M8, there are safety risks when operating high-voltage circuits, requiring professional operation; M8 valve expansion accessories, can be used To control the air compressor switch;
It is recommended that the 4 feet be fixed on the wooden table top with corner codes.
Step 2: Software Download
NEJE Win Software
When using the machine for the first time, please open the NEJE Win software first to check the latest firmware update. The NEJE team will continue to optimize the NEJE firmware and GRBL firmware to provide you with more surprising experiences.
.NET Framework 4.8 — Ignore if win10 and above
NEJE_v6.1.8.exe — 2022.6.6 . The Latest NEJE Win Software, Only supports NEJE 3 series.
NEJE APP for Android
Support OS: Android 5.0 or later
Support Device:NEJE 3, NEJE 3 Plus, NEJE 3 Pro, NEJE 3 Max
Download from Google Play Store
The "N-Scanner" APP (click me to download)mainly uses the fast transmission between the engraving materials in your mobile phone and the NEJE Win software. You can directly shoot the image through the mobile phone or quickly transfer the content of the photo stored in the mobile phone to the computer for editing and engraving;
NEJE APP for iphone, iPad, macbook
Support OS: iPhone (iOS 10.0 or later), iPad (iPadOS 10.0 or later), Mac (macOS 11.0 or later)
Support Device:NEJE 3, NEJE 3 Plus, NEJE 3 Pro, NEJE 3 Max
or Apple APP store search: NEJE 3
After the macOS system is upgraded, the original driver installation method and driver files are invalid. Here is the driver installation method after I modified it. For devices before the NEJE 3 series, the driver installation method needs to be updated.
https://neje99.com/faq/how-to-install-serial-driver-on-macos.html
LaserGRBL Software
Install Driver(Ignore if driver is already installed)
laserGRBL for Windows:
https://github.com/arkypita/LaserGRBL/releases/latest/download/install.exe
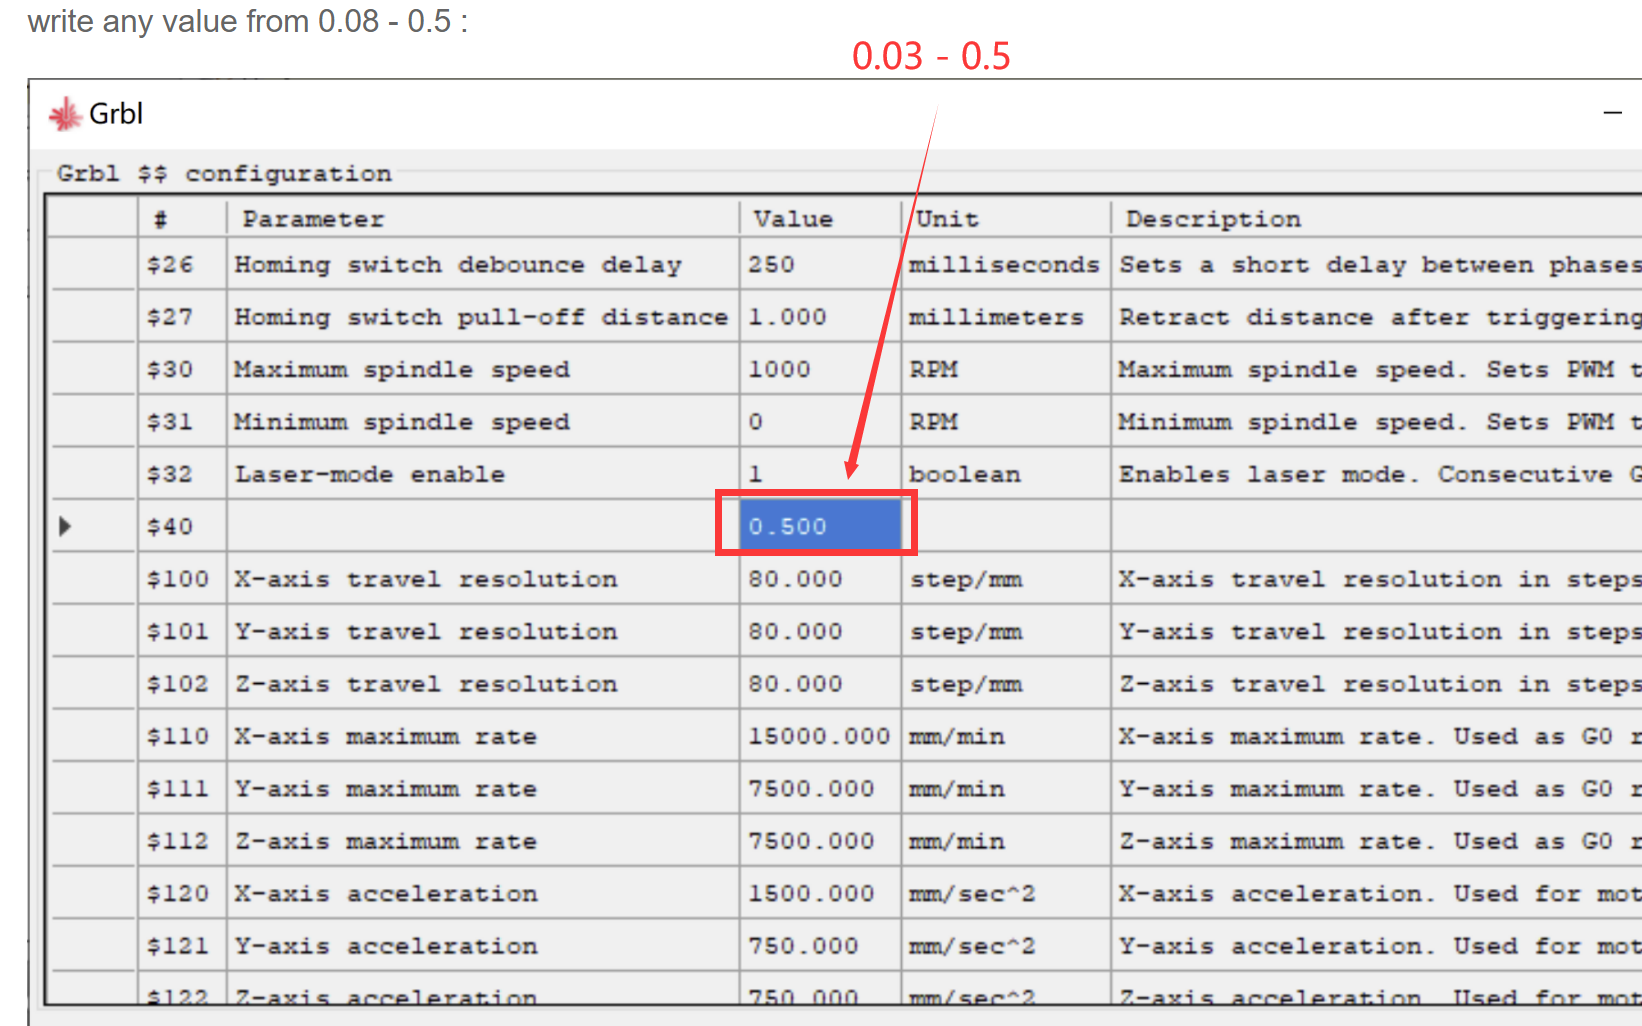
How to set low light intensity in GRBL:
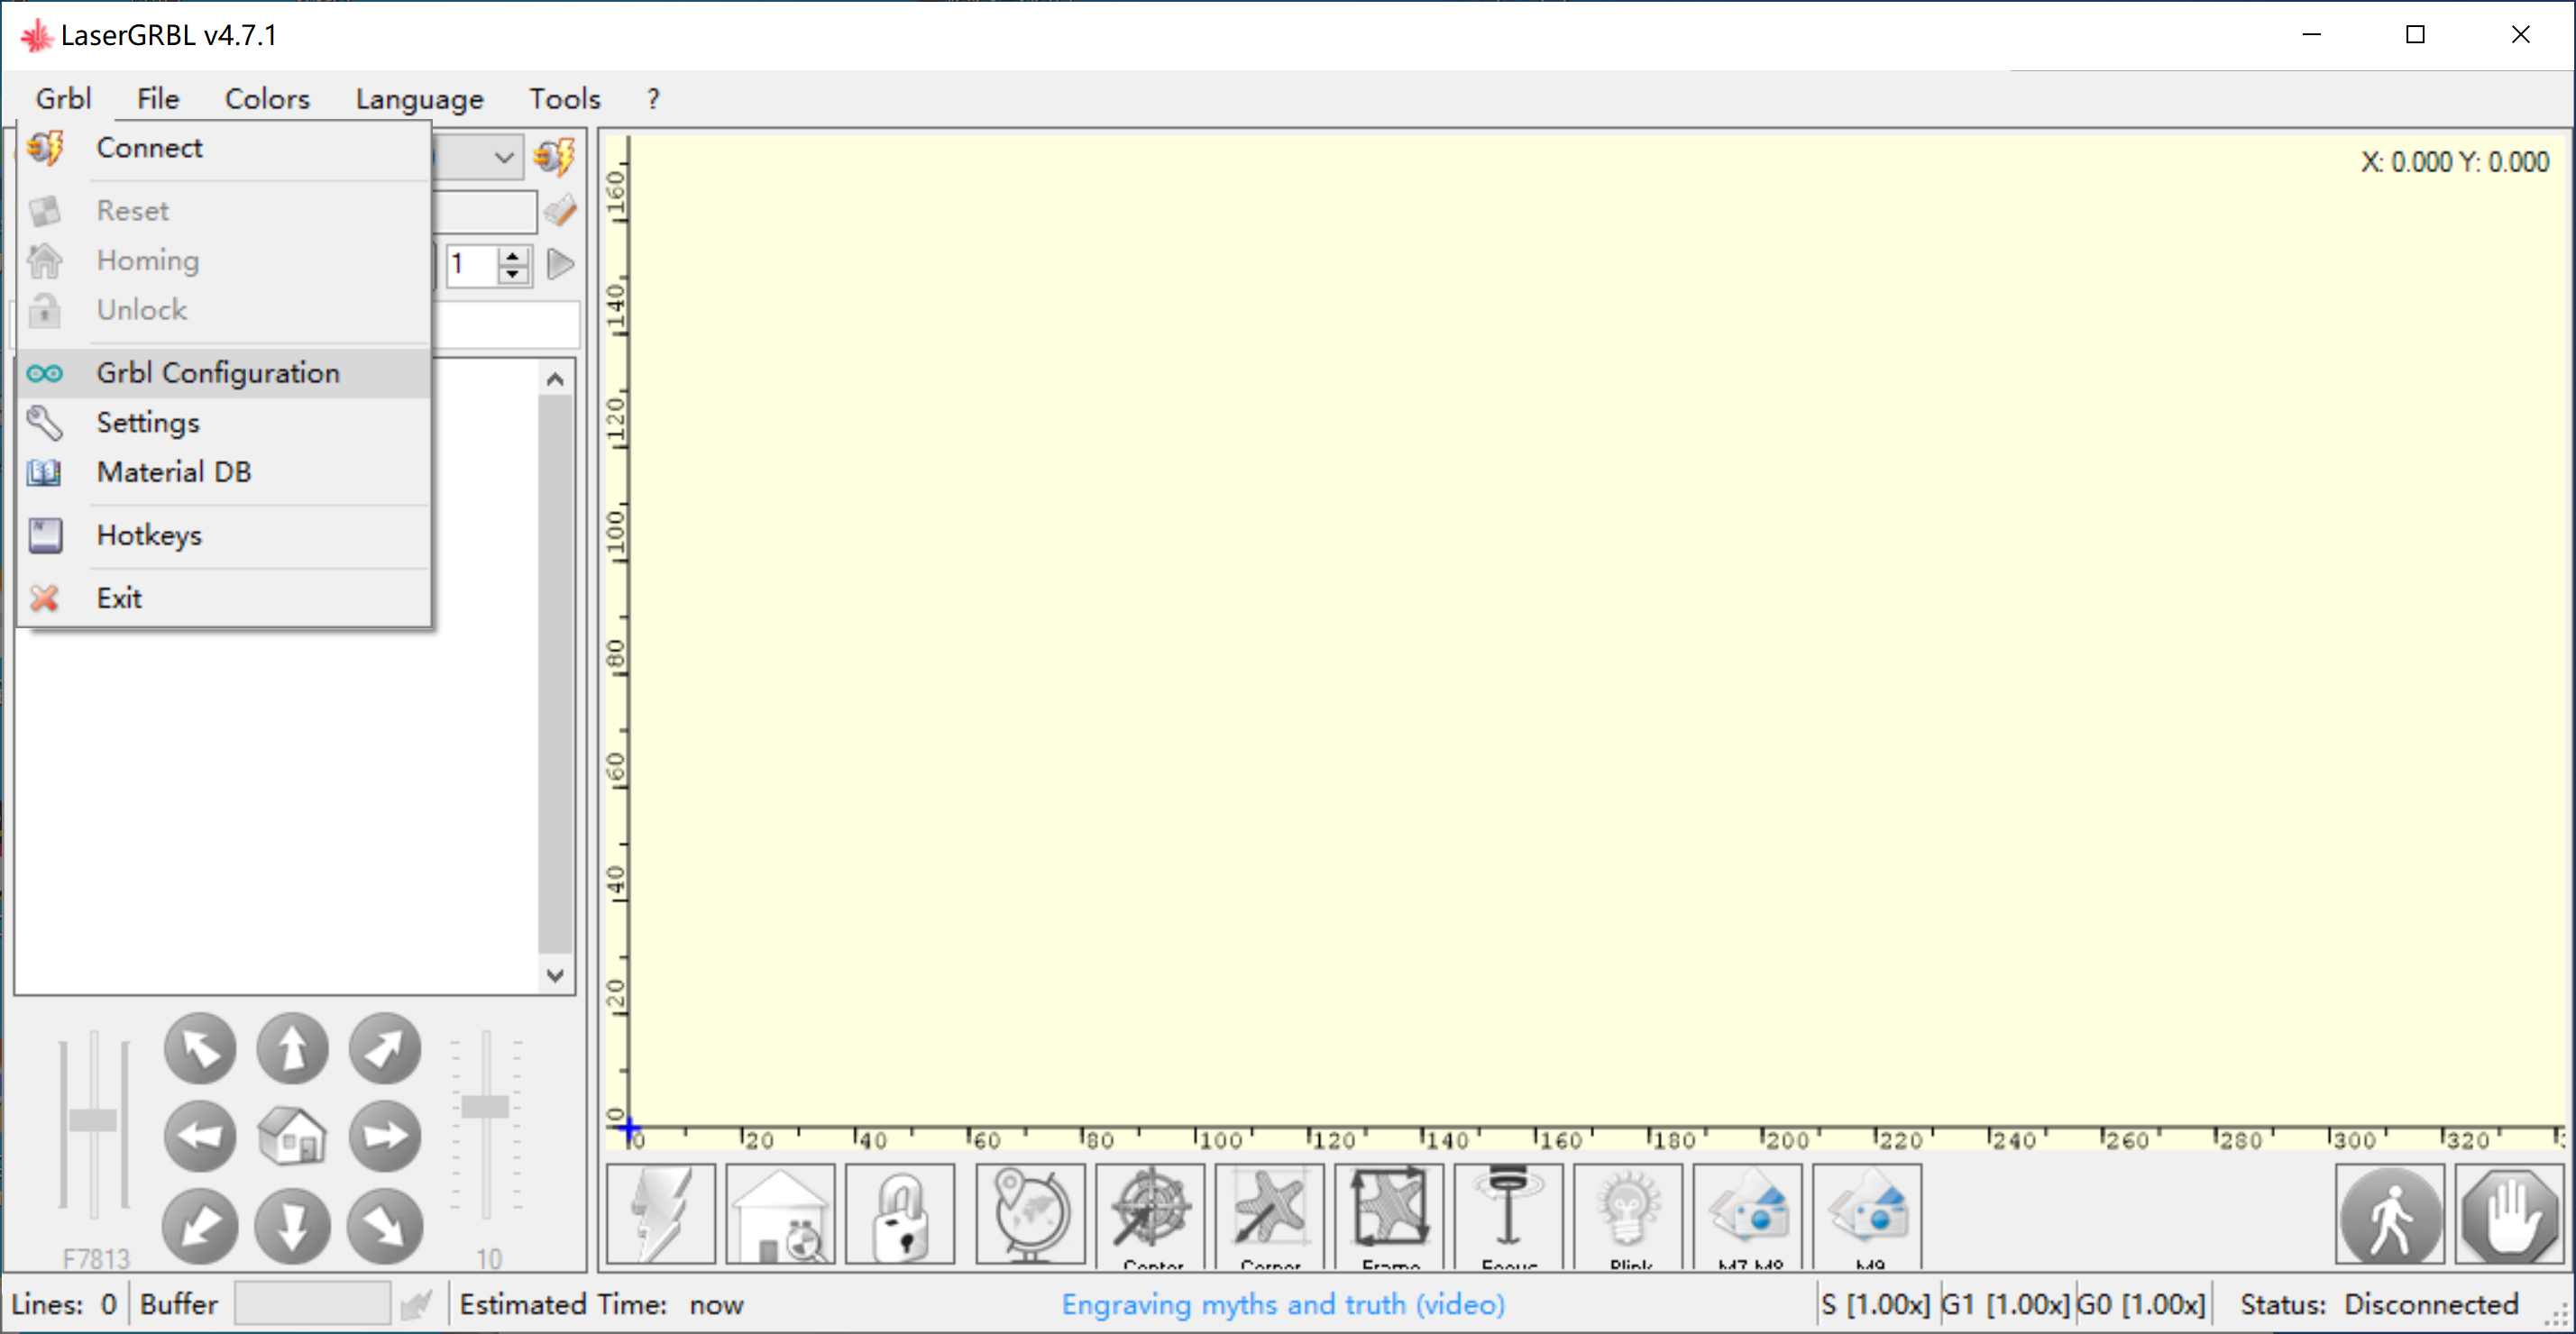
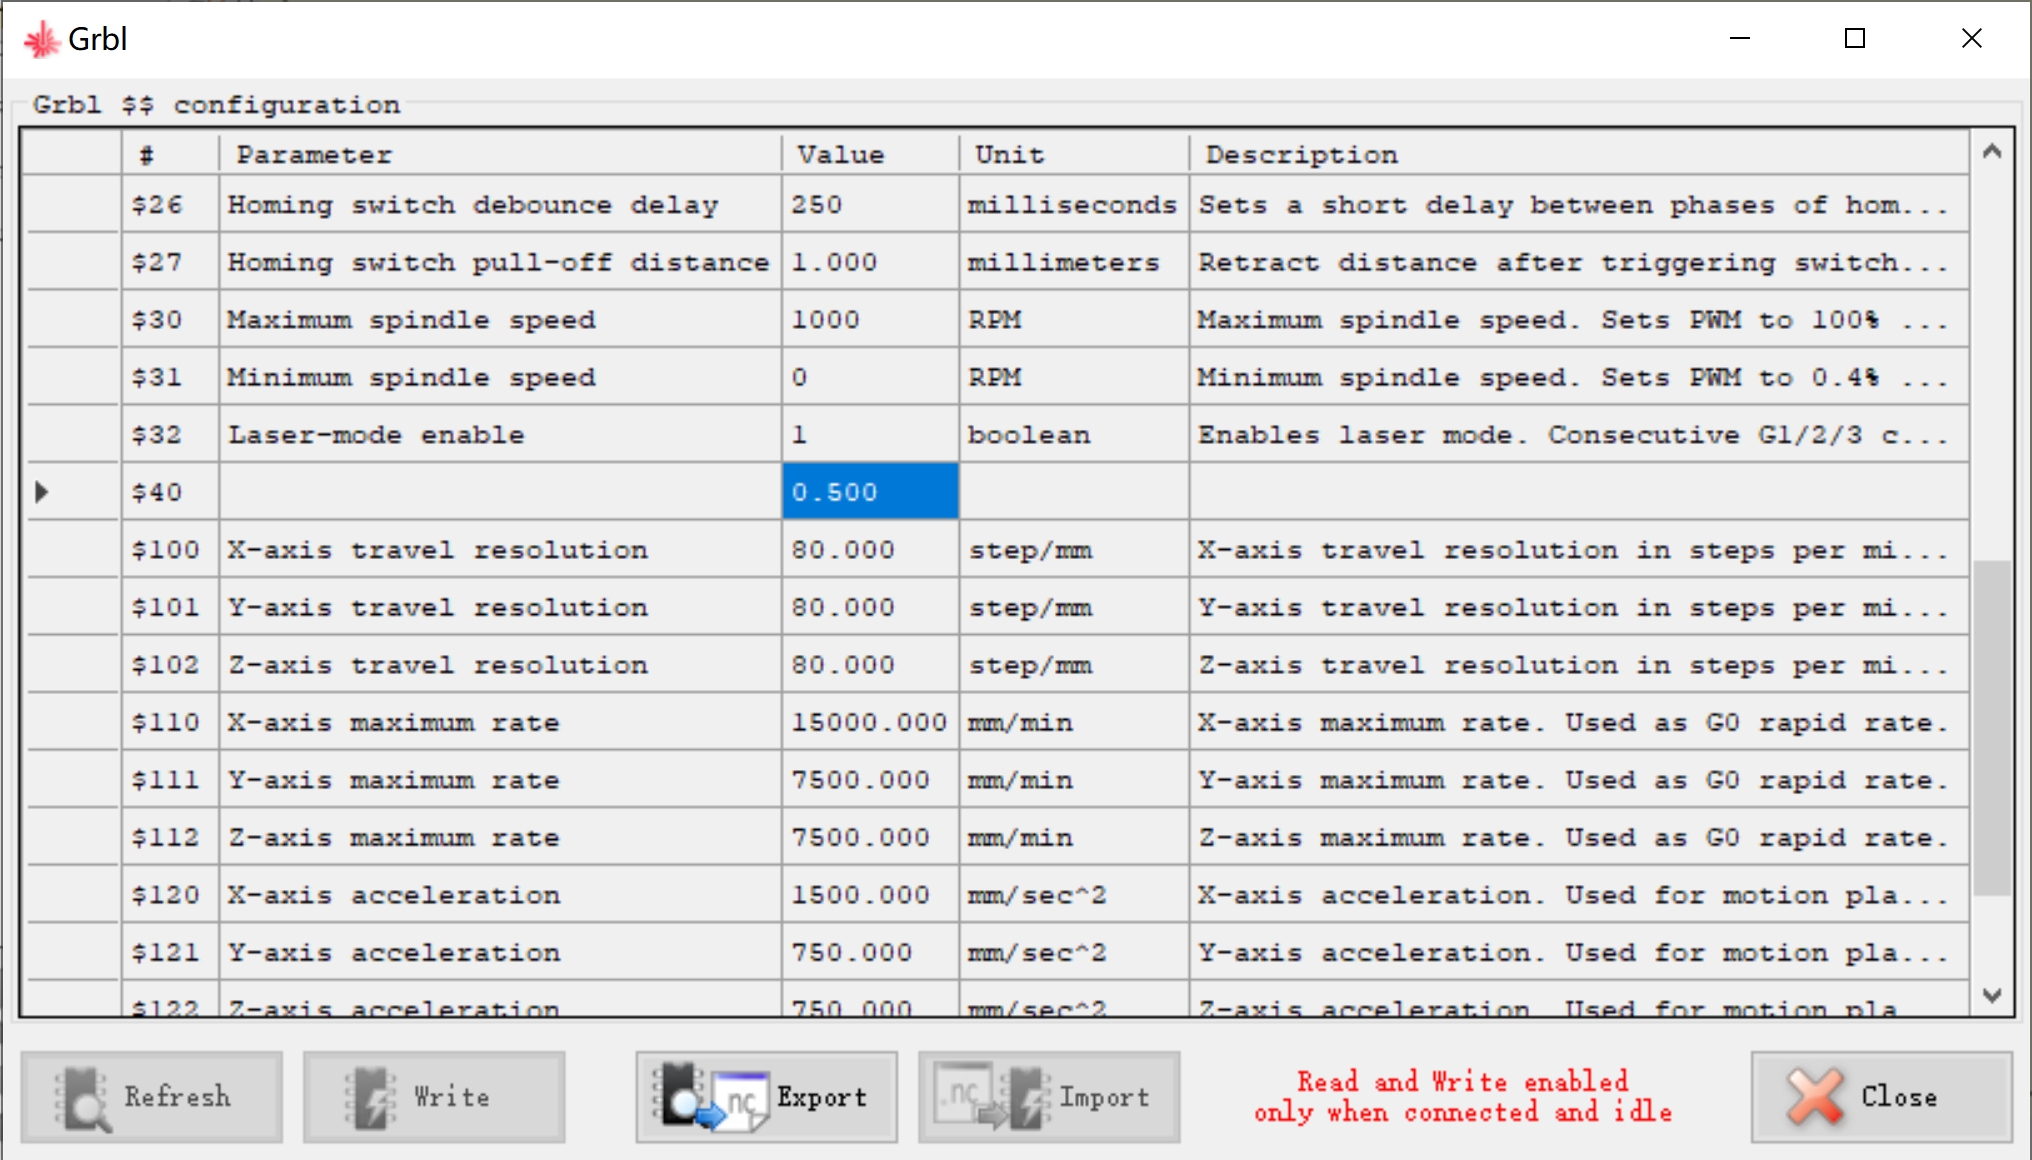
Grbl Configuration:
Write any value from 0.08 - 0.5, The value means % laser intensity, please proceed with caution,If you modify the parameters and cannot restore the default firmware, you can re-update the firmware in NEJE Win software.
Lightburn Software
Install Driver(Ignore if driver is already installed)
LightBurn is a paid software. You can download it from the official website of Lightburn. This software is not developed by the NEJE team. You can use it for free for 30 days.
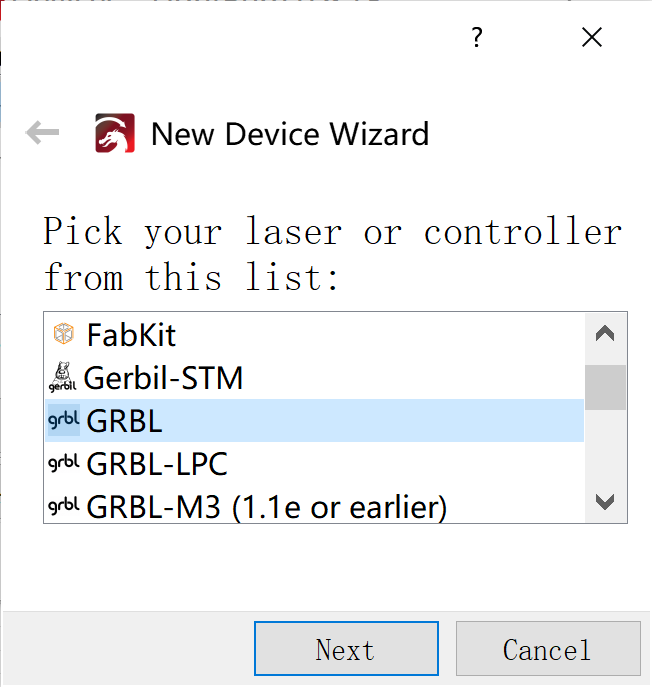
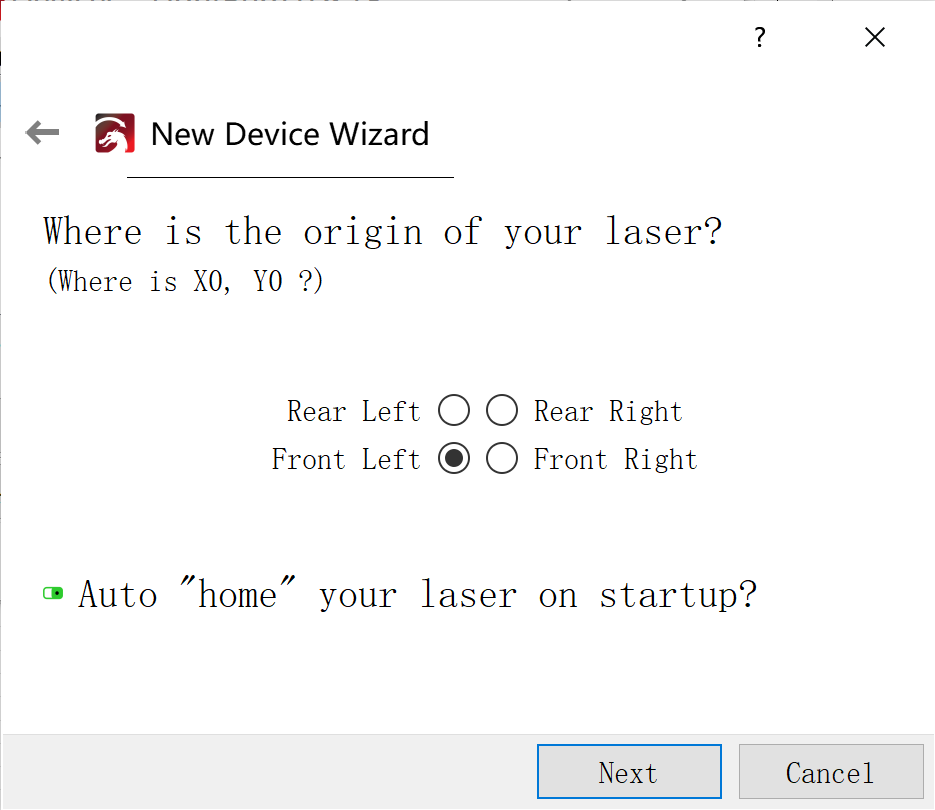
Initialize lightburn settings:
Area setting: X: 170 x Y:170
Origin X0,Y0: Front Left. Auto “Home”.
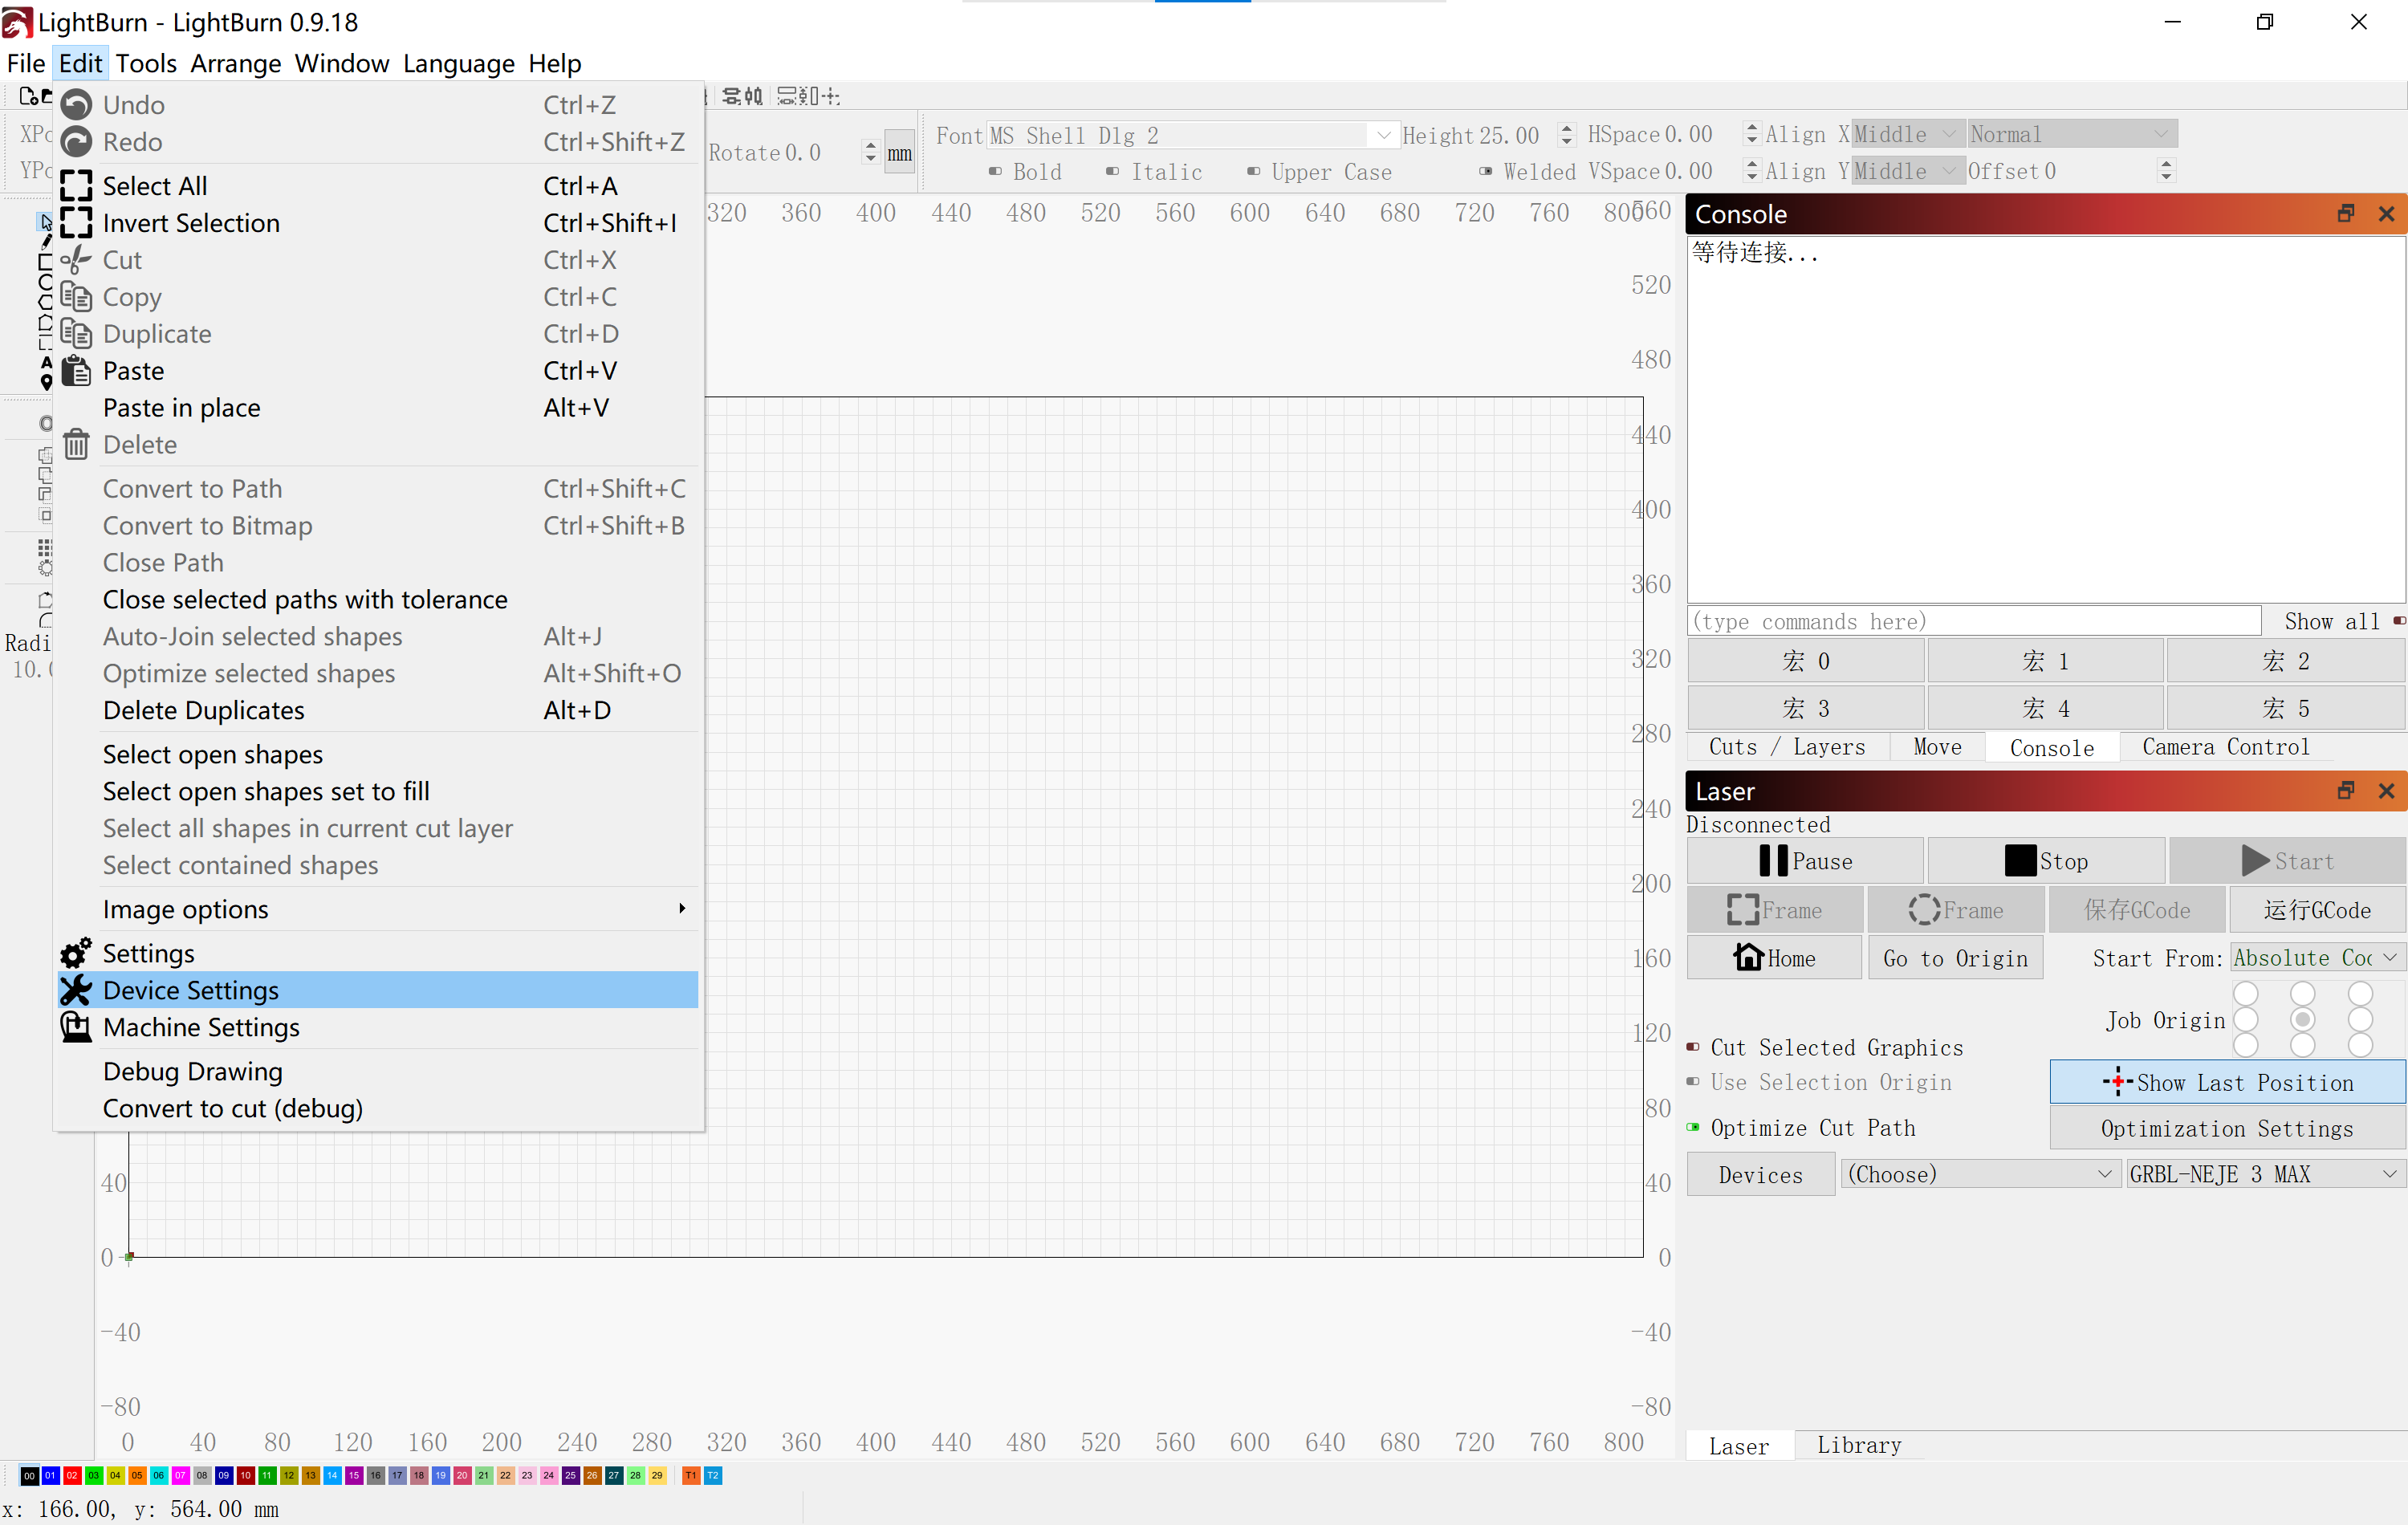
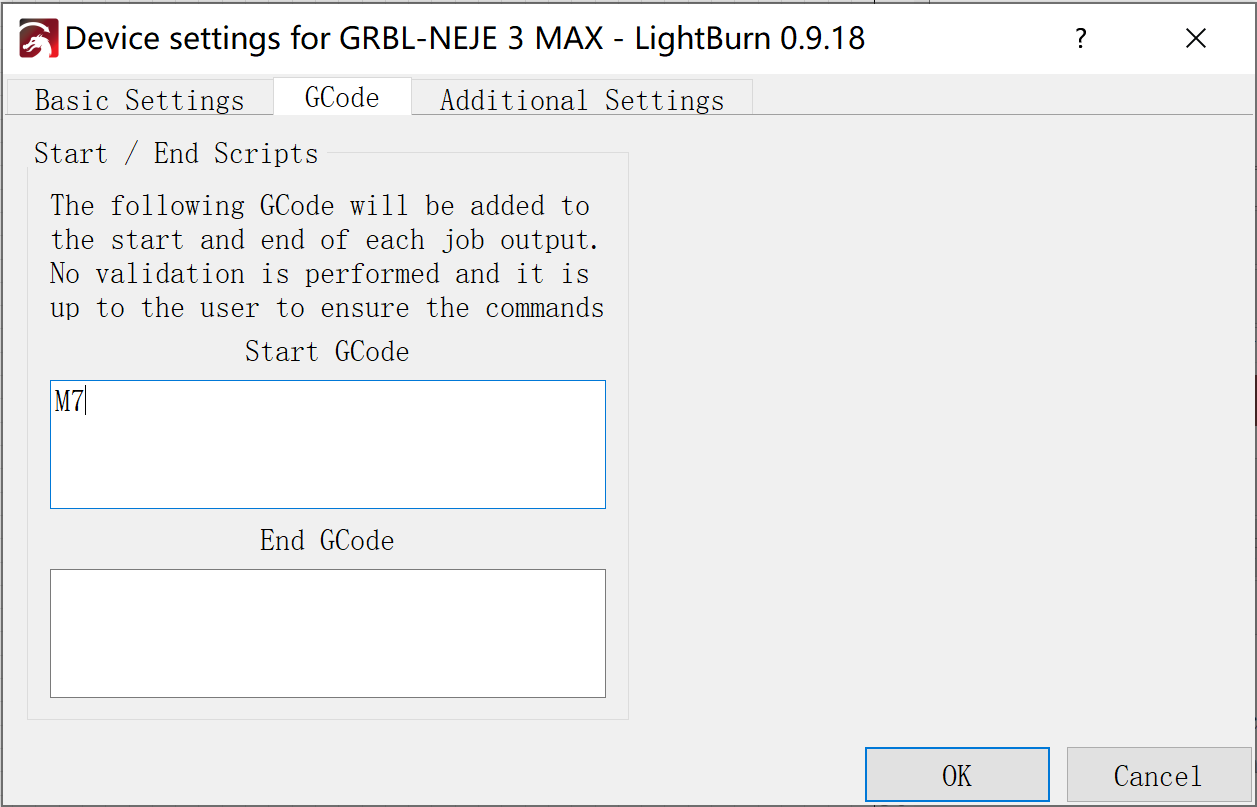
How to start M7 in lightburn:
Device Settings
Start G-code: M7
Step 3: Safety Attention
Please do not leave the equipment when the equipment is working, long-term stay may cause the material to burn!
Please wear protective glasses before operation!
Please do not touch the laser outlet with your hands. It may burn your hands!
Please avoid strongly impact on the machine!
Children under 14 years of age are prohibited from using this product!
Children over 14 years of age need adult supervision when using this product!
Avoid accidental touch by pets!
Step 4: Place Materials
Make sure the plane of the engraved material is at the same distance from the laser, so that the focus position is consistent and the engraved image is burned evenly.
Step 5: Adjust Focus
Set the right low light to find the focus more accurately:
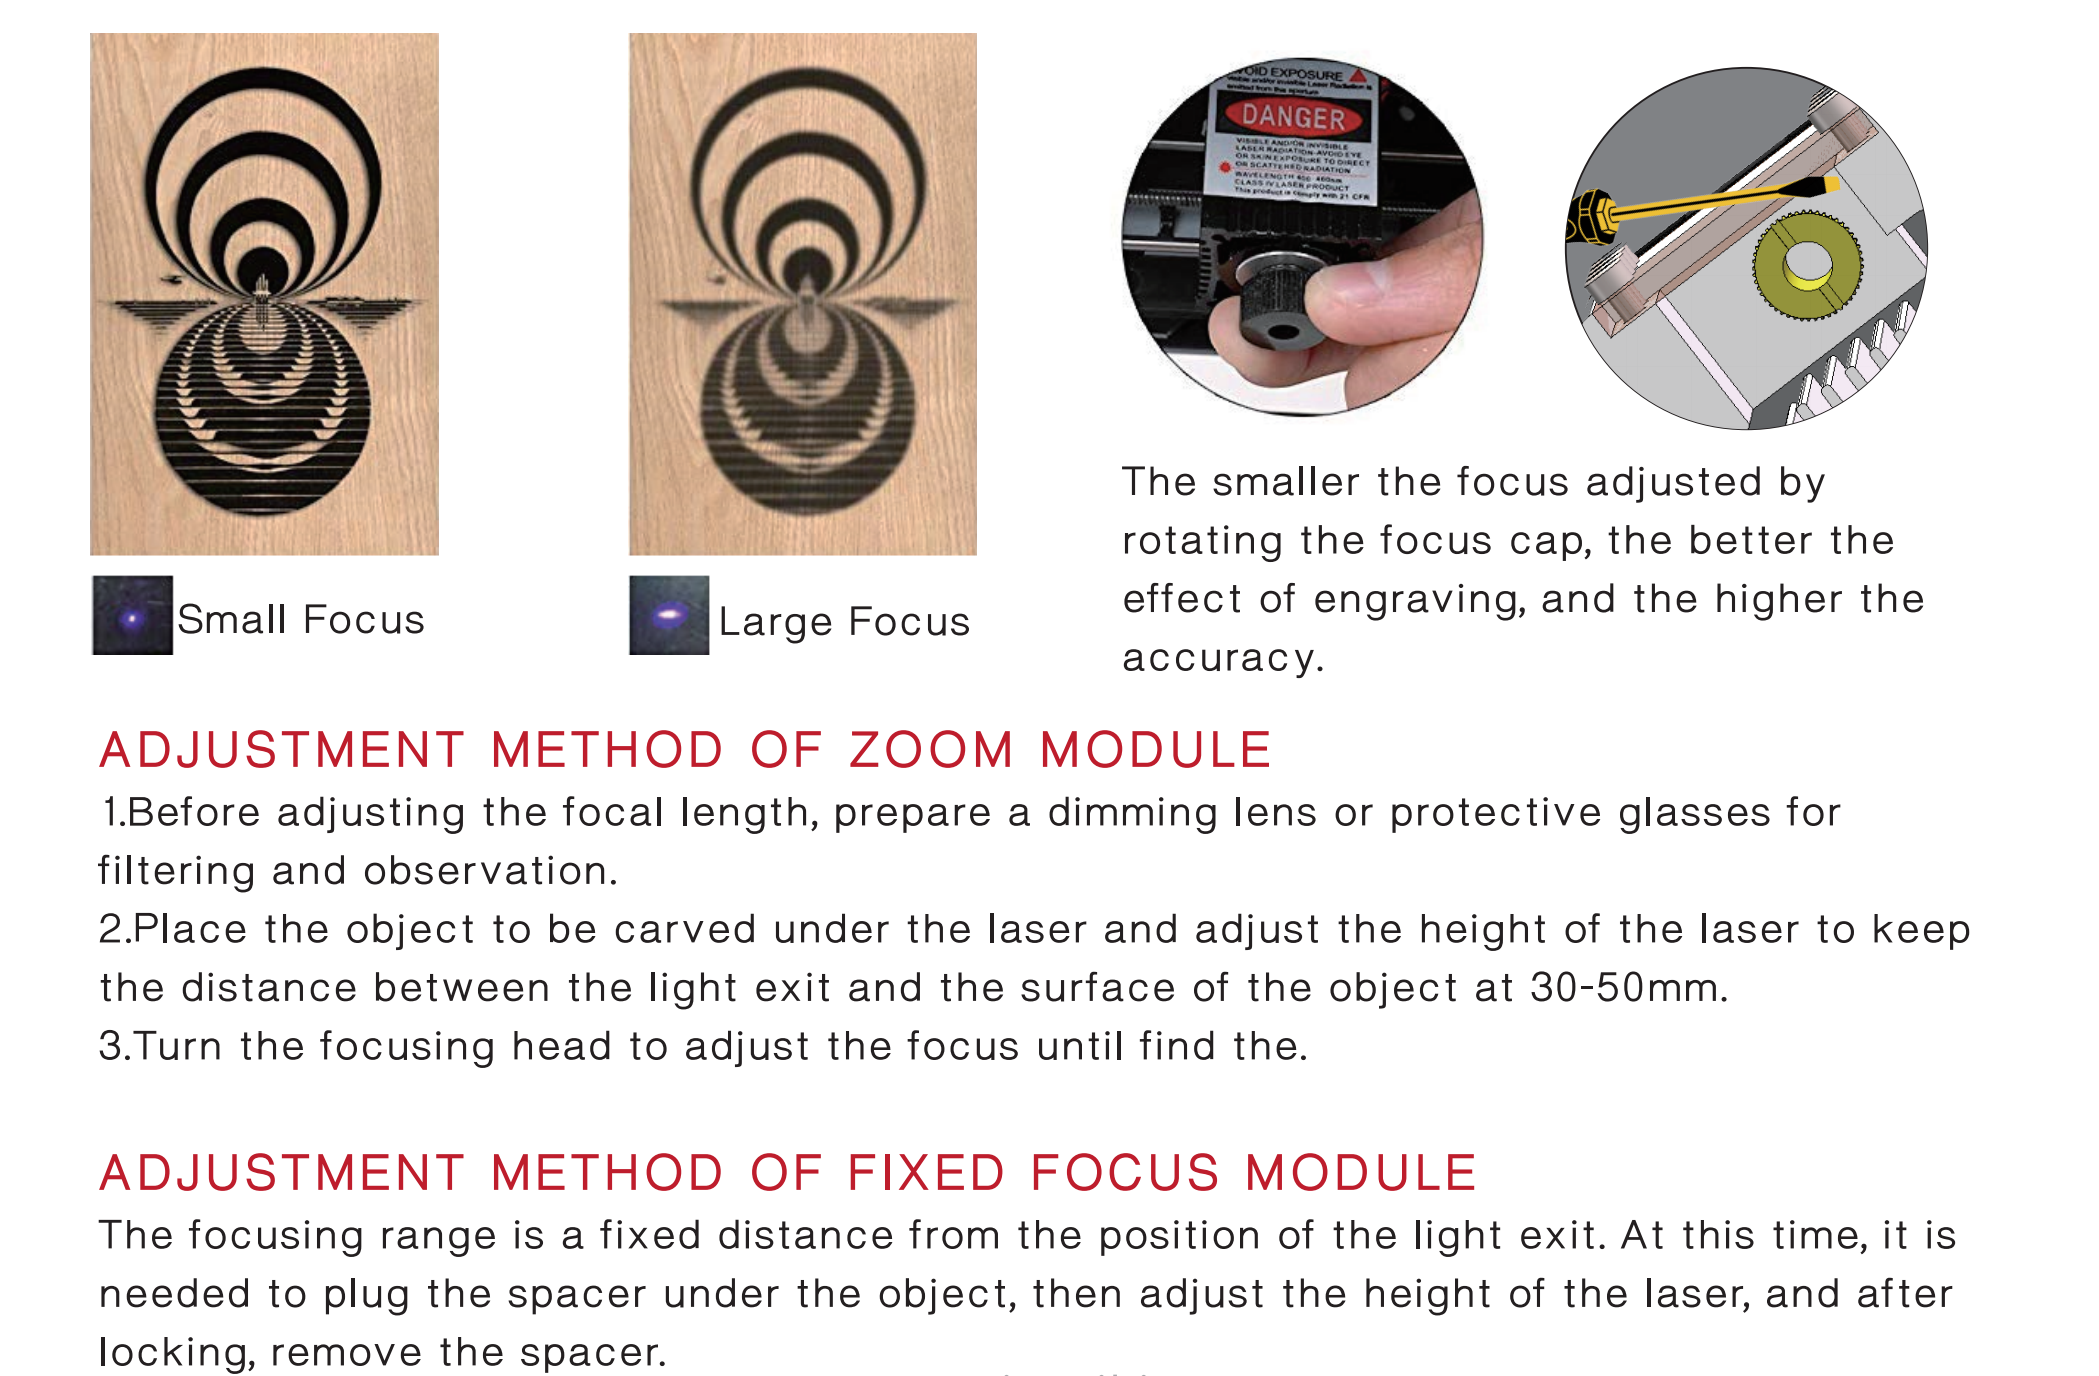
Find the best focus by rotating the lens. If it is a module with a fixed focus, it is enough to find the distance between the module and the object. Usually, we use a certain thickness of material to pad under the module to help find the best position.
Adjust the suitable low light through the software. The NEJE mode can be adjusted in the “Settings” column of the NEJE Win software; the GRBL mode can be adjusted in the “Grbl Configuration” of the laserGRBL software, which has been explained above.
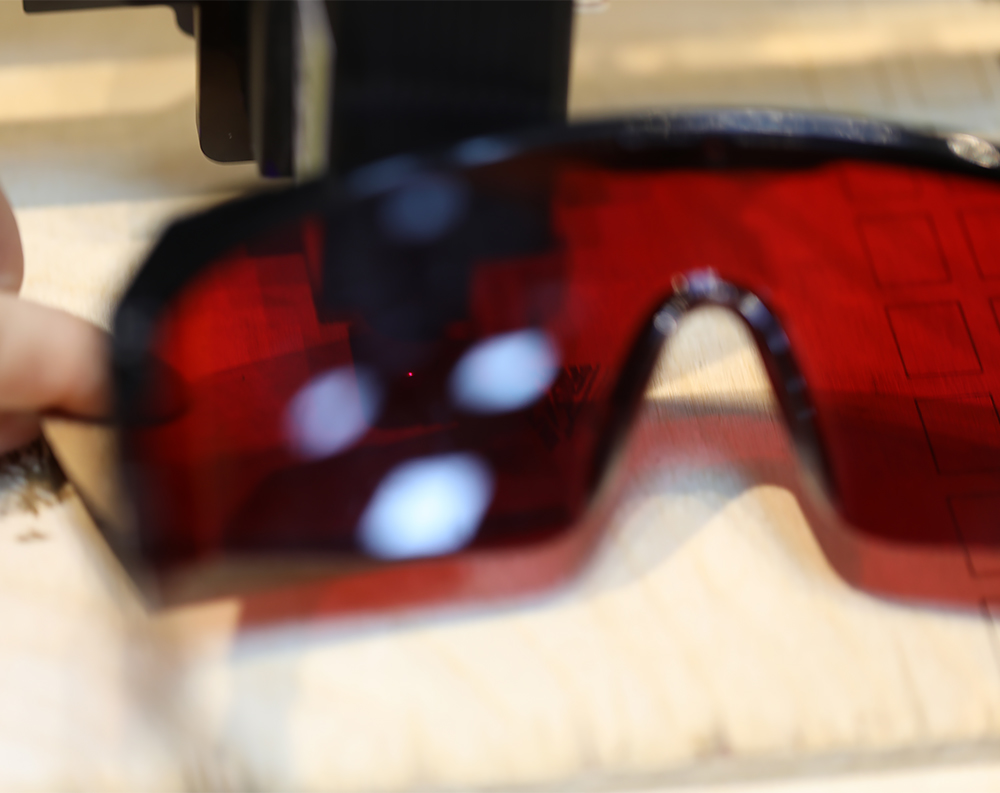
Put a gray cardboard on the surface of the white material (such as plywood) as a focus reference to find the precise focus. A fine focal point can be observed through the protective goggles or the shade of the module.
( Step 6: About air assist )
Notice:
 The air nozzle must be aligned with the cutting port to blow off the carbonized material,
 otherwise it will be ineffective.
 The focus must be located at the lower position of the material surface, otherwise there
 will be a certain degree of inhomogeneity in the X and Y axes.
 This is the optical feature of the optical diode laser, not a quality problem.
When do you need air assist
Air-assisted engraving or cutting can only be used for engraving or cutting that produces more carbonized substances. Generally, the depth of engraving is less than 1mm, and the cutting of plywood less than 2mm does not require air assist. A small fan can be used to blow off the smoke generated by the engraving. Air assist is not recommended when engraving images, and adding air assist at this time will destroy image details.
What kind of air pump is suitable for cutting
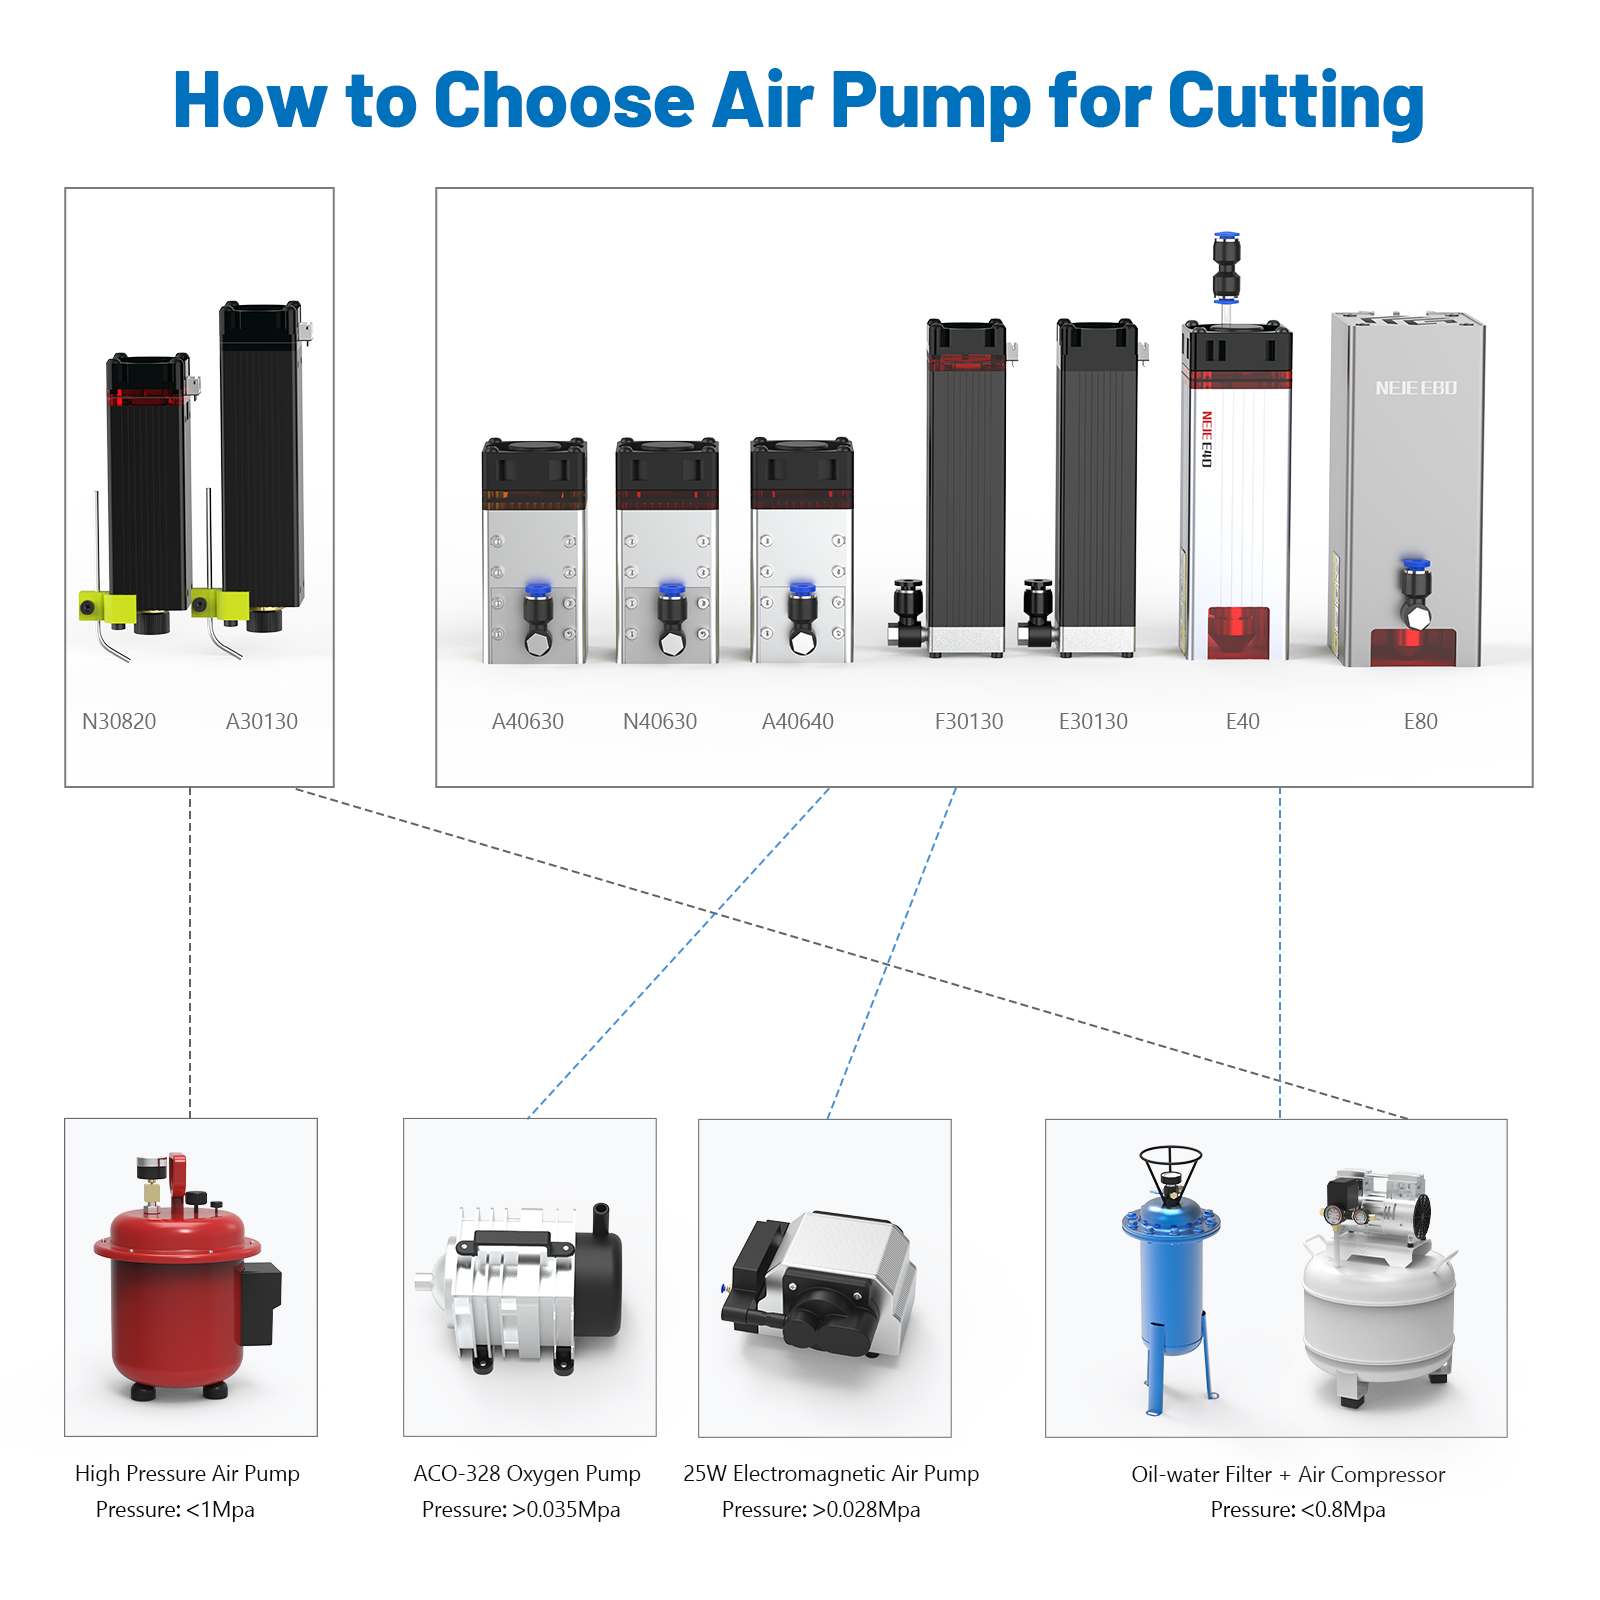
The main meaning of air assist is to blow off the carbonized material produced by cutting, and the general oxygener and electromagnetic inflator have almost no meaning. only the pressure of the oil pump and air compressor (0.4-1.5mPa) has the effect of blowing away the carbonized material. but it should be noted that the air of the oil pump contains oil and cannot be directly used for the air-assisted module of the closed cavity, otherwise the oil will contaminate the lens, resulting in power drop or damage to the lens. The air pressure of the air compressor can be used for a short time with the closed cavity, but When used for a long time, the water-containing gas will contaminate the lens, cause the power to drop, and even damage the lens.
Download STL Files for NEJE laser module
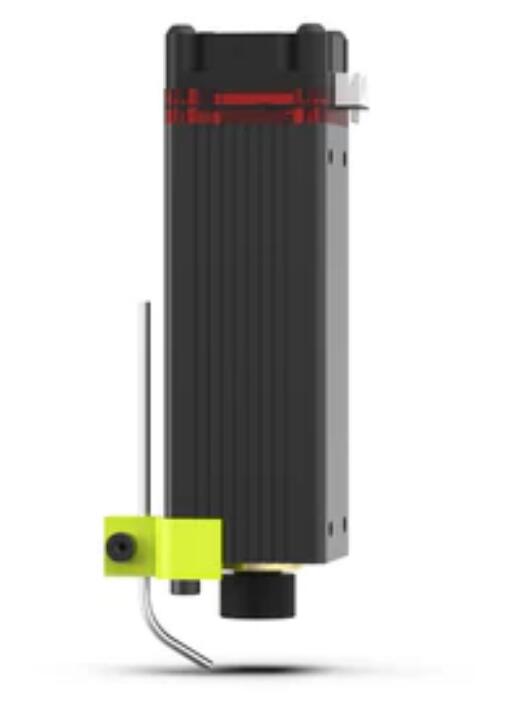
Solution with Universal Air Assist Kit
Can be used with oil pump or air machine (can contain a small amount of water and oil)
STL and Gcode File Download:
This solution is not very robust, it is possible to print stronger 3D printed components and add glue to stabilize the structure.
Notice
Please make sure that the air outlet is aligned with the focus point;
Cutting MDF board requires 0.6-1.5mPa air pressure to efficiently clean the carbonized material. The MDF board needs high-pressure gas to assist in cutting. The ordinary oxygener cannot provide high-pressure gas.
Step 7: Start Creating
Please set according to the material reference parameters, the actual effect will have errors, different material density, focusing accuracy, air-assisted air pressure strength and accuracy, whether the material is placed flat or not will affect the engraving or cutting effect;
Start with NEJE Win Software
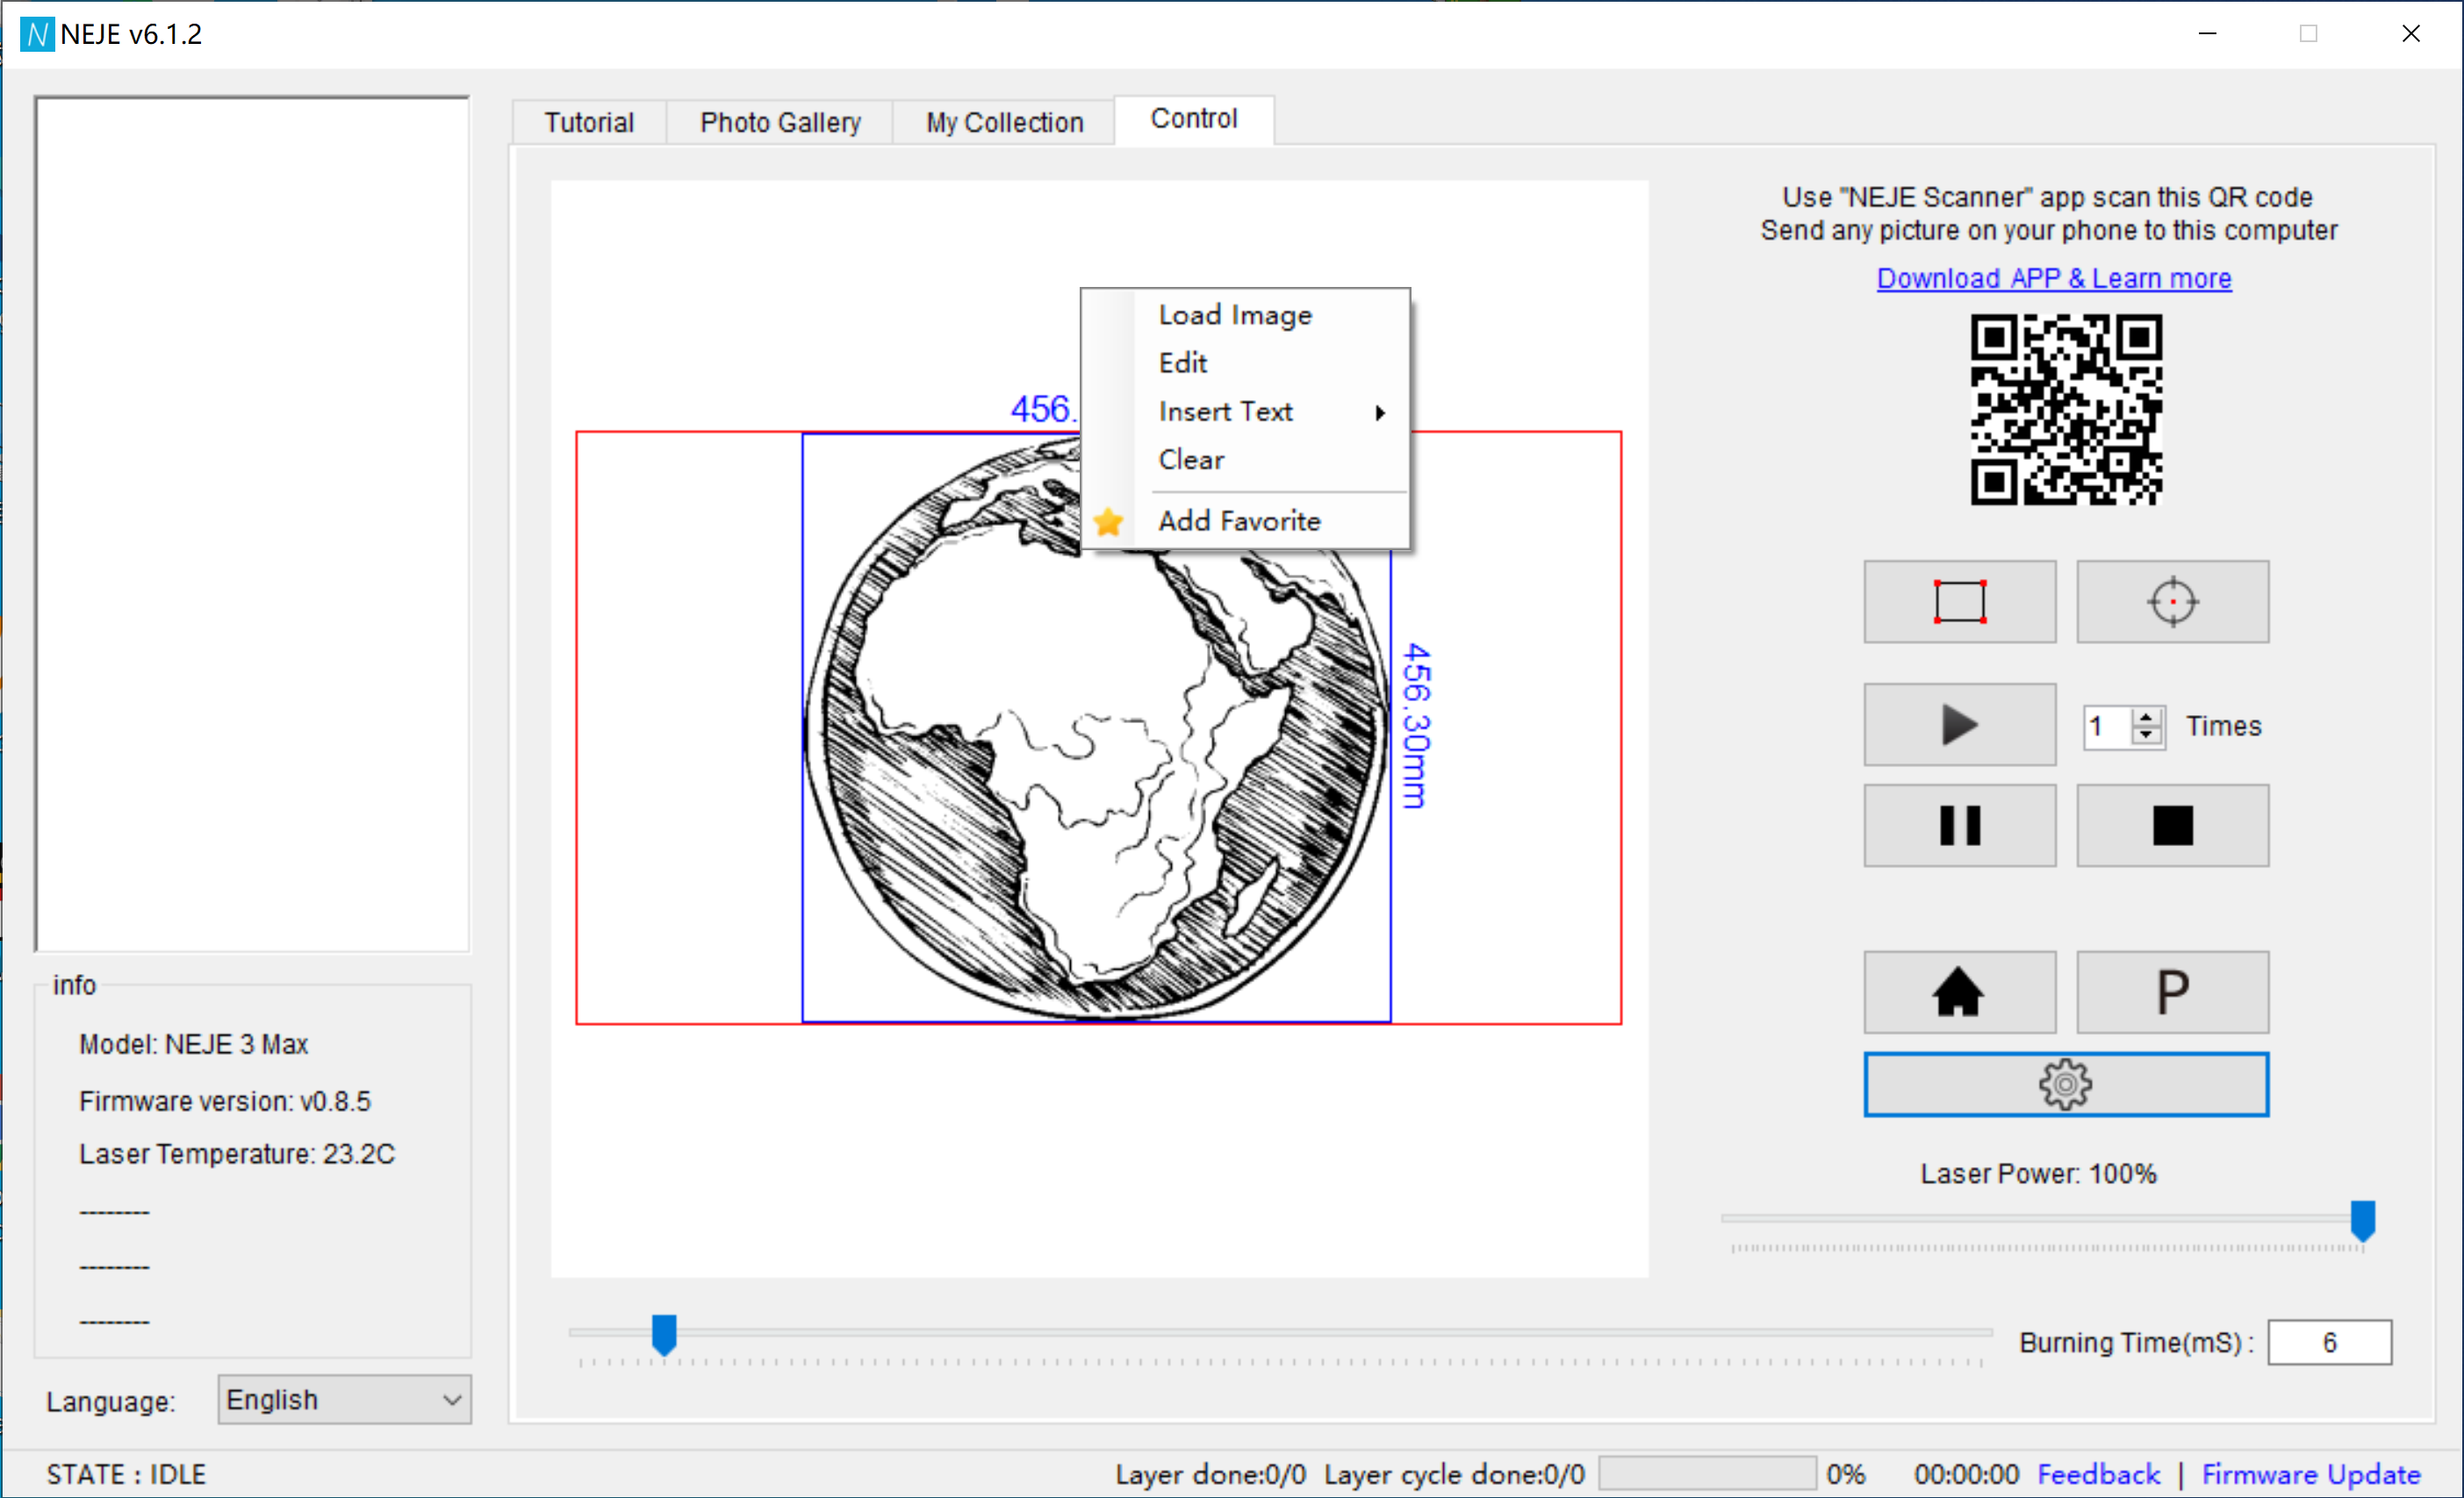
NEJE V6.1.2:
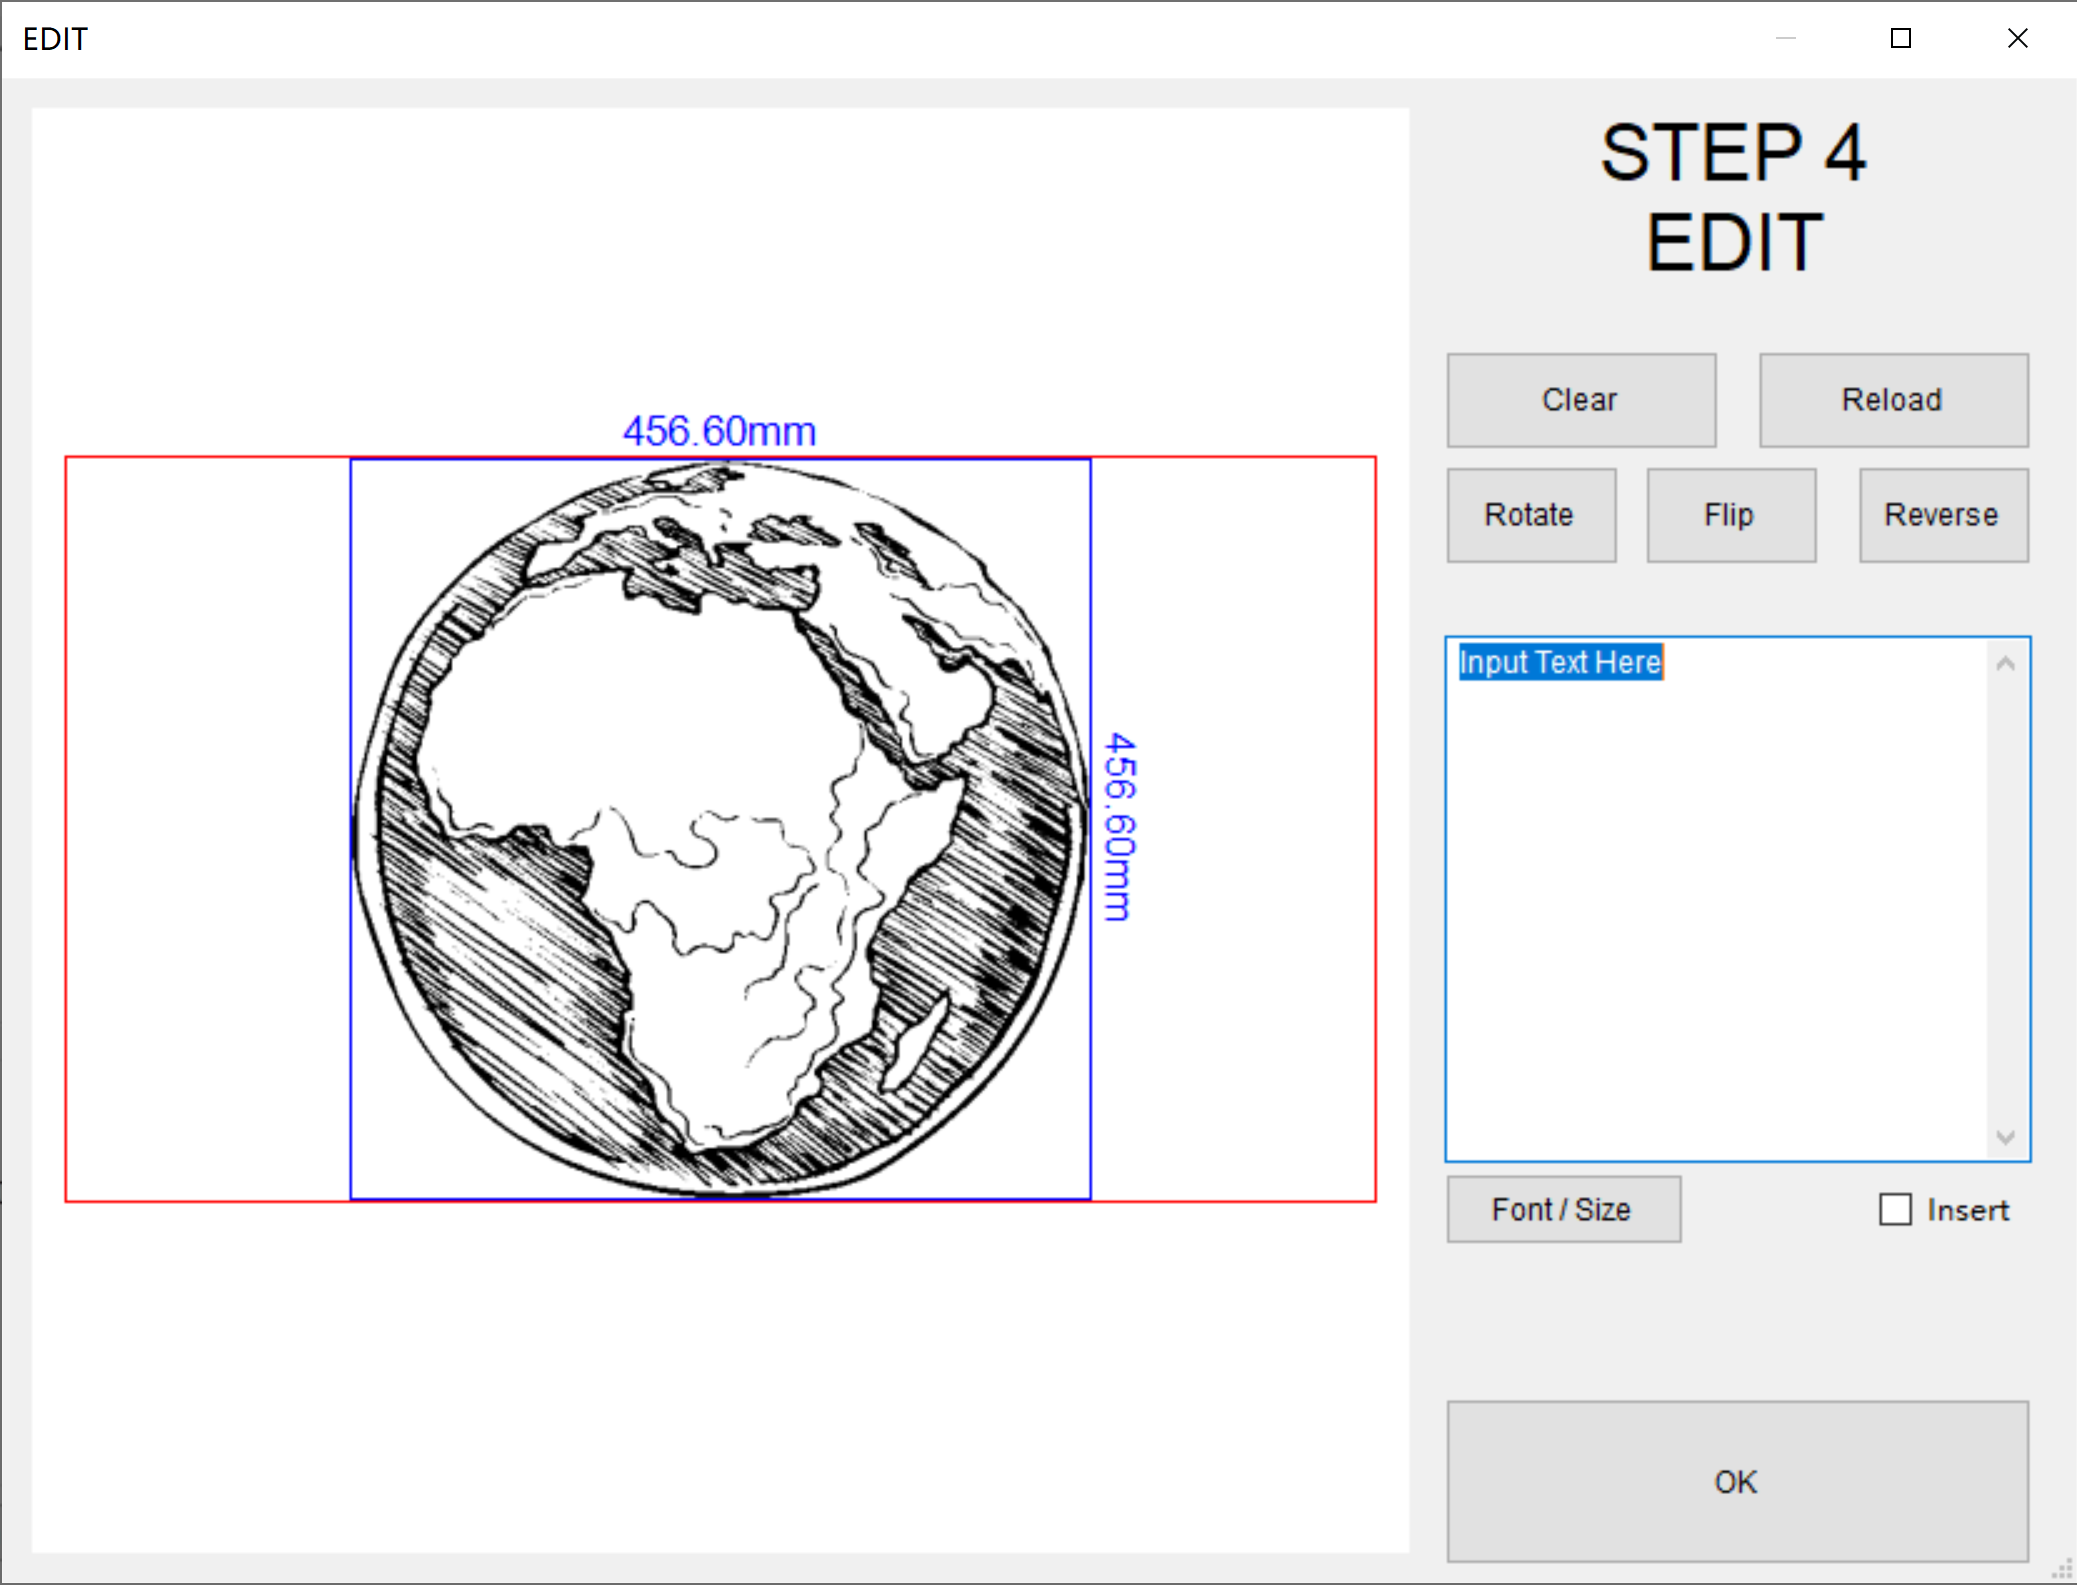
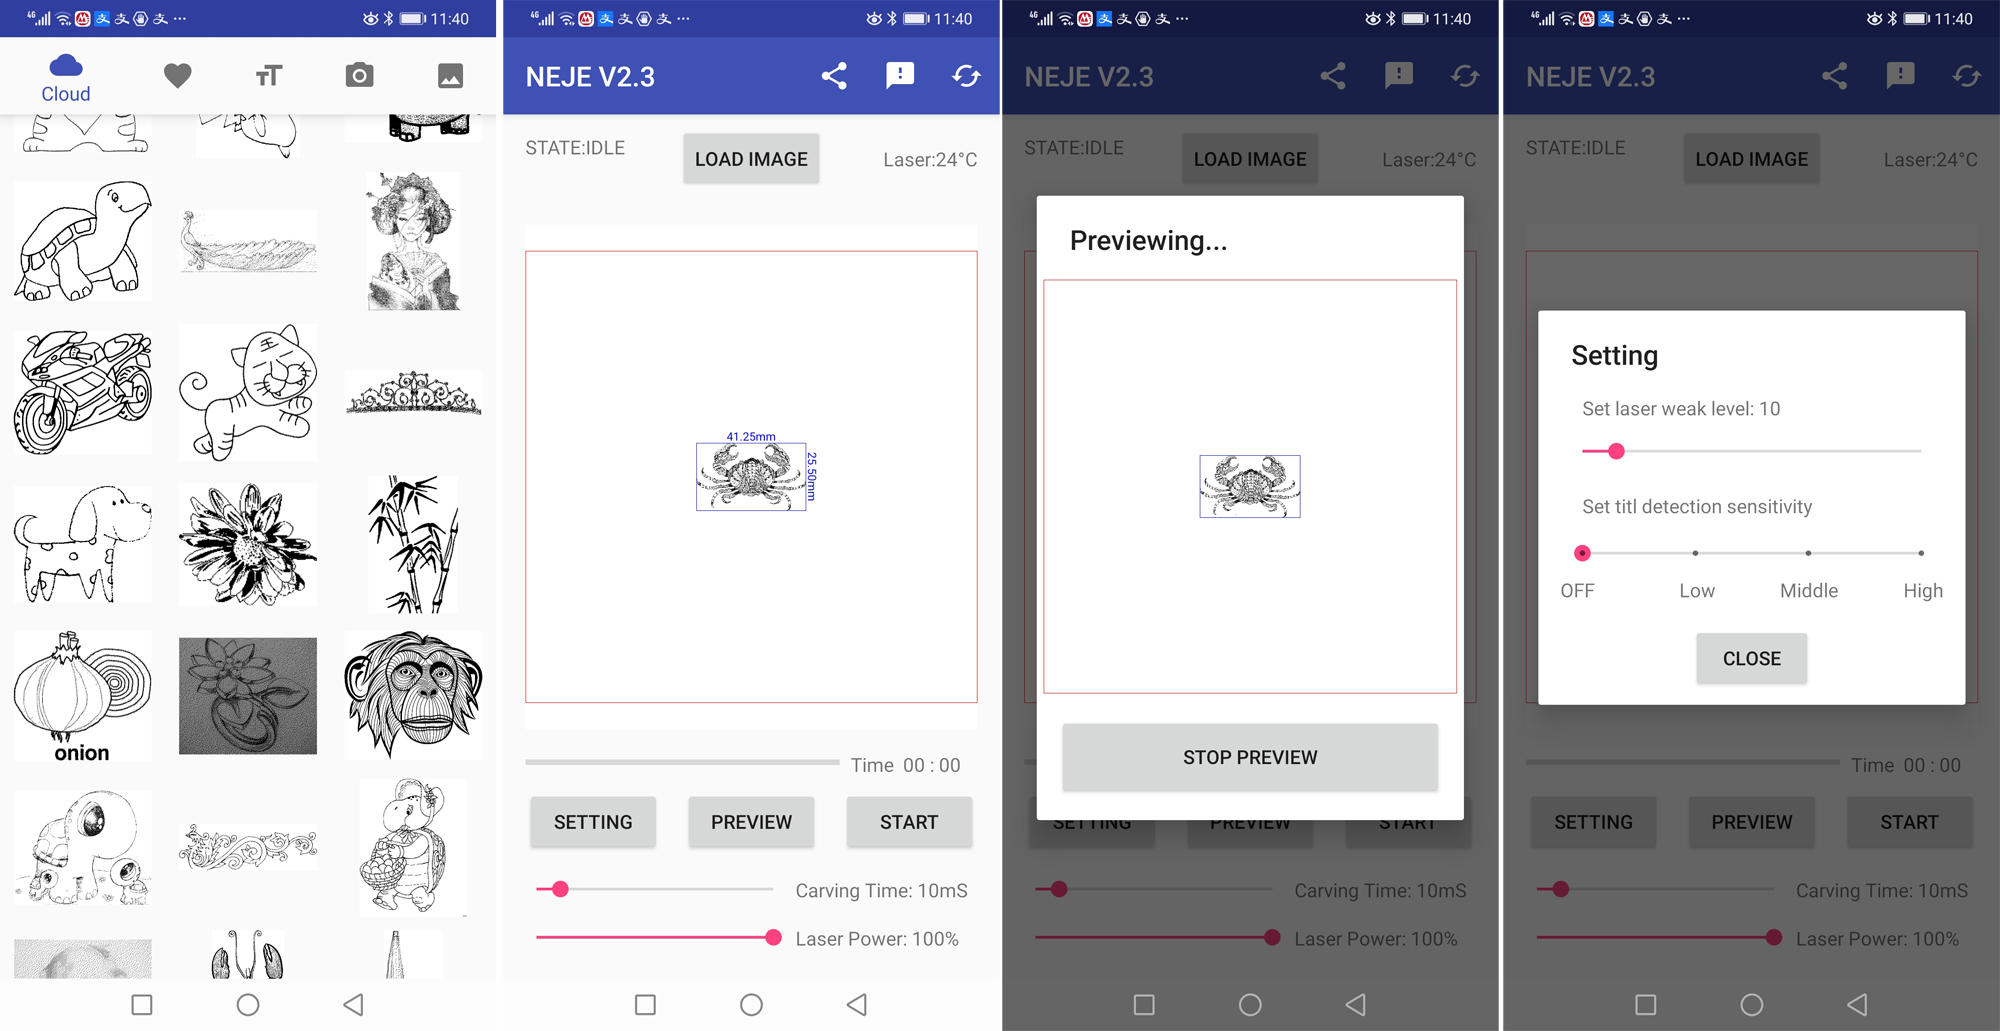
Choose an image (.bmp .jpg) from: Photo Gallery, My Collection, Load Image from My Computer, Insert Text, “NEJE Scanner”APP:
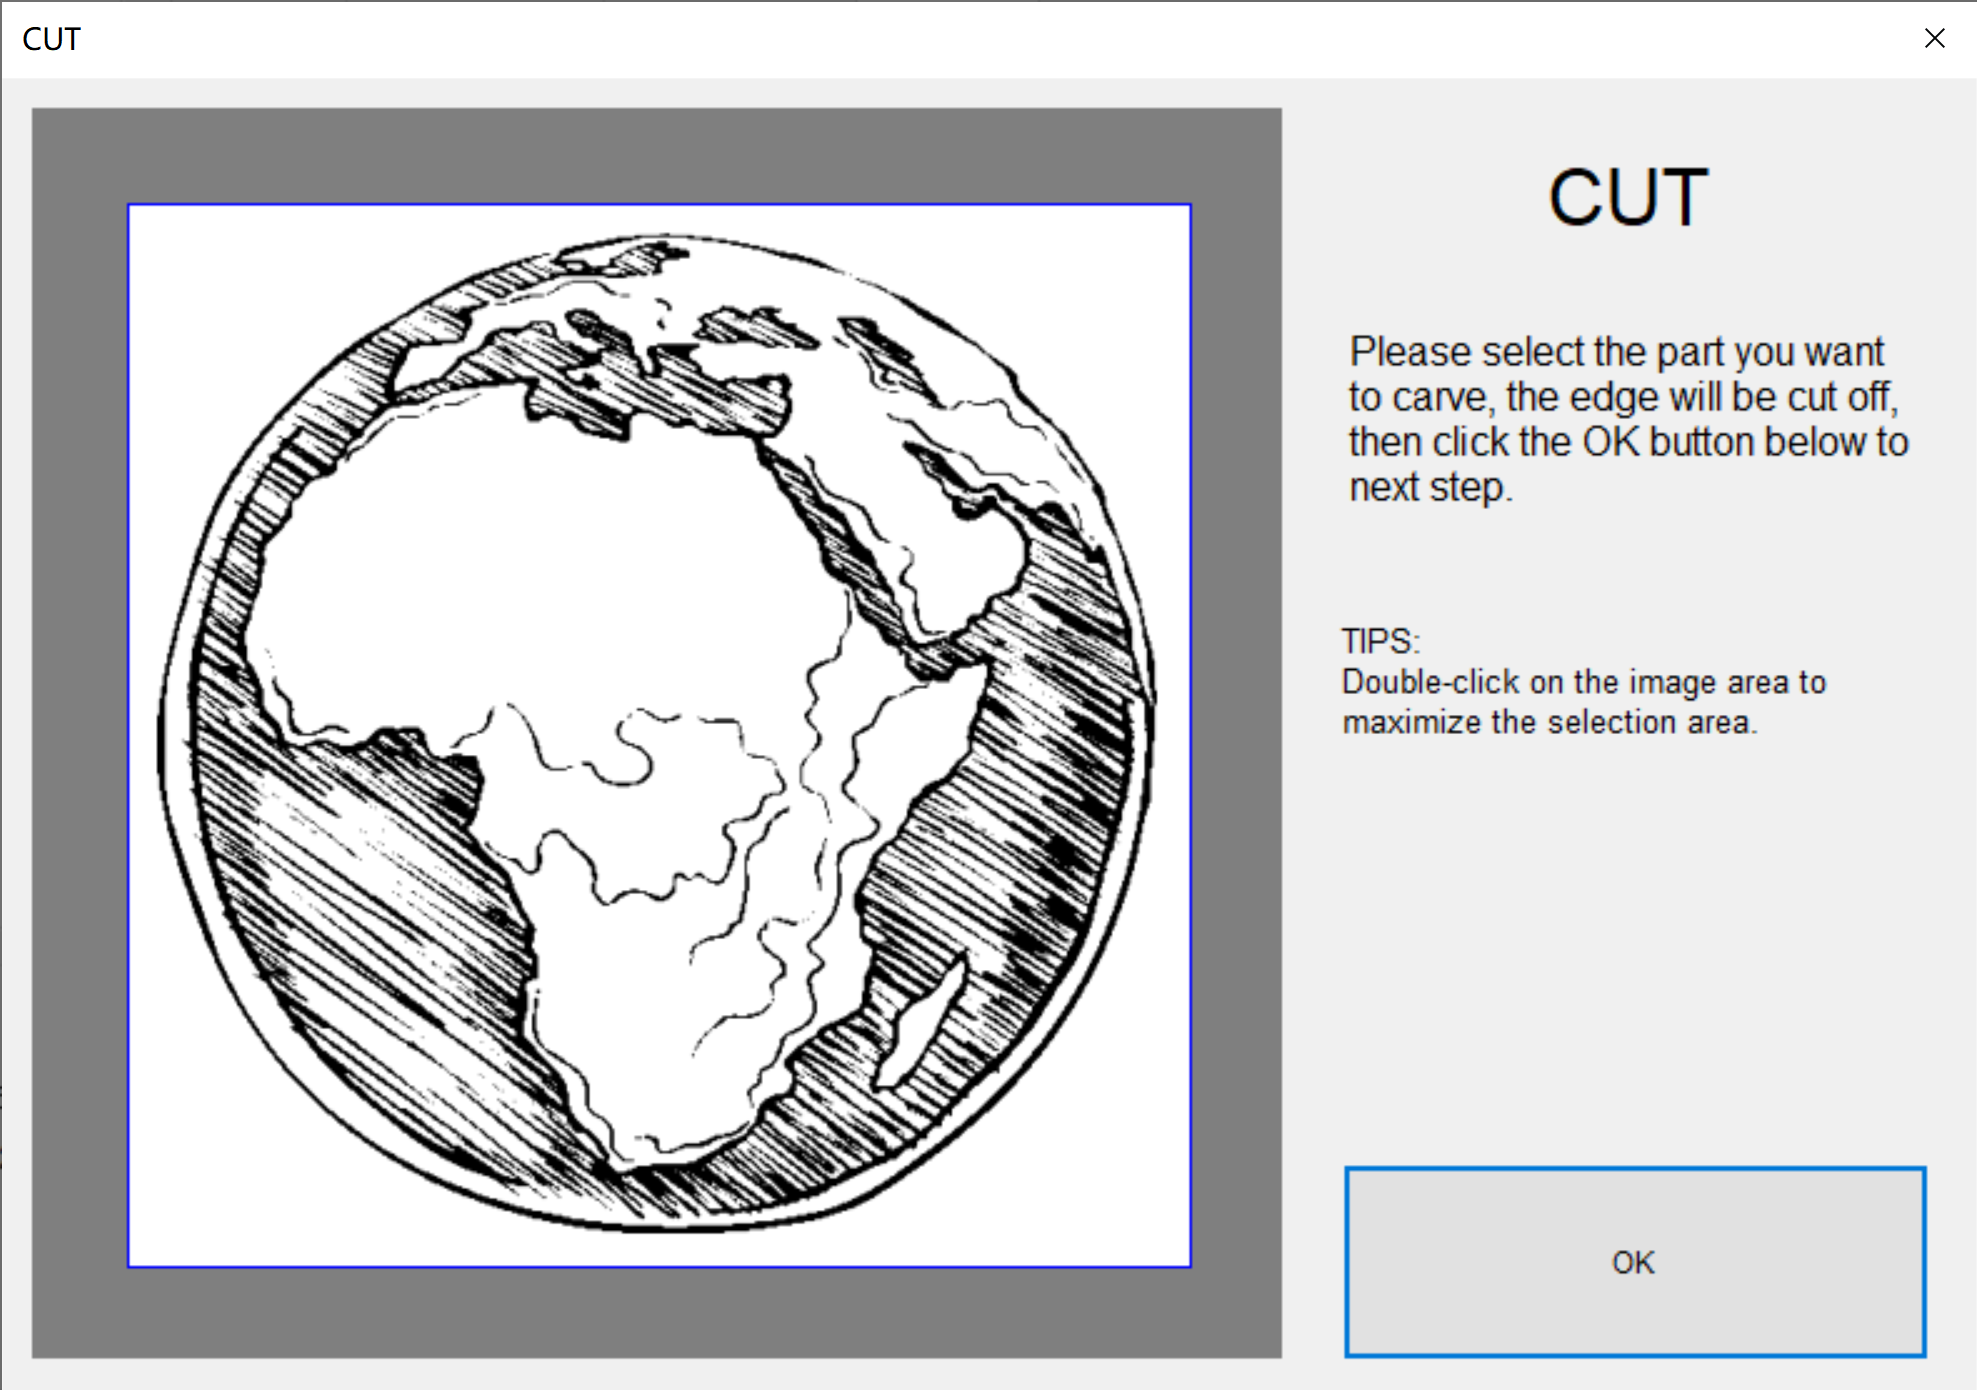
Cut the range that needs to be engraved:
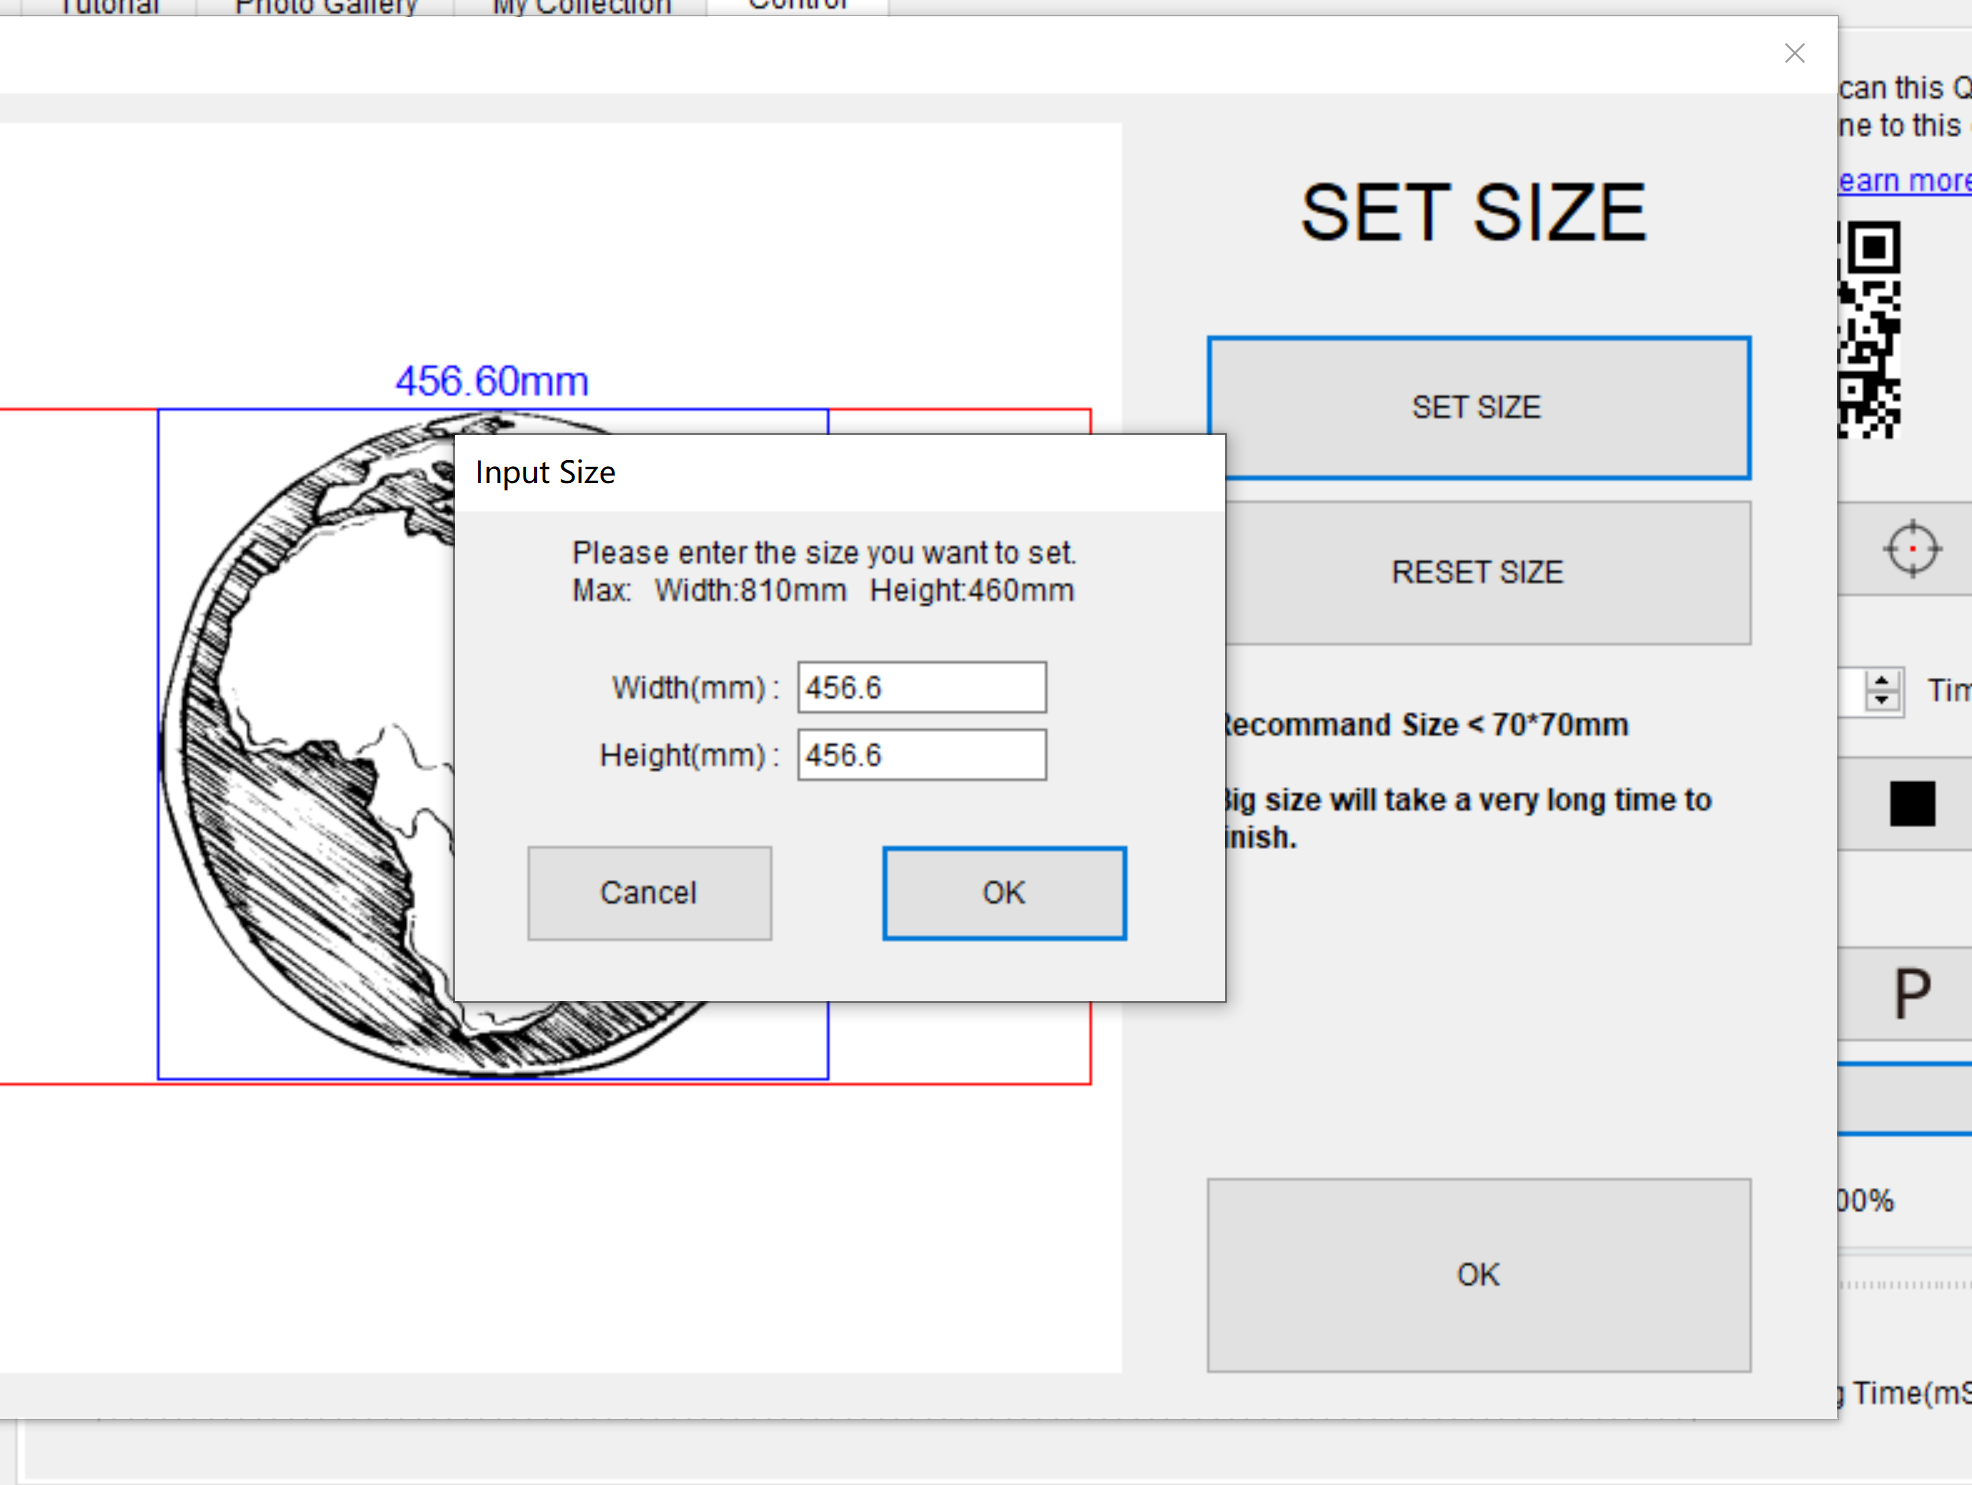
Set image size:
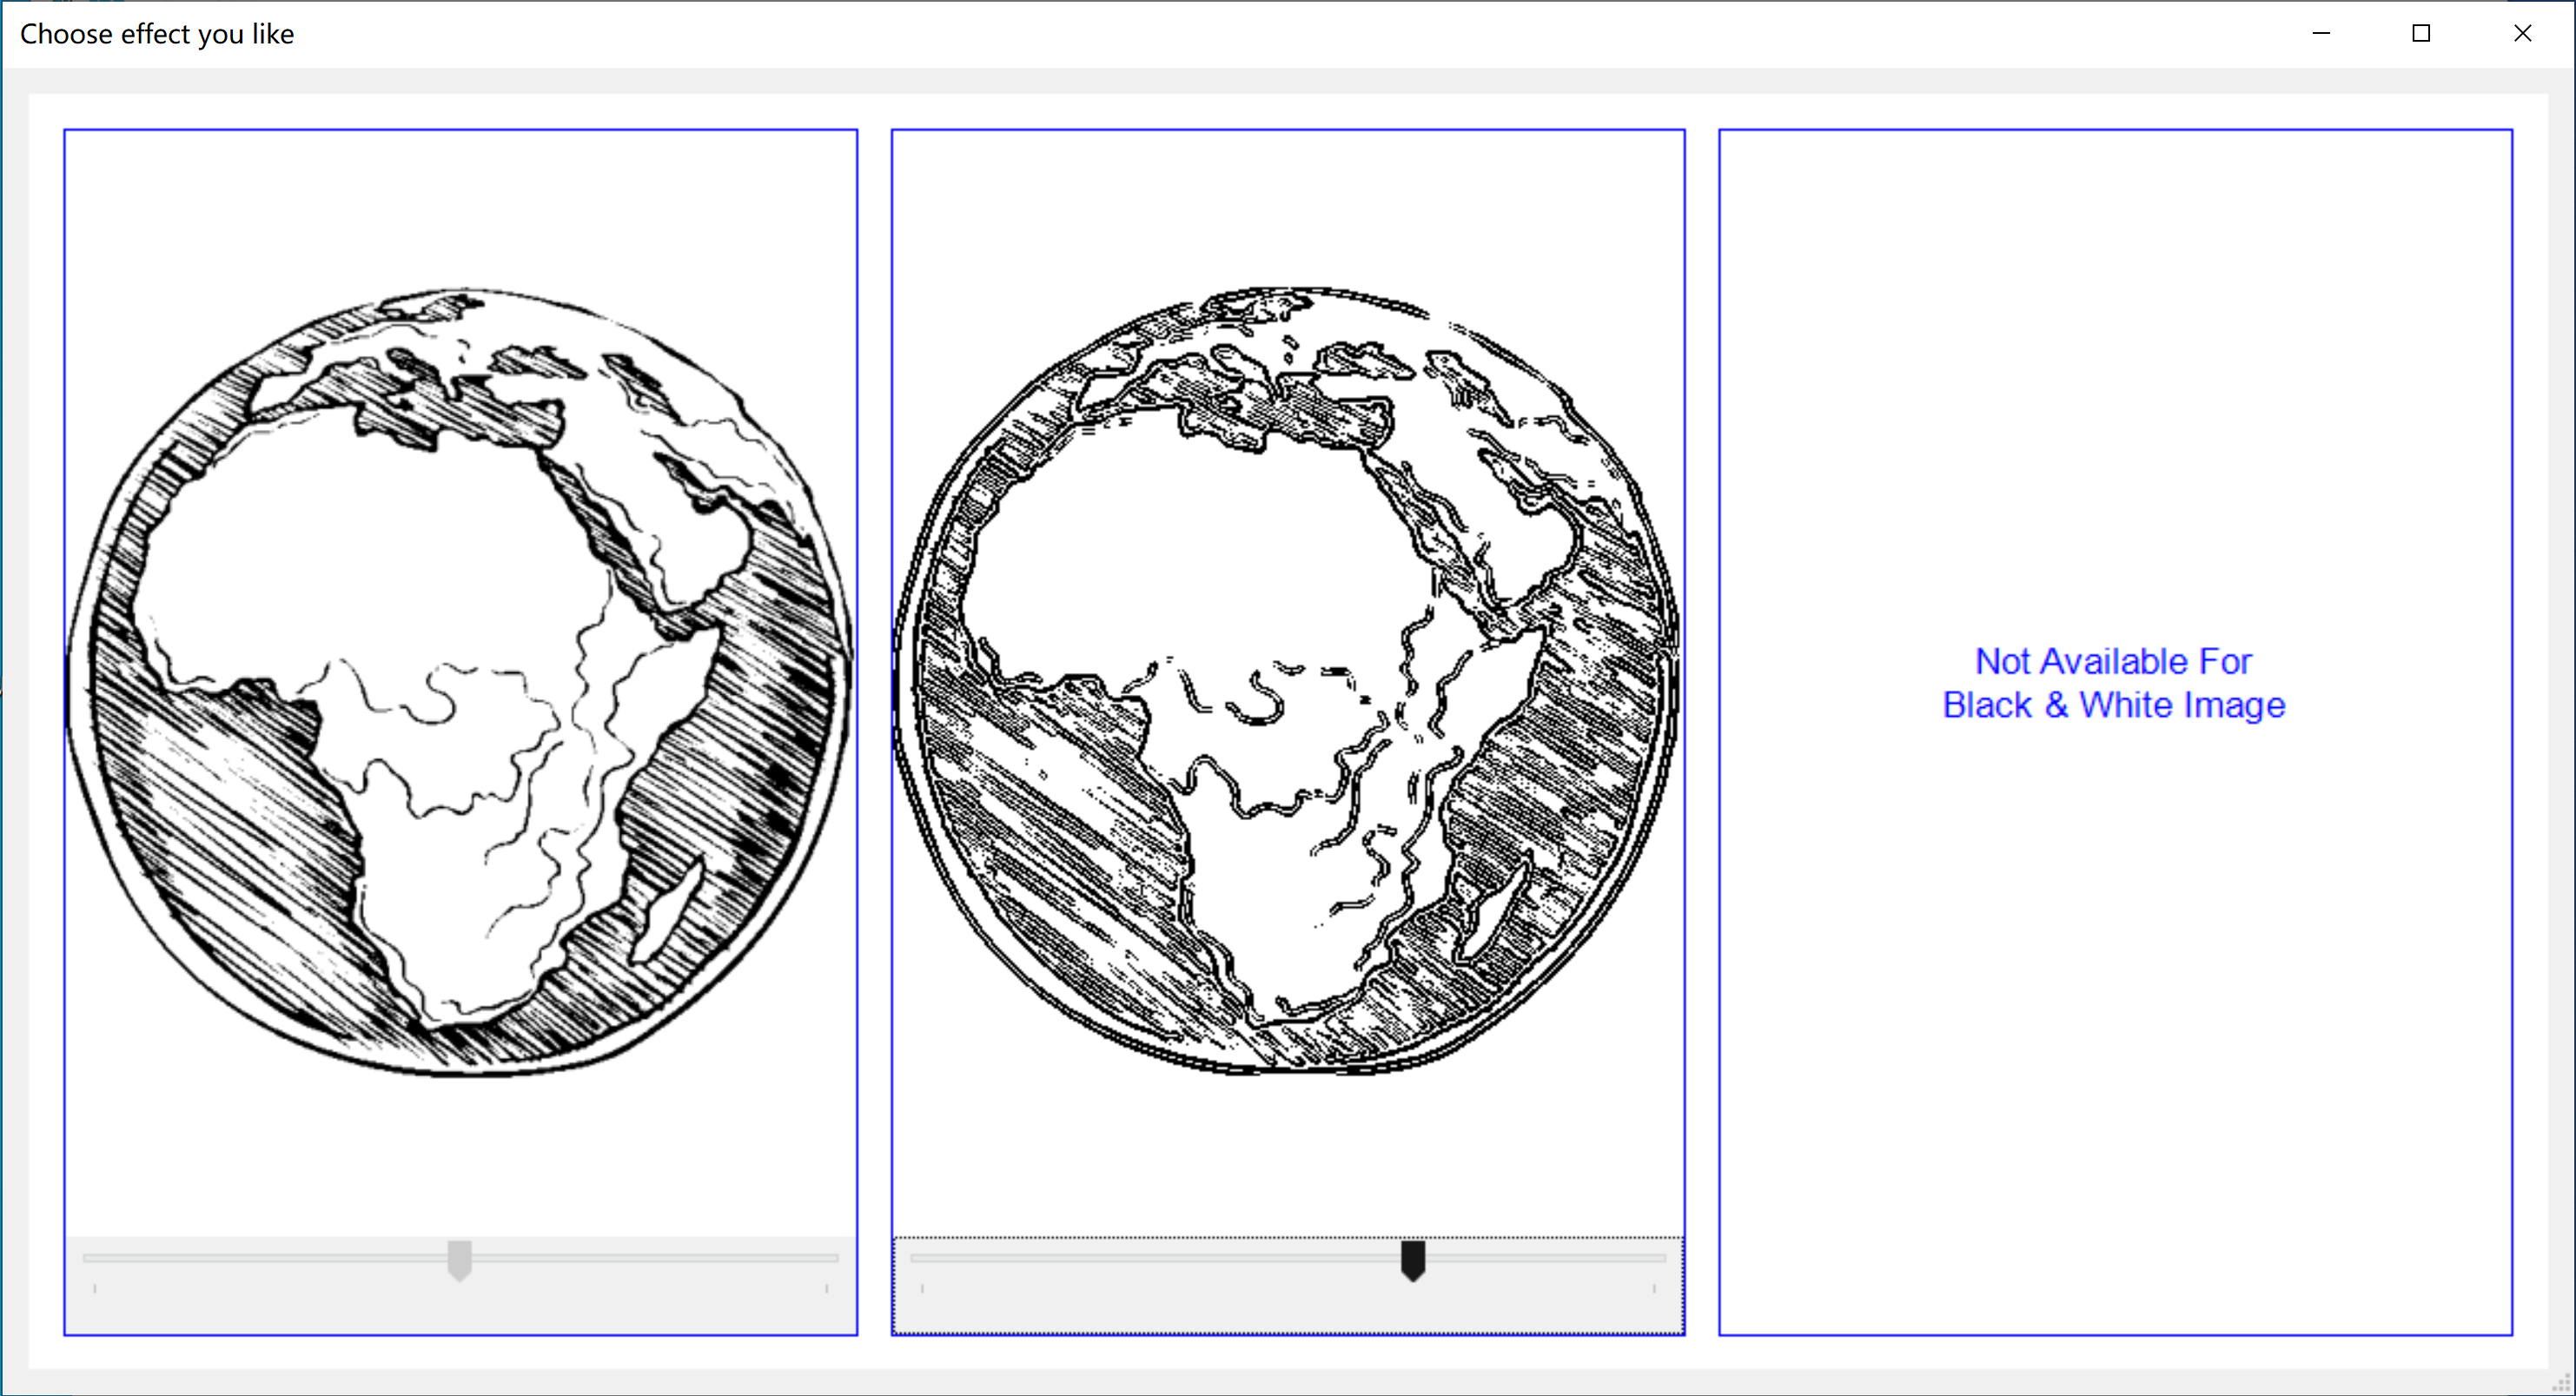
To adjust the rendering, or not to:
Special effects processing:
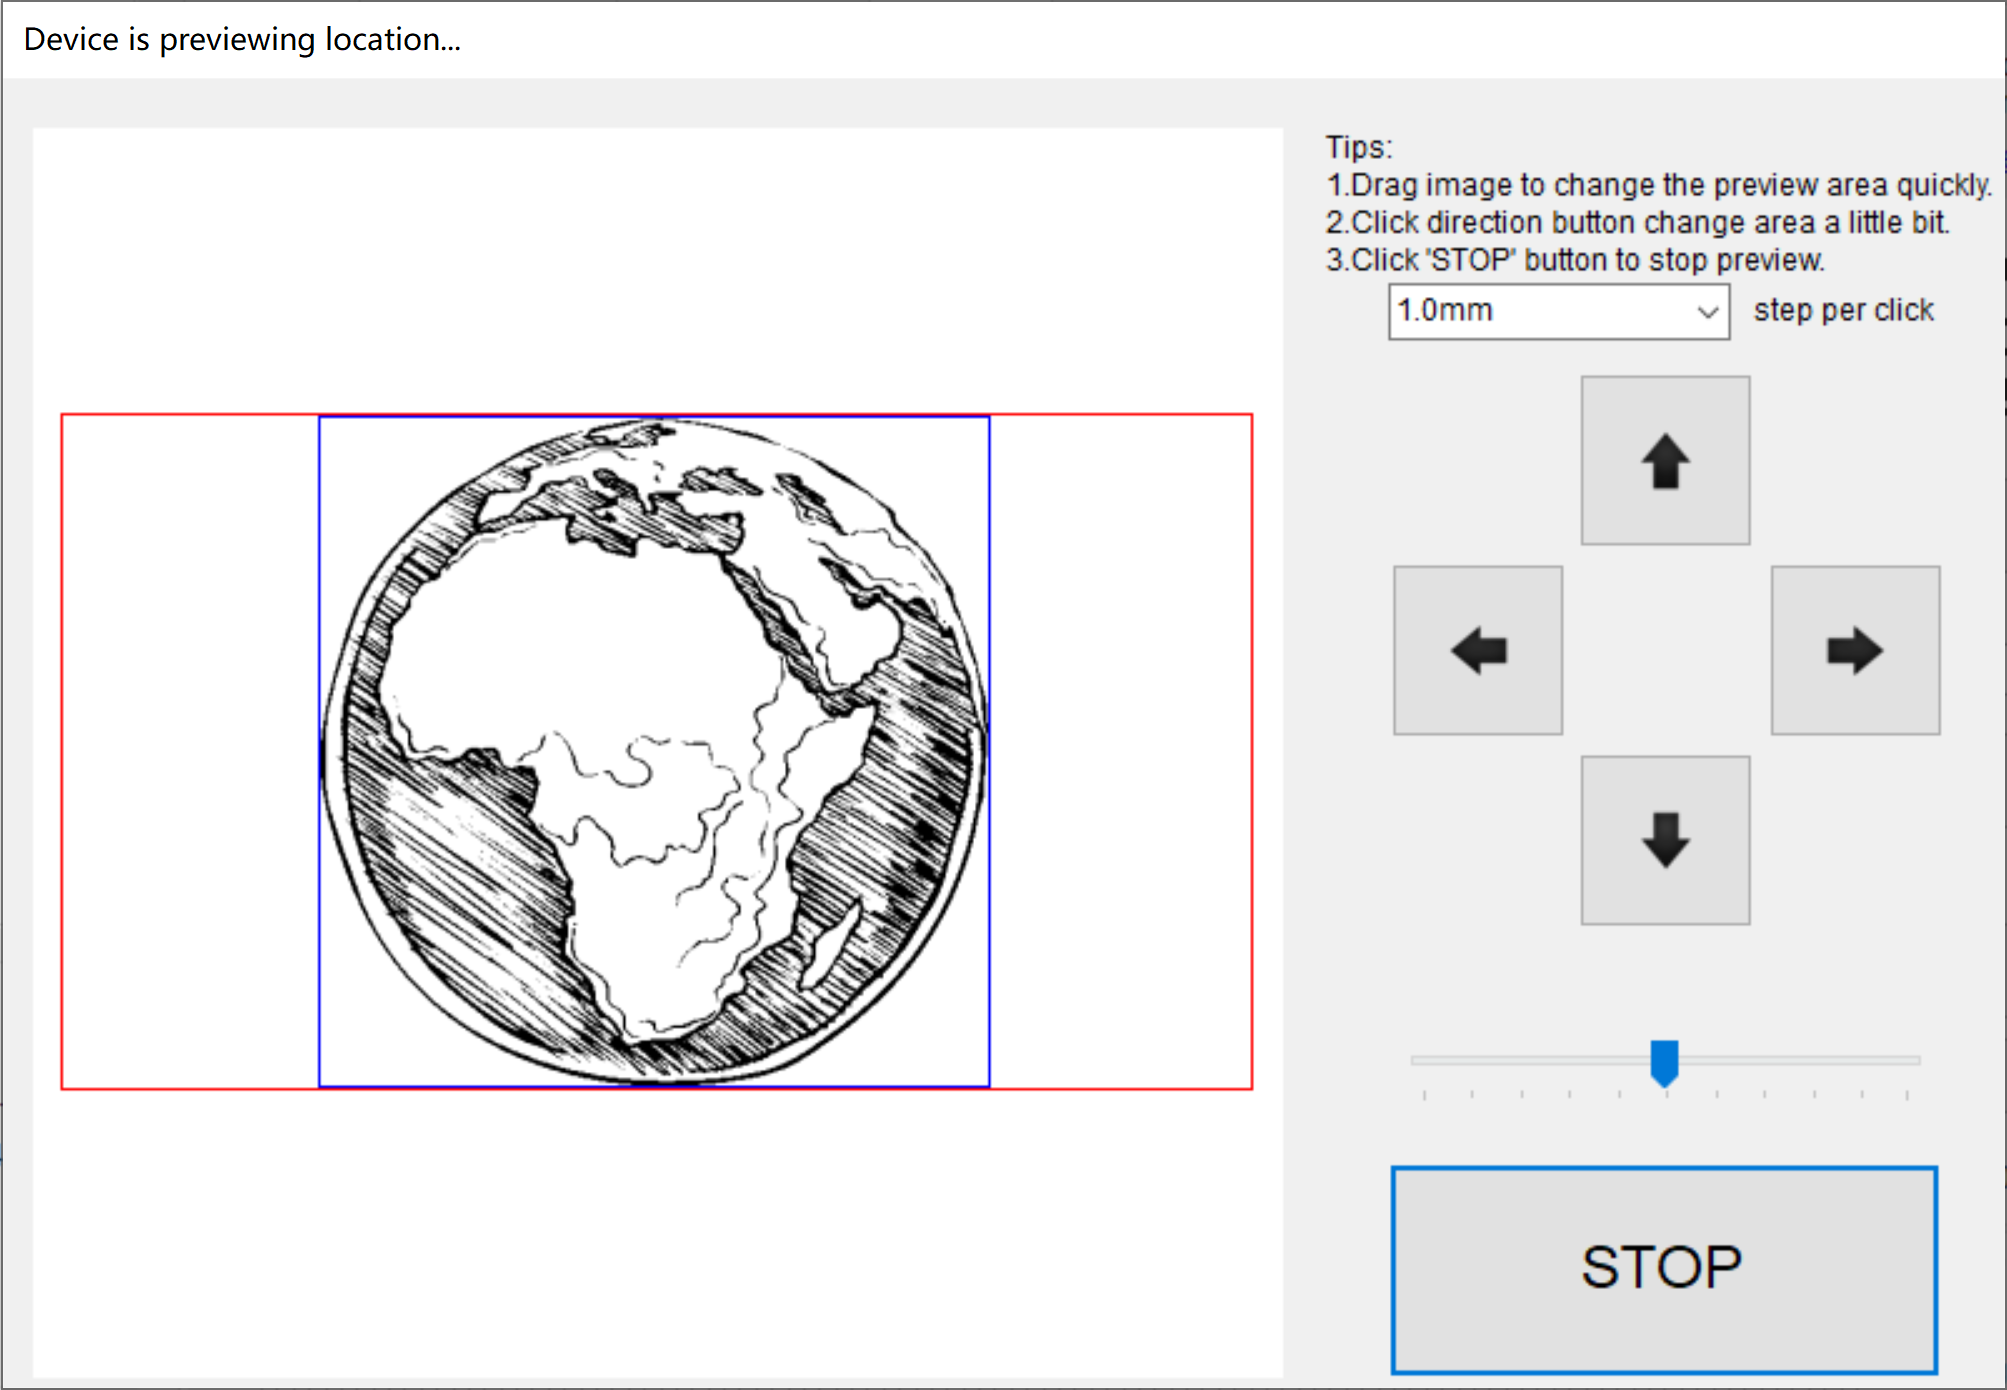
Box positioning:
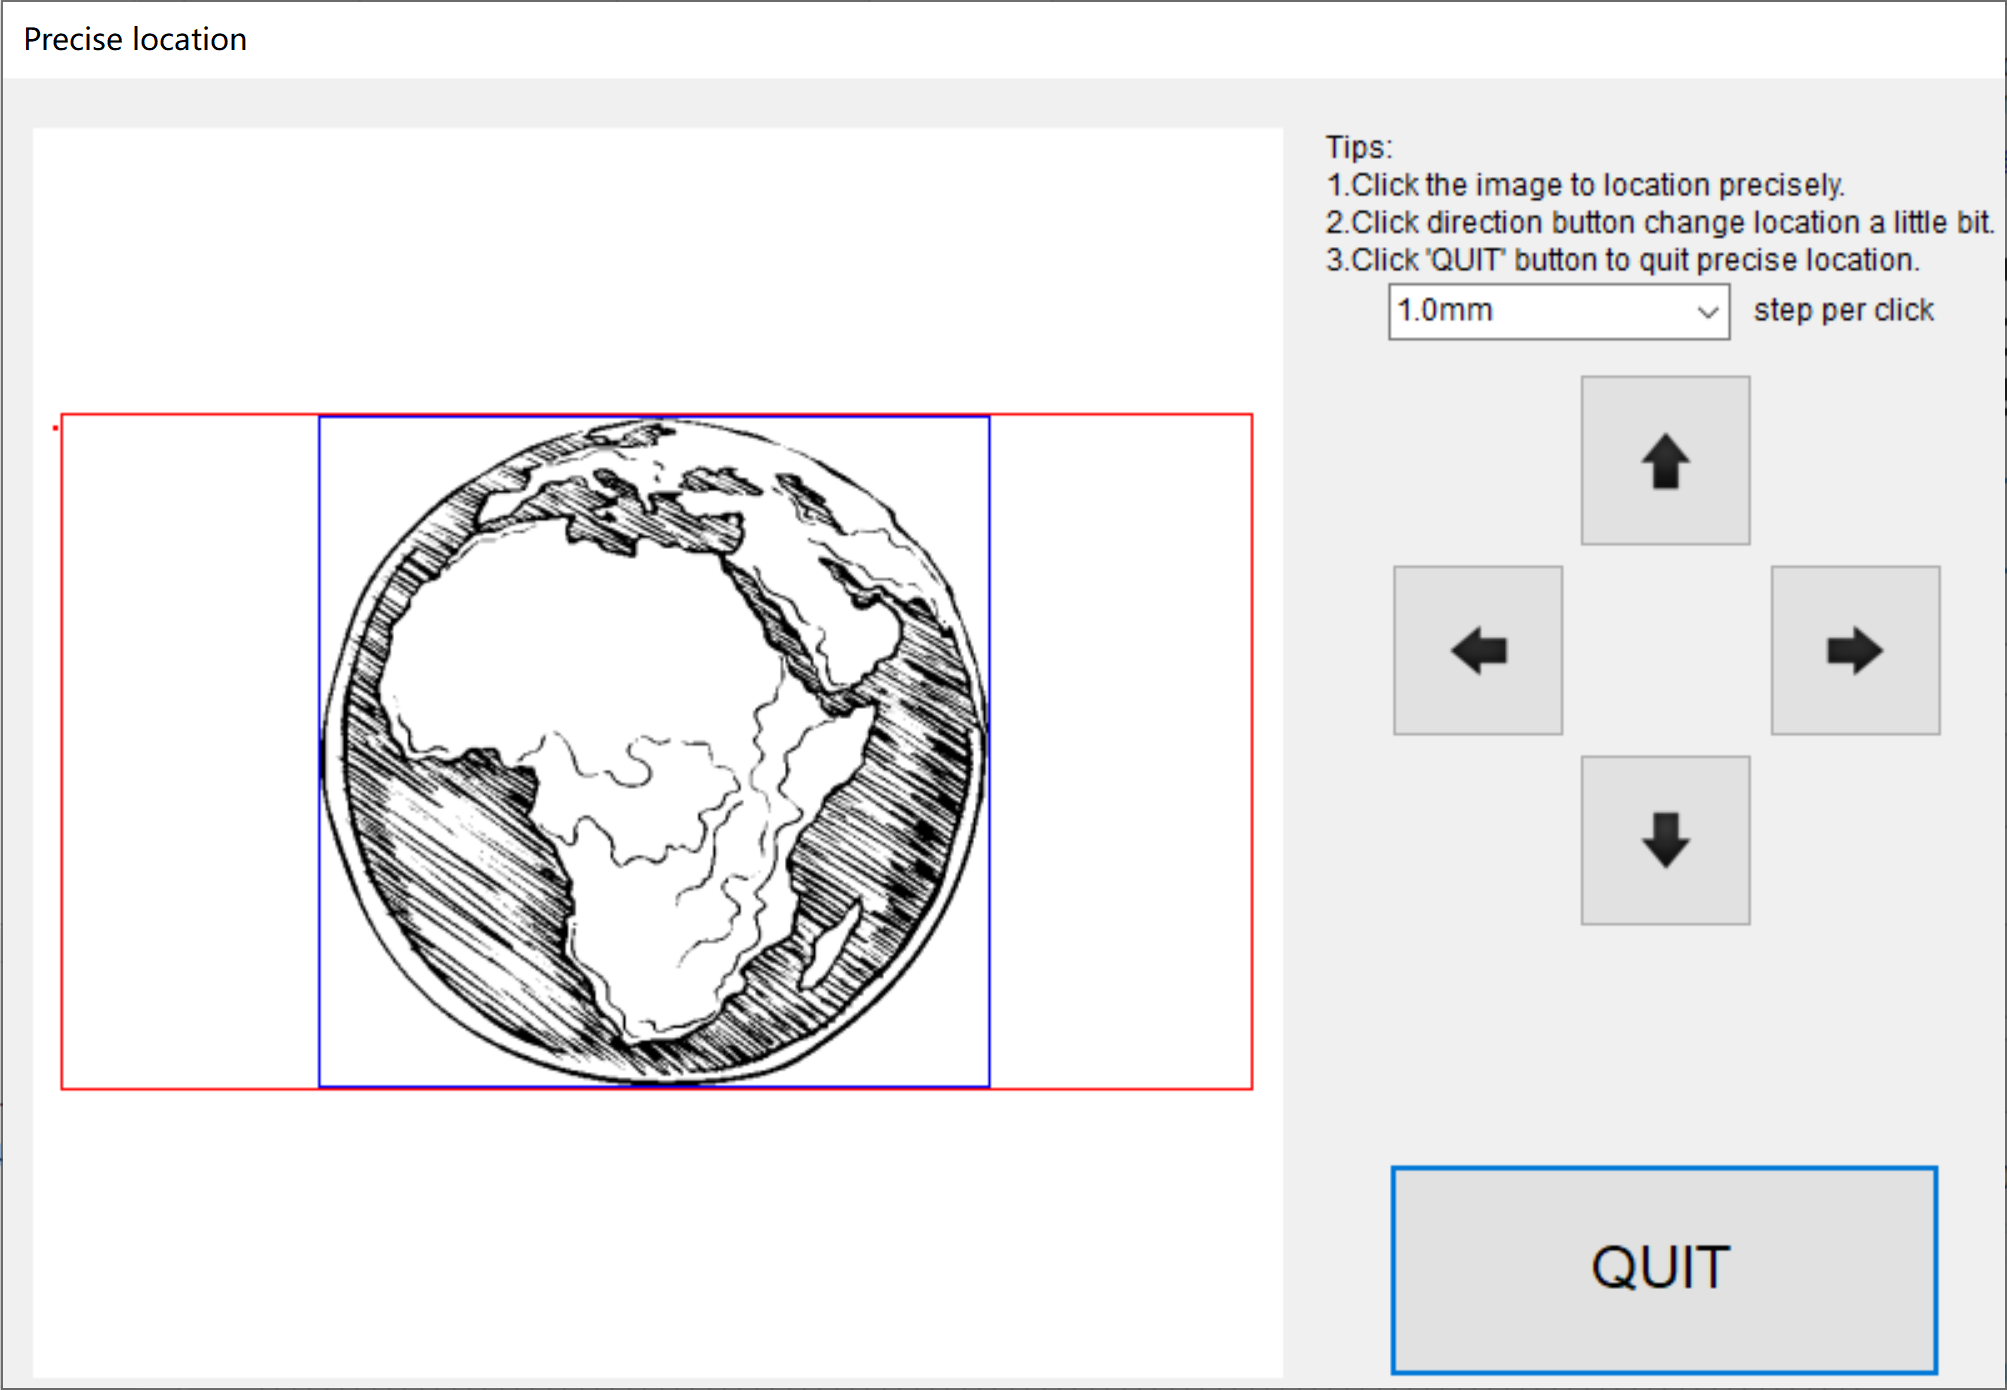
Point positioning, precise control at 0.075mm accuracy:
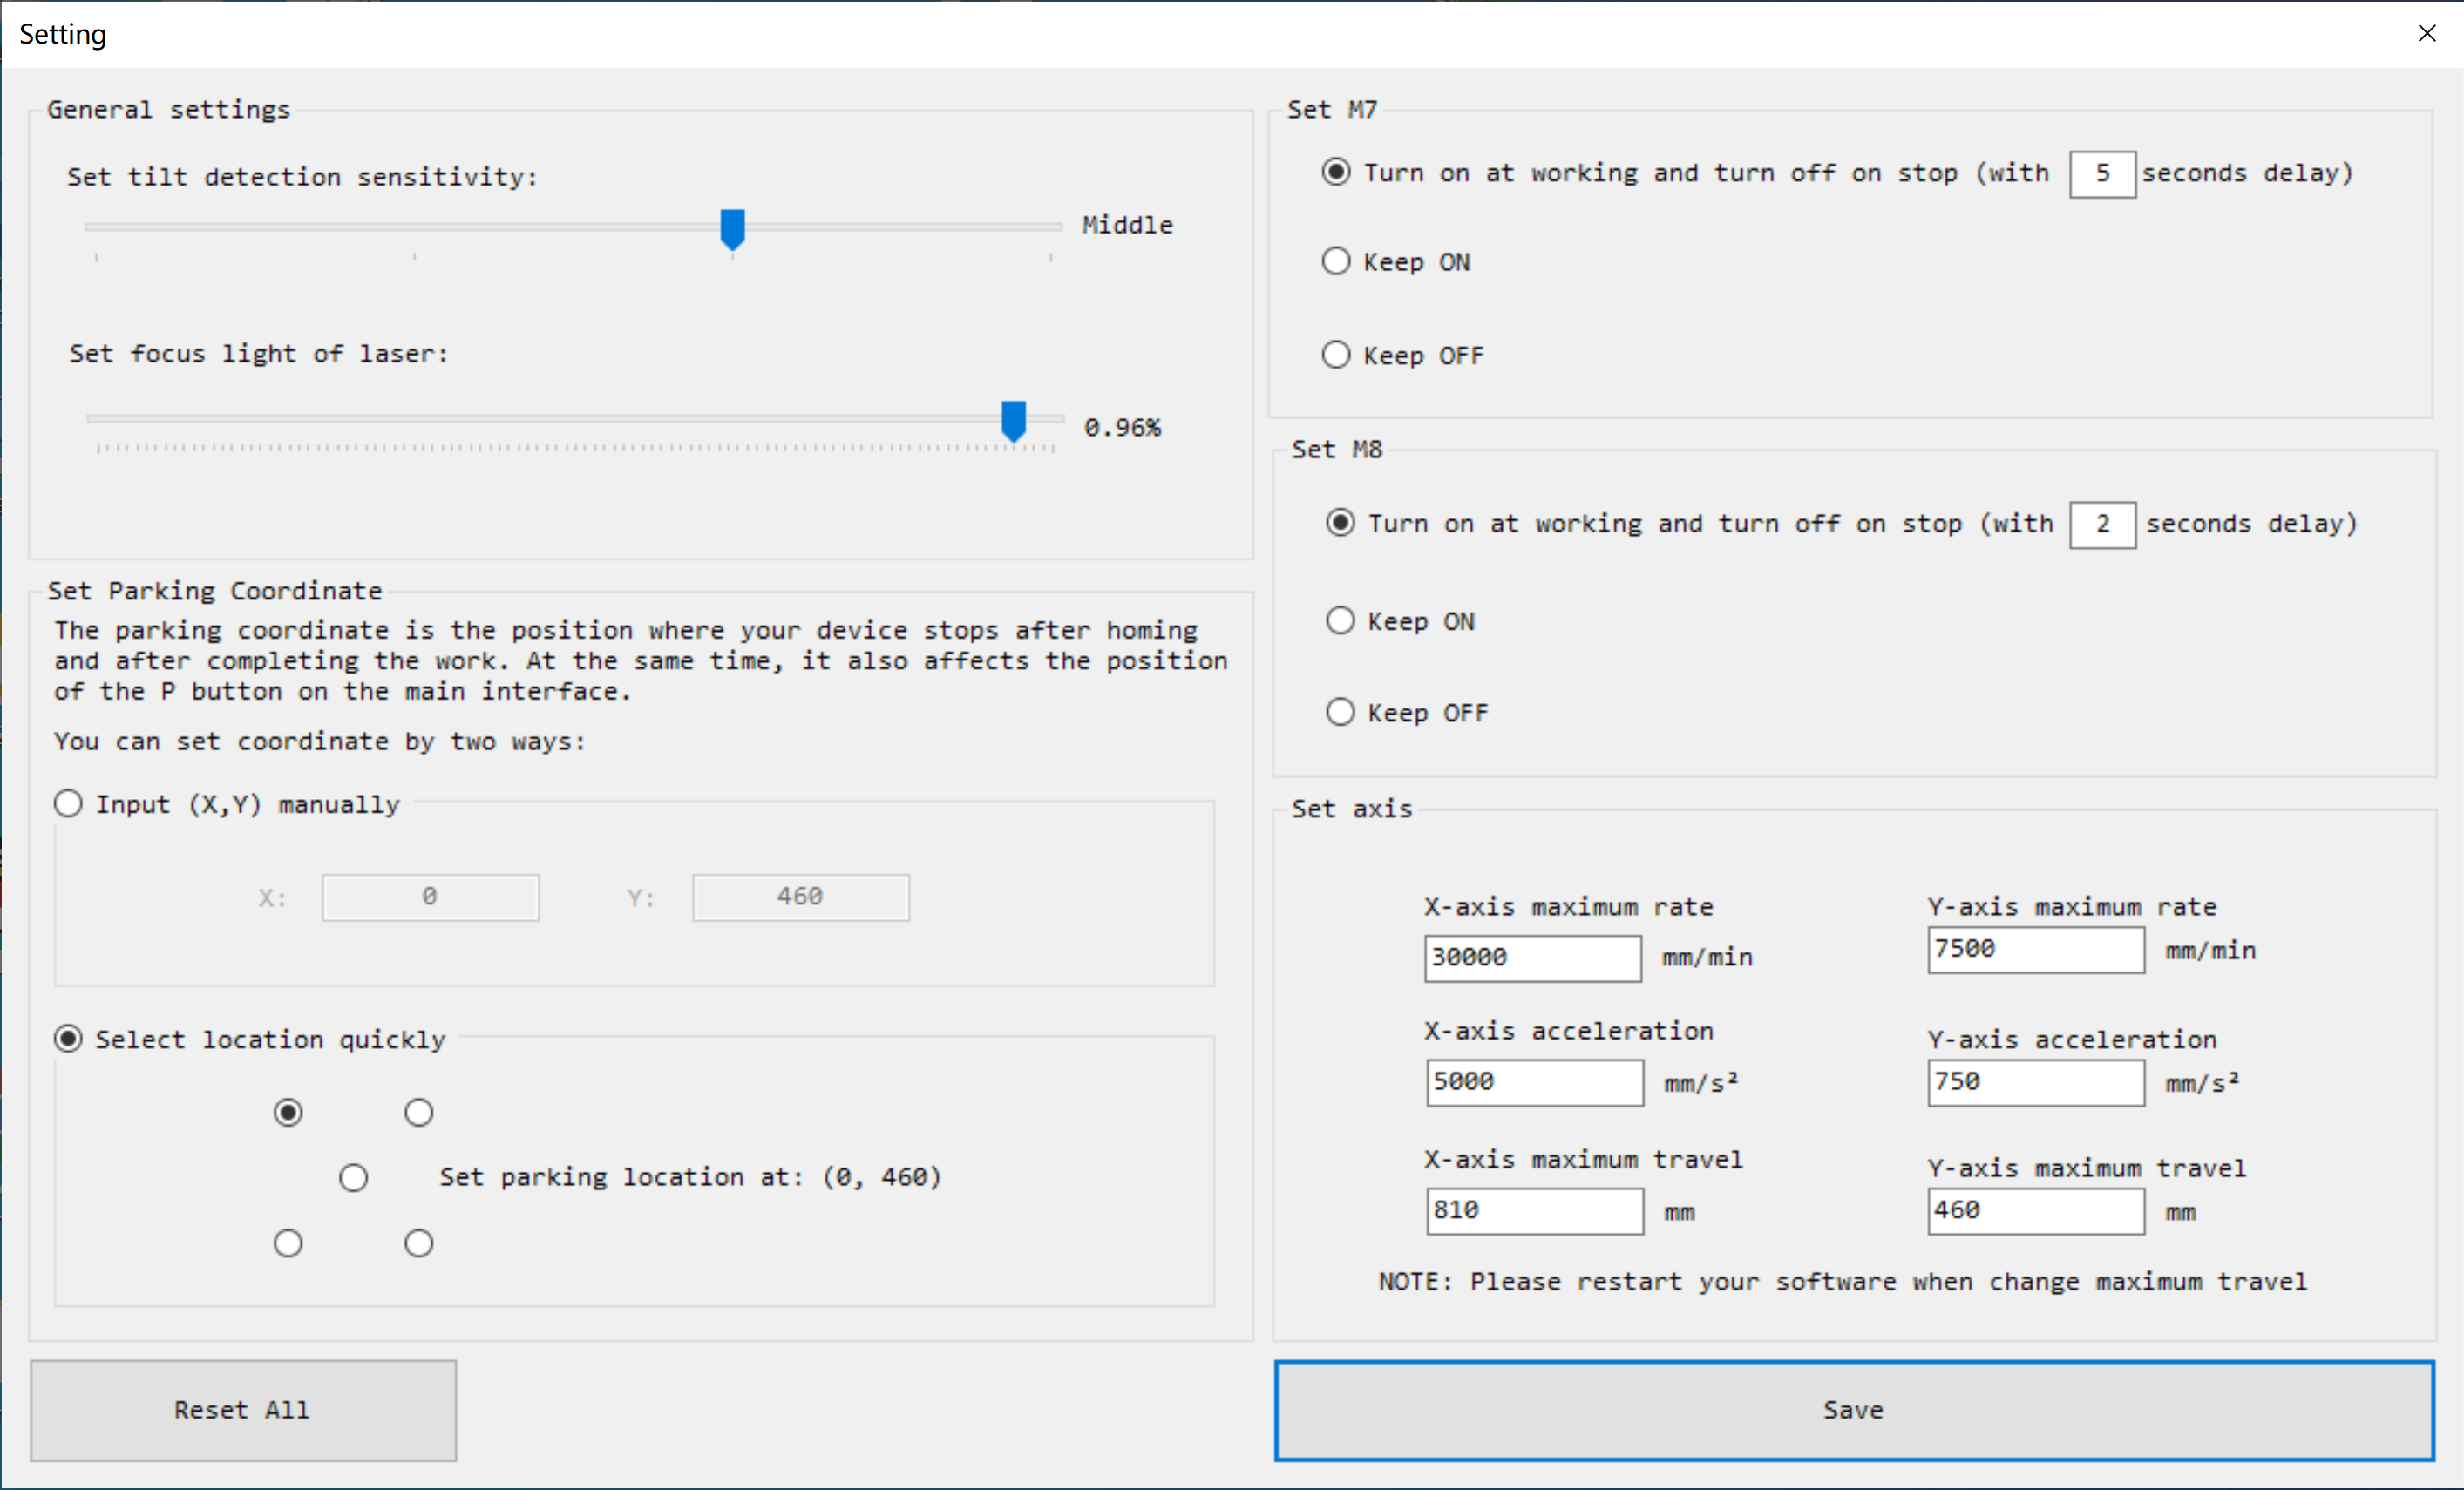
Setting:
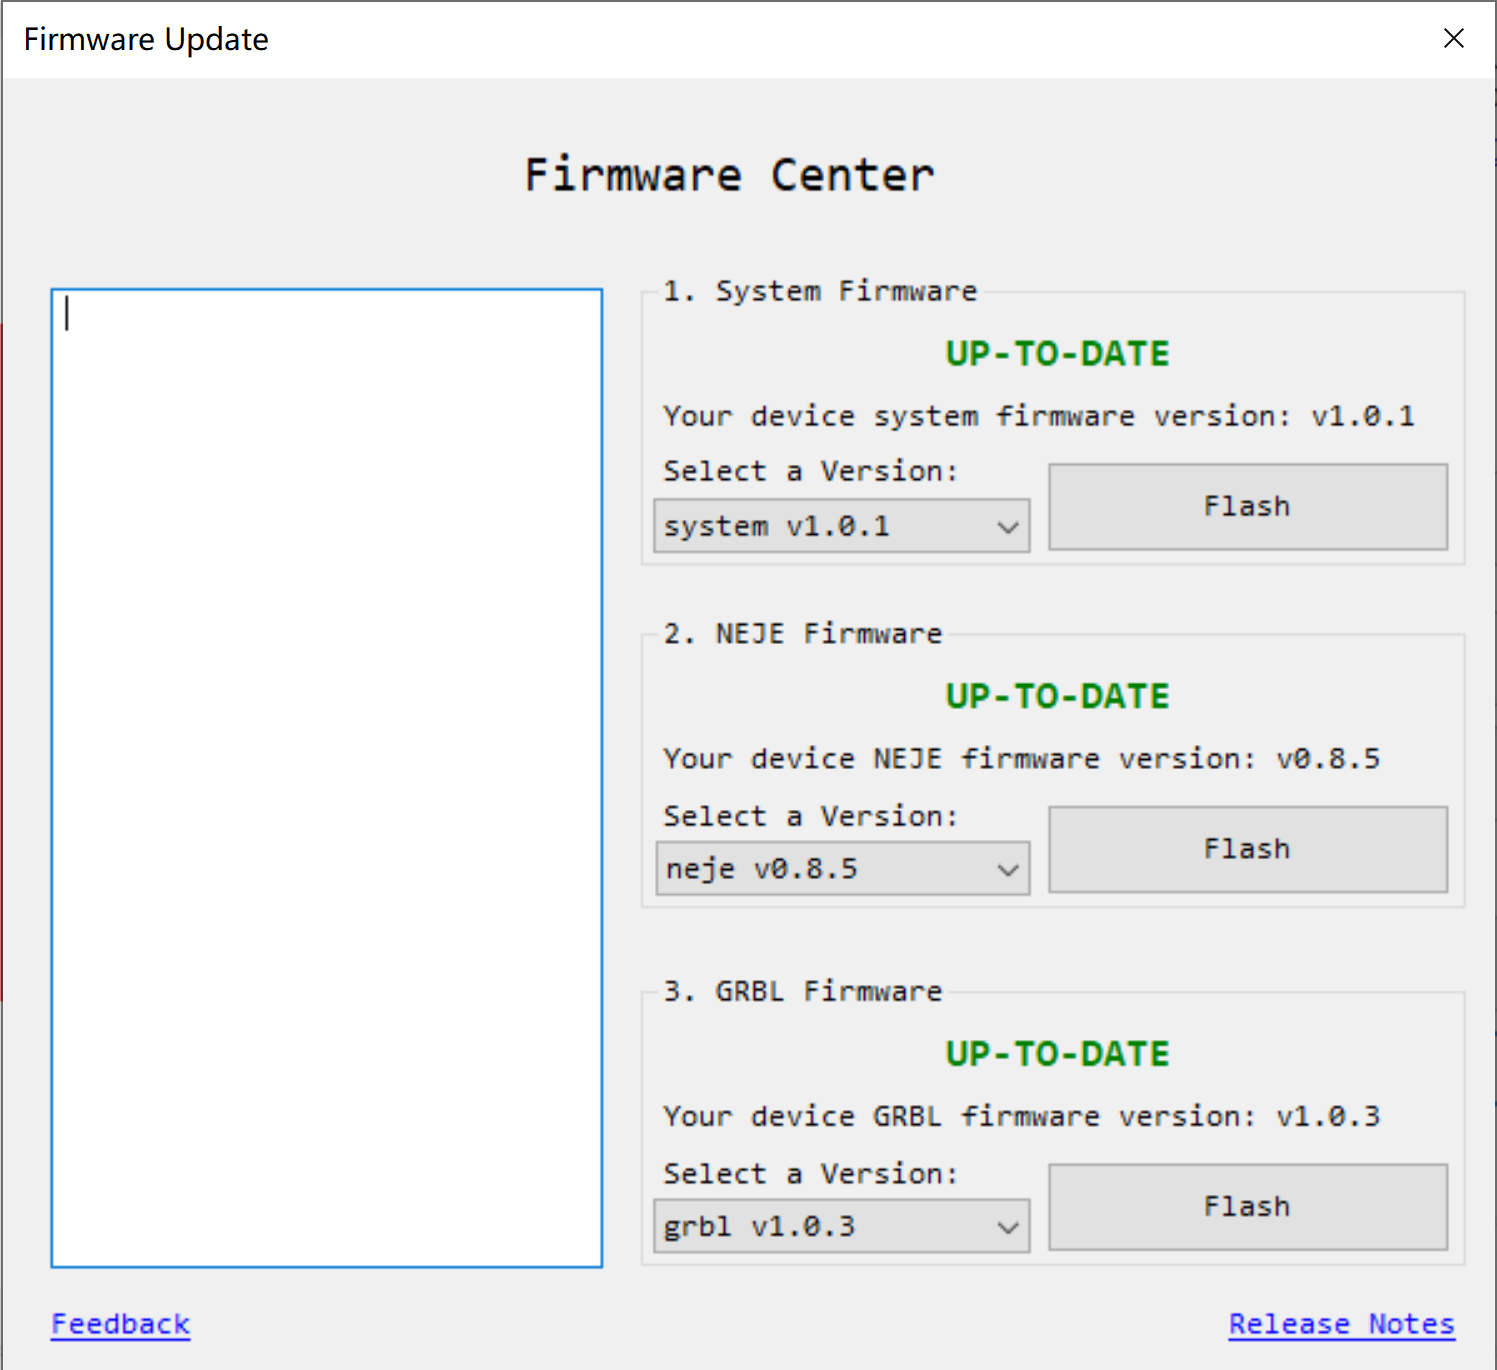
Firmware Update:
Start with “NEJE 3” Android APP
Start with laserGRBL
Please refer to the official instructions for laserGRBL. It should be noted that NEJE 3 Max has added M8, M7 and Door to adapt to laserGRBL. In addition to the low-light settings mentioned above, you need to add M8 to the .nc file to control the air to open, M7 controls the exhaust to open, M9 controls them to close;
Start with Lightburn
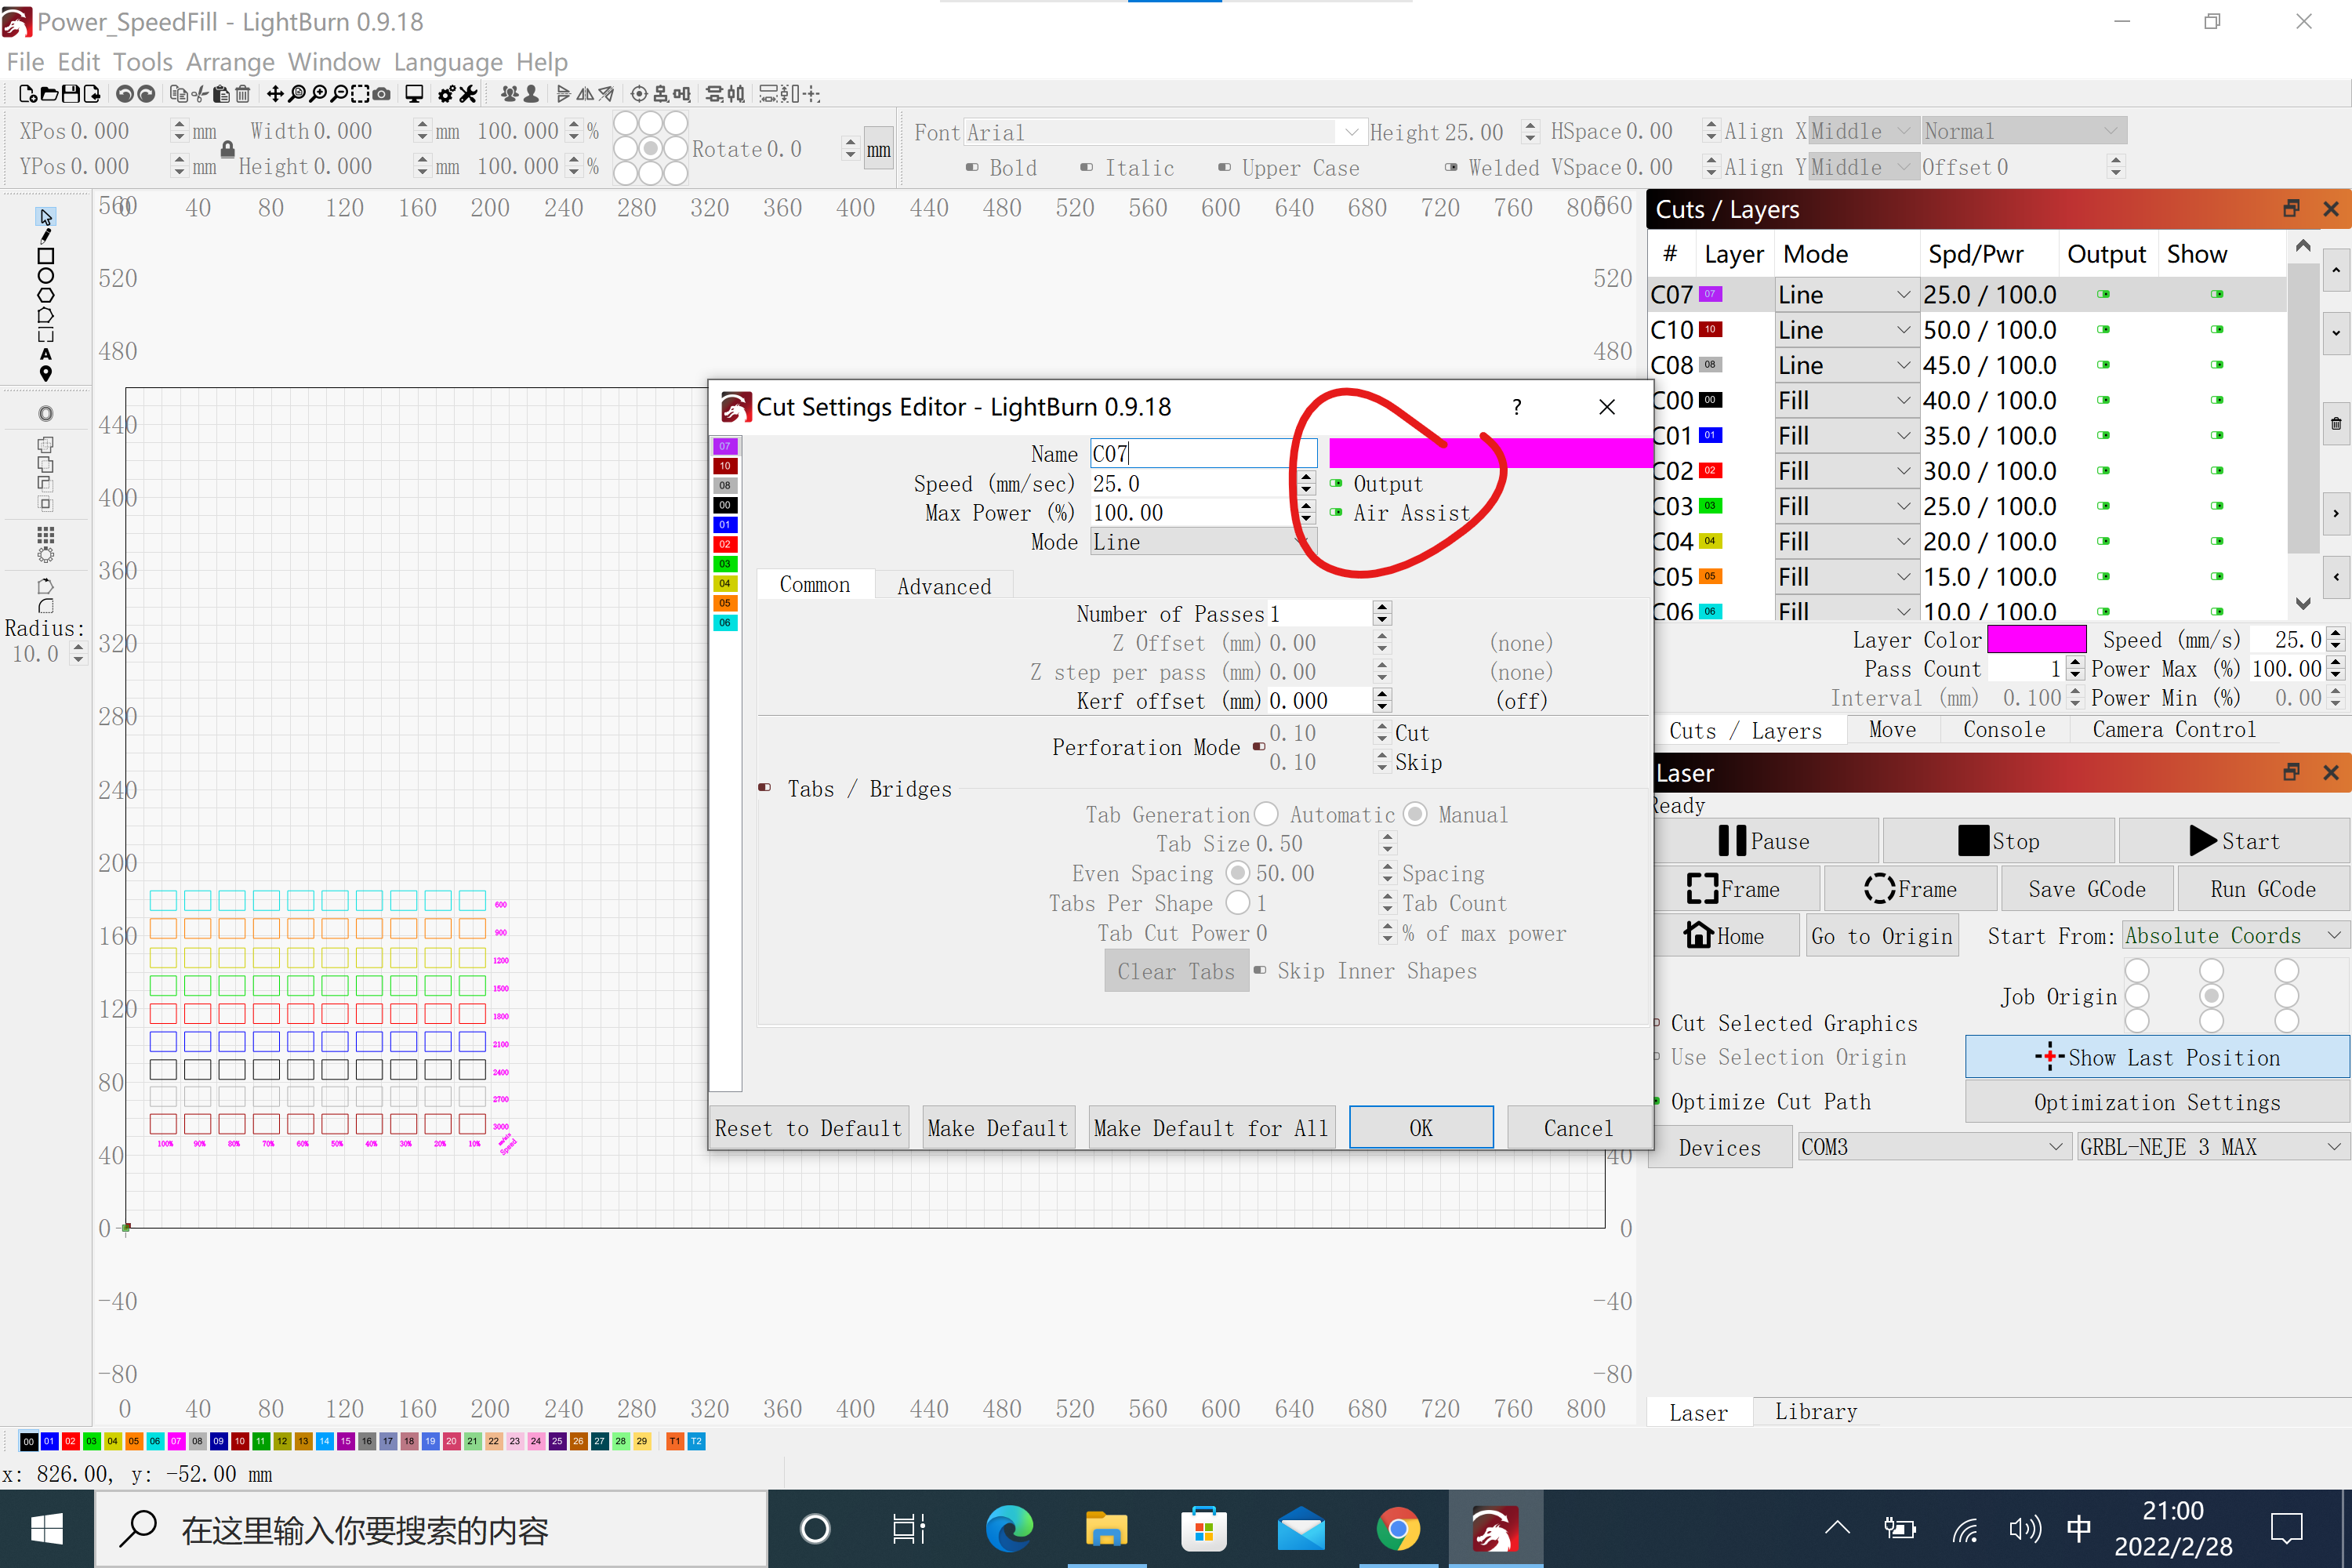
For the use of lightburn software, please refer to the lightburn official documentation. It should be noted that the M8 function needs to be turned on in the lightburn layer setting, and the M7 needs to be manually turned on by referring to the previous method. Lightburn defaults to signal the M9 to turn off the engraving end, and the Door function only works in lightburn mode. Can be stopped, but cannot resume engraving after stopping, NEJE mode and laserGRBL mode can resume engraving after the Door function is activated;
Offline control
NEJE 3 built -in Neje and GRBL dual firmware. The Neje firmware can be used as a controller. It can be used as a virtual instruction controller. Through Neje software, the .gc file exported by LightBurn through the latest Neje Win software transmits files to the device through wireless ways, or can also Perform the operation directly through the Neje software control .gc file. This is currently the most advanced and more portable control method.
The Neje control board has updated the NEJE traditional “One Key Start” function, which can manually switch mode, positioning, start, suspension, shutdown and other operations.
Maintenance
- Dust cleaning: regularly clean the dirt and dust on the tracks and wheels, and check the tightness of the timing belt.
- Lens cleaning: Smoke from engraving or cutting, or oily air sources may contaminate the lens. After contaminating the lens, the lens will be broken due to the high temperature of the laser. It is recommended to use alcohol to clean the lens surface frequently;
- Moisture-proof storage: If your laser machine is not used for a long time, we suggest adding some anti-rust oil to the metal places such as the screws and bearings of the machine to avoid metal rust, and store it in a dry environment.
